
Introduction
In the event your Framework Laptop 13 (11th Gen Intel® Core™) isn’t powering on, it may be necessary to reset the state of the Mainboard by fully cycling power to it. Usually you’ll only need to do this if directed to by a Knowledge Base article or by the Framework Support team.
If you're on a Framework Laptop 13 (11th Gen Intel® Core™) and have needed to reset your Mainboard more than once, it may be that your RTC battery has reached the end of its cycle life and is no longer holding a full charge. You can reach out to Framework Support to request a free replacement RTC battery or if you have expertise with soldering, an RTC Battery Substitute module that removes the need for an RTC battery. To make the request process go smoothly, enter the email address that you ordered the 11th Gen product on and/or include photos of the system and Mainboard serial numbers.
Tools
Parts
No parts specified.
-
-
Power off the Framework Laptop by navigating to the Windows icon on the bottom left and clicking on "Power" followed by "Shut down," or if on Linux, the equivalent action there.
-
-
-
Unplug your power cable from the USB-C Expansion Card in your Framework Laptop.
(I had formerly left a long comment here about how you guys 'forgot' to have a bit about removing the expansion cards...and while some official guide on this is probably a good idea to have, it's...not actually necessary to remove them! Even though in the build guide, they go in last, they don't actually need to come out in order to replace the screen! Heh.)
-
-
-
Close the lid on your Framework Laptop and place it upside down on a soft, non-marring surface, such as the bag that it shipped in.
-
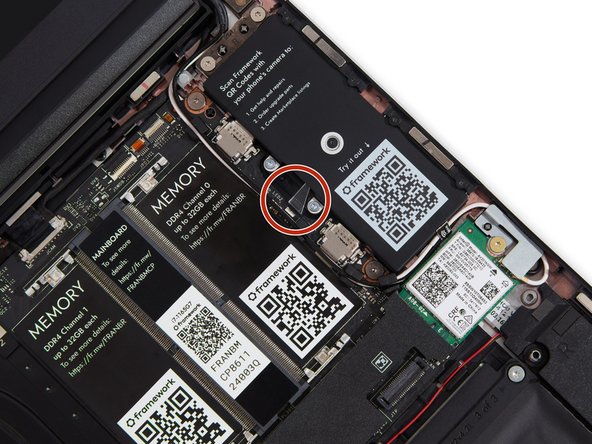
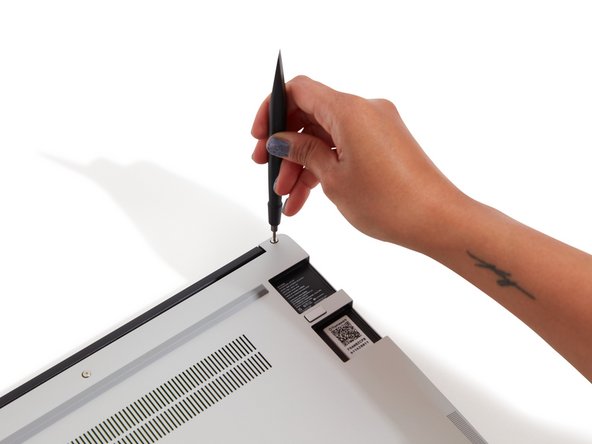
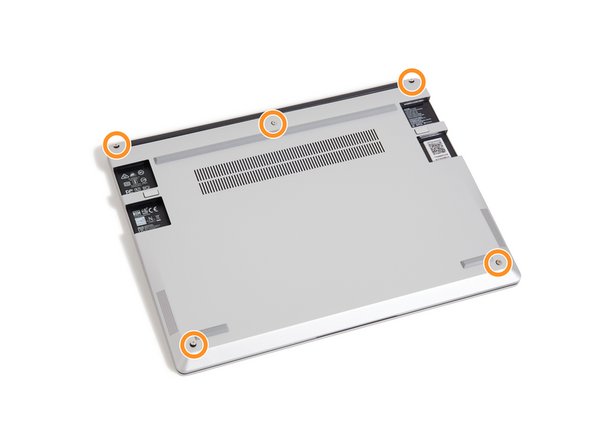
Using the T5 bit in the Framework Screwdriver, unscrew the 5 fasteners on the Bottom Cover. These fasteners will remain attached in the Bottom Cover so that you do not lose them.
-
The fastener on the bottom left (circled in red) will not unscrew as far as the others, as it is acting as a lifter for the Input Cover.
-
You'll hear this fastener start clicking as you rotate when it is unscrewed far enough.
-
Do not use a powered tool for these steps, as this will likely result in damage to the fasteners.
It would be super nice if the lower-left screw were circled in red as the text indicates!
Mike Shaver - Resolved on Release Reply
Thank you for writing the specific detail on the lower left corner screw.
I thought something was not working correct until re-read this guide.
Patrick Corey - Resolved on Release Reply
-
-
-
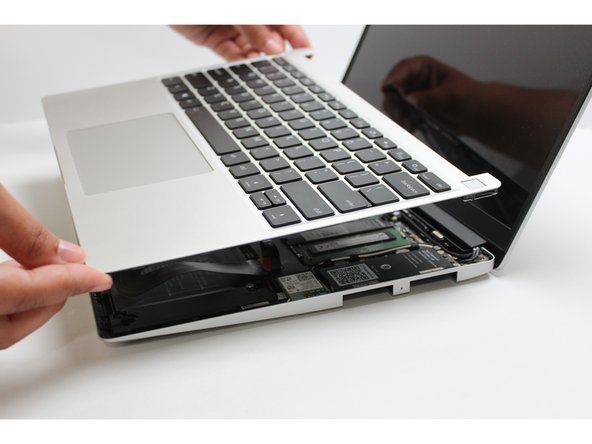
Flip the Framework Laptop back over and open the lid to around 120 degrees.
-
Important: Pull the Input Cover off carefully as it is still attached to the Mainboard via the Touchpad Cable. You don't need to disconnect this cable to do most repairs. You can just flip the Input Cover over. If you do want to disconnect it though, make sure to disconnect the Mainboard side using the finger loop over the orange label.
-
The bottom right corner of the Input Cover lifts up when the five fasteners are properly unscrewed from the previous step. You should not have to use any excessive force to remove the Input Cover.
-
Carefully lift the cover up from the bottom right corner. If you need to, you can use the spudger end of the Framework Screwdriver to lift it as well. Lift the Input Cover off the Mainboard, flip it over (keyboard side down), and place it about halfway on the Bottom Cover.
-
Be sure not to put too much force on the Touchpad Cable when doing this.
-
If the LEDs on the left and right sides of the system are flashing red when you lift off the cover, it means the system is still powered on. Make sure your power cable isn't plugged in and that you have shut down correctly.
-
Note that it may take up to 30 seconds after shutting down for the system to fully power off. Wait until the LEDs stop flashing before proceeding.
-
You should keep the Battery connector plugged in unless you need to replace the Battery, Mainboard, or Speakers. This connector is easy to accidentally damage, so it's better to not handle it.
Important: Pull the Input Cover off carefully as it is still attached to the Mainboard via the Touchpad Cable. You don't need to disconnect this cable to do most repairs. You can just flip the Input Cover over. If you do want to disconnect it though, make sure to disconnect the Mainboard side using the finger loop over the orange label.
While that’s true for most repairs, it’s pretty much essential to disconnect that cable for this repair, so I think the guide should probably amend this boilerplate!
Mike Shaver - Resolved on Release Reply
You should flip the keyboard around the x-axis (so that the back edge comes towards you as you flip) and not the z-axis (resulting in the left edge rotating to the right). I started to do the z-axis and the touchpad cable was getting twisted. I am capable of messing up all instructions. This is my anti-super-power... or joker power in the Wild Cards universe.
-
-
-
Using a SIM Eject tool or another small pin (such as a paperclip), carefully insert the pin into the hole at the bottom edge of the coin cell receptacle, and tilt it down to eject the coin cell battery. Please use caution here as improper removal can potentially result in damage to the RTC cradle
-
Place the coin cell off to the side for now.
I have the same problem as these other commenters; I have an AMD Ryzen AI version with no (visible?) coin cell.
avoidingmarketing - Open Reply
With no RTC coin cell, do I need to do any other steps instead?
Fingal Plumpton - Resolved on Release Reply
-
-
-
Be extremely careful when sliding the Battery connector out, as it is very easy to accidently bend the pins. Make sure to slide straight down, and avoid letting the connector twist or bend.
-
Carefully disconnect the Battery by gripping the connector edges with both fingers and slide the connector straight down from the socket.
-
With all power now removed from the Mainboard, let it sit for two minutes to allow any residual power to discharge.
Don't do it like the video. You will break your nails. The battery connector has a piece of black rough tape you can pull on instead
Maks Góralik - Open Reply
When I contacted support about this guide not helping, they asked if I let it sit for fifteen minutes at this step. I tried that too; didn't change anything for me anyway.
Jason Pettiss - Resolved on Release Reply
-
-
-
Now with the Battery still disconnected and the RTC Coin Cell still removed, plug your Power Adapter back into the laptop. At this point, you should see the LEDs on the left and right sides of the Mainboard start to blink red. This confirms that the board is powered on and in a reset state.
-
If the LEDs do not blink red, confirm that the Power Adapter is working by plugging it into any other USB-C device you have available, or by trying a different USB-C power adapter on the laptop.
-
If you still do not see blinking red or ran into any other issues along the way, make sure to reach out to Framework Support. We're here to help.
13" AMD Mobo user with no RTC battery - Adding my experience. My specific issue was a USB port not working on the back right, next to the power button (The actual MOBO port was not working). I have an 13in AMD board with no RTC battery; instead, you have a concealed 2-pin connector for an optional sealed, rechargeable, RTC battery.
Effectively, for this guide, you can skip this step if your setup matches mine. Move on to remove the main battery connector and then provide AC power via a power brick (Although I'm not sure this part is strictly necessary in our setup). My LEDs blinked and cycled between Blue and Red. Without looking it up, I think this just means hey, you are trying to run me as an "out of case" setup without setting the BIOS settings. Anyways.
Reconnect your battery connector and then apply AC power. I then got the blinking RED LEDs indicating the reset had occurred. For me, my USB port now works; apparently, the controller just needed to be reset.
Best of luck!
stephen@everydaydev.io - Open Reply
For me only the USB-C on the right side worked, left side not.
Might be a hint for anyone experiencing no red light on the first port. But as users are free to choose amount and position of the USB-C, it will be different for everyone
Michael Meier - Resolved on Release Reply
-
-
-
Disconnect AC power from the laptop.
-
Re-insert the RTC Coin Cell battery by sliding in the top edge first, and then pushing down on it until it clicks into the receptacle. Make sure the Coin Cell is aligned well, and don't apply too much force, as forcing the cell in could damage the receptacle.
-
-
-
Before plugging the Battery connector back in, double check the pins on the Battery receptacle on the Mainboard, and make sure none of them look bent.
-
Don't plug the Battery connector in if pins look bent, as that will bend them even further. Reach out to Framework Support for guidance.
-
If you feel resistance when plugging in the Battery connector, stop, slide the connector back out, and make sure that no pins are being bent.
At this point, when you re-connect the battery should the LED lights on the left and right side start flashing red? I just had that happen after making sure the pins were straight and I put the connector in.
Charles Alspaugh - Resolved on Release Reply
-
-
-
Carefully slide the Battery connector back into the mainboard, gripping both edges of the connector and sliding in straight without letting the connector twist or bend.
-
At this point, plug the Power Adapter back into the laptop and let it charge for five minutes. The LEDs on the sides of the Mainboard should blink red when the Power Adapter is plugged in.
-
If the LEDs did not blink red, with the Power Adapter still plugged in the the laptop, follow the earlier instructions to unplug the main Battery and plug it back in. After this, the LEDs should start blinking, confirming power. If not, please reach out to Framework support.
-
After five minutes, you can disconnect the Power Adapter and reassemble the laptop.
-
After reassembling the laptop, keep it plugged into power for 24 hours to let the RTC Coin Cell fully recharge.
Same here. Battery was charged. I assume this is the intended behaviour and just the instructions aren't fully clear.
Max Bergmann - Resolved on Release Reply
At this point, when you re-connect the battery should the LED lights on the left and right side start flashing red? I just had that happen after making sure the pins were straight and I put the connector in.
Charles Alspaugh - Resolved on Release Reply
Same for me. The lights flashed red AFTER plugging in the battery but BEFORE plugging in external power. I had a fully charged battery, so perhaps that explains it?
-
-
-
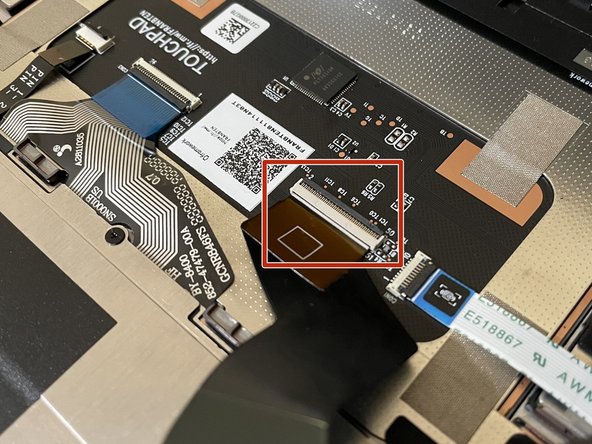
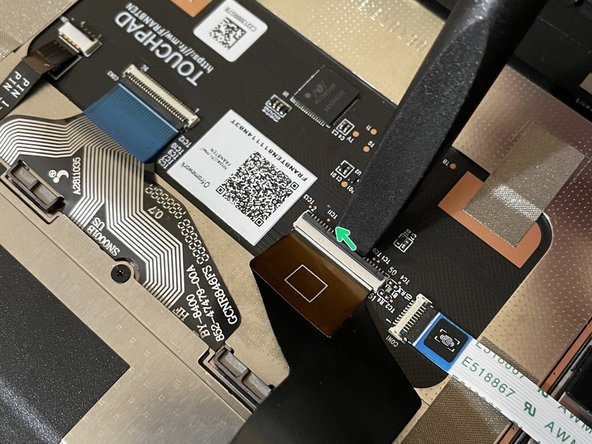
Before closing up the laptop, make sure that the Touchpad end of the Touchpad Cable is fully seated in the receptacle.
-
The cable should be inserted far enough that the white line almost touches the receptacle.
-
If it is not inserted far enough, you'll need to flip up the black latch on the other side of the connector, slide the cable in further, and then close the black latch again.
-
-
-
Flip the Input Cover over the Bottom Cover so that the keyboard is facing up and attach it to the Bottom Cover by aligning the top and bottom edges of both covers.
-
The covers are magnetic and should fit into one another easily. If you feel any resistance simply lift the Input Cover up and try again.
-
-
-
Close the Framework Laptop and turn it upside down to reveal fasteners on the Bottom Cover.
-
Using the T5 bit in the Framework Screwdriver, screw all 5 fasteners back in.
-
Be sure to not over-tighten the fasteners.
-
-
-
Plug your Power Adapter back in and let the laptop charge for 24 hours. You can use your laptop during this time, but keep it plugged in to let the RTC Coin Cell fully recharge.
-


If you run into any issues during this process, please reach out to the Framework Support team. We’re here to help.
And again, if you're on a Framework Laptop 13 (11th Gen Intel® Core™) and have needed to reset your Mainboard more than once, it may be that your RTC battery has reached the end of its cycle life and is no longer holding a full charge. You can reach out to Framework Support to request a free replacement RTC battery or if you have expertise with soldering, an RTC Battery Substitute module that removes the need for an RTC battery. To make the request process go smoothly, enter the email address that you ordered the 11th Gen product on and/or include photos of the system and Mainboard serial numbers.
Cancel: I did not complete this guide.
37 other people completed this guide.
20 Comments
Thanks a bunch, this worked like a charm after I thought my original charging cable failed. Will have to see how long the RTC battery is stable, I'll try and keep it plugged in for longer periods.
Andrew H Burdick - Open Reply
It appears my 2nd RTC cell is going on me. I got a new one not very long ago, from Framework, and have had the same issue again. I could not get it to reboot at all unless I left the A/C plugged in when replacing everything (very cautious not to touch any other trace or wires) or the board won't charge once the RTC cell is back in.
I performed all these steps and the time is not staying correct just 2 weeks later... I hate this pos laptop totally "fixable" garbage sure...
Andrew Hansen - Resolved on Release Reply
I cant seem to make a framework laptop 13 AMD DIY edition reset its bios password using this guide. this guide, the LED colors blinking etc. is not exactly matching the behavior on the AMD edition of framework. what am I doing wrong here? any update or more precise information for more framework laptop models etc? thanks.
If I have followed these steps twice now, and after 24 hours the laptop will still not turn on when trying to power up, is my next step to replace the RTC coin cell?
Everything else seems to be okay, minus the coin cell. If I leave my laptop on, or asleep, everything is fine. But after letting it charge for 24 hours, it still will not power on after I shut it down.
Thanks for the help!
Side note: I think this was a result of stupid Windows modern standby. Twice a week I had the machine try to shut down, and would get stuck and not shut down. Then the machine ramps fully for 5 minutes, and I have to manually hold the power button down to turn it off. I hope Microsoft eventually resolves this standby nonsense.
Charlie Abrams - Resolved on Release Reply
Laptop was plugged into one of those wall outlets you can switch off; accidentally switched it off. A week later, the laptop was a brick. No lights, no charge. Followed this guide, now the LED side lights are solid white when the AC adaptor is plugged in. Now it's a brick with a tiny white LED. Ordered a new battery. Repeated this guide. No dice.
Jason Pettiss - Resolved on Release Reply
If I haven't used my laptop for ~7 days, it won't boot up without being plugged in. Support suggested this guide. It didn't make any difference. Easy enough steps to follow but it did not fix my problem. I can't recommend Framework to others because of how quickly the RTC battery dies. It's a huge inconvenience.
I have gone through this guide several times without success!
Steven Taylor - Resolved on Release Reply
Hey I just completed these steps after having a dead laptop[ let ubuntu run it's update and did not power on the next time I was going to use the laptop] , laptop sees daily use so this was a new issue. Only thing I want to note is that the LED lights came on as soon as the battery was reconnected and stayed flashing when the power adapter was reconnected. After assembling and powering on again, the USB-C port went from green to white but the screen remained off. I then pressed the DEL key and the laptop power cycled itself (the USB-C port white led pulsed a bit) and then went into a normal boot again. Not sure if this warrants any hardware replacement but, I have nothing else to blame other than the OS update. 1st issue too , been running smoothly since May 2022!
I also went through this procedure, but I noticed some things that I did not expect based on the instructions. I think the reset was successful eventually (though I did this because of issues with my microphone, which were not fixed, but that was a long shot anyway).
I wanted to go into detail about what I observed in this comment, but it seems the character limit won't let me. The short story is that the leds did not exactly behave as documented, partly because the laptop powered on when I plugged in AC (which is a setting I have enabled in the BIOS, though it seems weird that that BIOS setting was preserved at step 7, and reset like all BIOS settings at the end of the procedure).
I wrote down more details at https://gist.github.com/matthijskooijman... but I mostly suspect that maybe these instructions should be reviewed with the "power on AC" setting enabled. Or maybe the difference is that my battery and/or RTC were not empty, but still charged?
Matthijs Kooijman - Resolved on Release Reply
Followed this guide with success. My 11th gen i7 model was not charging after sitting idle for a couple months. I left it in sleep not powered off. So I assume this happens with long periods of no use. I changed the usb c port to all sides with no success. Once I followed this guide it is charging and working and charging again!
Jonathan Telep - Resolved on Release Reply
I followed this guide, and received all LED indications as described in the various steps. After reassembling the laptop and plugging in the power, there is still no indication of charging after 20 min. The only LED that briefly flashes green on the right side (where my USB C adapters are) No other LED is on, no power button or elsewhere. I will wait a little longer to see if something changes. The instructions do say though that the laptop can be used while charging for the 24h for the coin battery to recharge.
- i5-1240 Australia. 16Gb Ram.
- running Ubuntu 22.04
- followed FW post install steps for Ubuntu.
- I changed bios setting to maximum battery 75% and used for a few days, but never allowed for it to run down fully.
- Yesterday I also followed and ran the post-install script https://community.frame.work/t/automated... after seeing the battery life not being great, I chose the hibernate option and left it lid closed, unplugged onite.
Denis Johnson - Resolved on Release Reply
Update:
- After waiting for 24hrs as recommended by the guid, I still had the issue. No LEDs or lights while plugged in, no power button light, and when pressing power button, only momentary green LED on usbc C side where power adapter was connected. But nothing else, no life or lights.
- Decided to follow the steps again. Waited for red LEDS to blink after reinserting RTC, then main battery, then power adapter. Instead of waiting the suggested 5 min before disconnecting power and re-assembling, I waited 30 min. Then followed remaining re-assemble state. This time, after re-assembly, when I plugged the power adapter in, the normal charging LED lit. I waited a further 30 min, then pressed the power button, and alas, the machine came to life.
Note: When dissembling the second time, when I removed the RTC coin battery, I took the liberty to put a multi-meter across it, and it seemed fine reading about 3.34v so I don't thing the CR battery was flat.
If you’re getting the USB power surge error with the 11th gen model, make sure you update to the latest bios and then follow this guide to reset the motherboard. Just updating the bios is not enough apparently. Also, as @cheese mentioned, plug it in often enough to charge the RTC battery. Not great but there doesn’t appear to be another resolution besides replacing the main board. Maybe they can offer a higher capacity battery in the same form factor someday? The RTC should obviously charge itself using the main battery, an issue they have acknowledged and fixed in the 12th gen board, it seems. Hopefully the 3.10 bios update will reduce the drain on the RTC in the 11th gen model and somewhat mitigate this issue. Still, if you don’t want to experience this frustration, make sure you keep it charged.
Timothy Lee Russell - Resolved on Release Reply
Just done for this guide. It works for my framework laptop which is a 11th gen i5 model. I haven’t use it for more than 3 months, it just sits in my bag for that long, and I guess the RTC battery run out of power through that long period. The symptom at the beginning was that after that long time not using, it actually starts up successfully when first time reusing it, but for the next time, it did not until I plugged it into power, and for the third time, it just did not start up no matter if it is plugged into power or not. So be careful when after long time not using.
I have just worked though this guide (13th July) and successfully woken up my Framework Laptop after a 26 day pause in use (Norton 360 reported that many days since last scan). It would not power on and the indicator lights did not illuminate when I connected the power supply. I recalled seeing this guide and refound it by a general Bing search on ‘Framework laptop won’t turn on’, leading me to your page ‘My Framework Laptop is not powering on’ which pointed me here. At Step 10 when I reconnected the battery, the indicator LEDs came on. After completion, the machine woke up to power button (taking longer than usual which I guess is normal after a reset). The Windows 11 lock screen initially showed a date of around 18th June before rapidly updating. The battery status was 80% charge. All seems well now, thank you!
What is the ‘complete guide’ box above for? It does not respond to my Framework account credentials for purchase. Should the RTC coin cell (Real Time Clock?) last so little time?
Christopher Kimberley - Resolved on Release Reply
Heyo! 👋
The 11th gen mainboard is wired up in a way where the RTC battery only charges via wall power and not off of battery. If you don’t frequently plug it in for long periods of time it cannot charge faster than it discharges and will eventually deplete. This has been fixed in the newer 12th gen model / mainboard.
Hope this helps! ☺️
Cheese -
Even after full reset computer still does not show logo screen! All we hear is the fan running!!!!
Michael Bernstein - Resolved on Release Reply
If you are upgrading to an Intel Ultra series, disable Bitlocker before shutting down your old main board if you are upgrading to an Intel Ultra series.
And for Ultra series, install windows as a fresh installation. This appears to be particularly important if you can't disable Bitlocker because your old main board died.
Jim Barron - Open Reply
Before even starting, inspect the new board to be sure all the connectors are ok. Mine had the speaker connector broken off.
Gary Aitken - Resolved on Release Reply
@ahappykittycat I wish that I had read your comment before I undertook this…
Mike Shaver - Resolved on Release Reply
IMPORTANT: If you plan to install your existing mainboard in a CoolerMaster case, make sure to boot into the BIOS and enable standalone mode before continuing.
Richard Tango-Lowy - Resolved on Release Reply
Pretty sure you might want to include a reminder to backup the bitlocker recovery key if it is enabled. The system will definitely boot to the bitlocker recovery screen since it will be a different TPM.
James Wu - Resolved on Release Reply
It could be helpful to give the bash terminal command to shutdown such as
Patrick Corey - Resolved on Release Reply
Bottom left*
Vijfhoek - Resolved on Release Reply