
Introduction
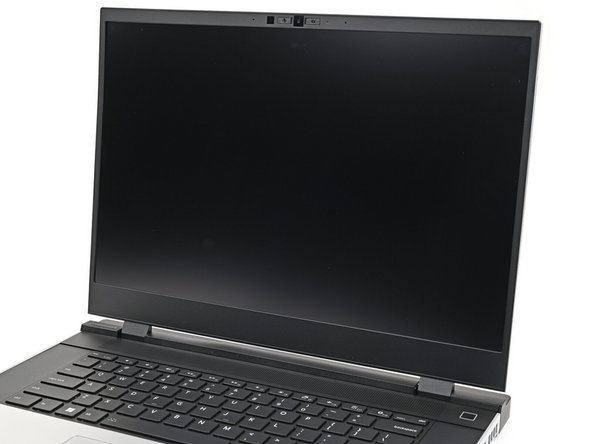
Congratulations on getting the Framework Laptop 16 DIY Edition! Follow this quick start guide to assemble your laptop and get it running.
Tools
Parts
No parts specified.
-
-
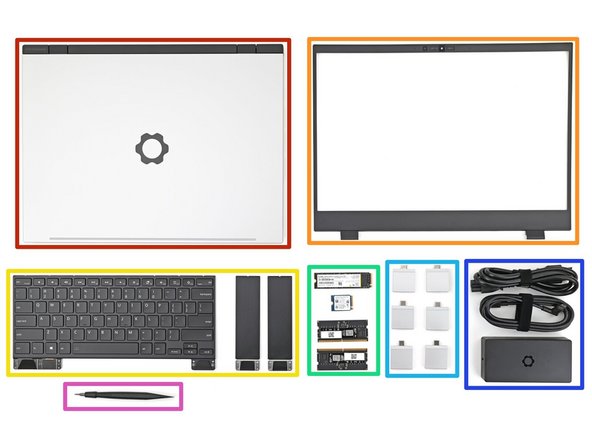
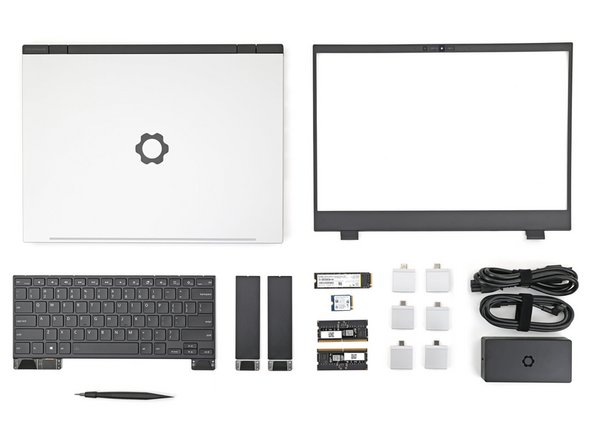
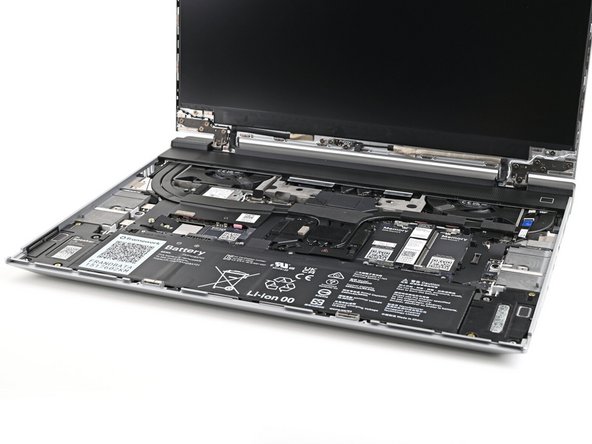
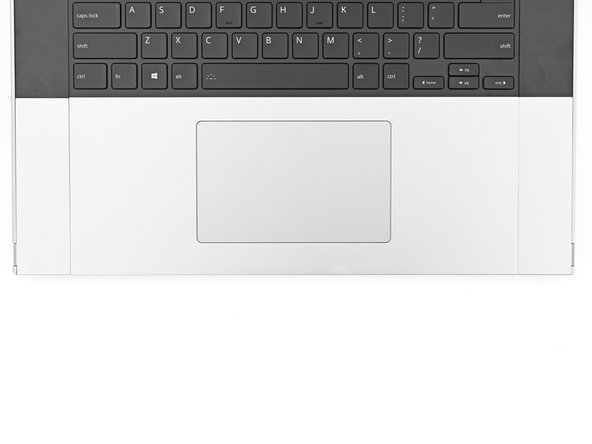
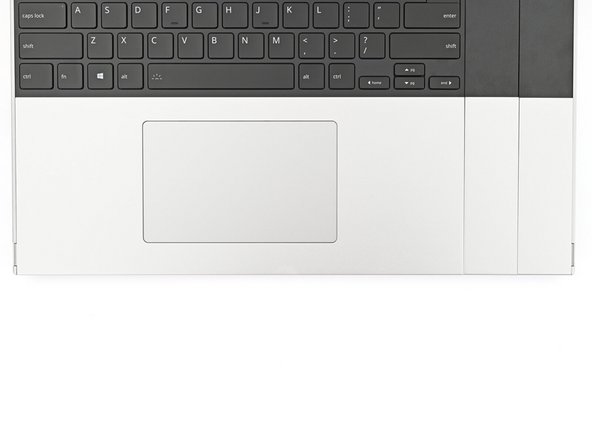
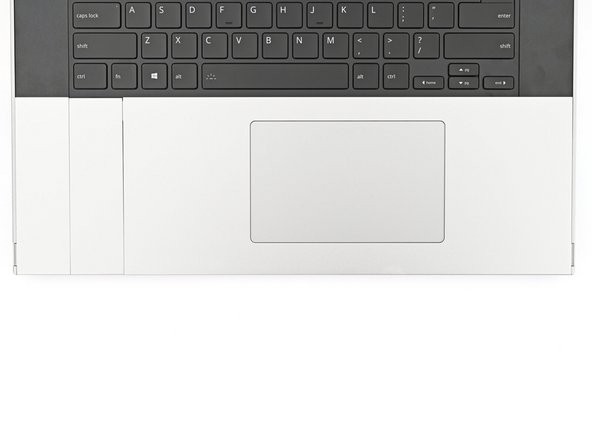
Unbox your Framework Laptop and make sure you've received the following items:
-
Framework Laptop chassis with pre-installed Mid Plate, Touchpad Module, and Touch Spacers.
-
Bezel
-
Keyboard and Input Modules
-
Memory and Storage
-
Expansion Cards
-
Power Adapter
-
Framework Screwdriver
-
-
-
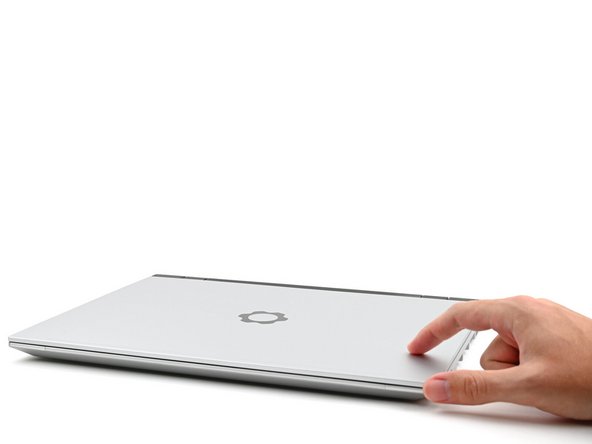
Open the laptop
-
-
-
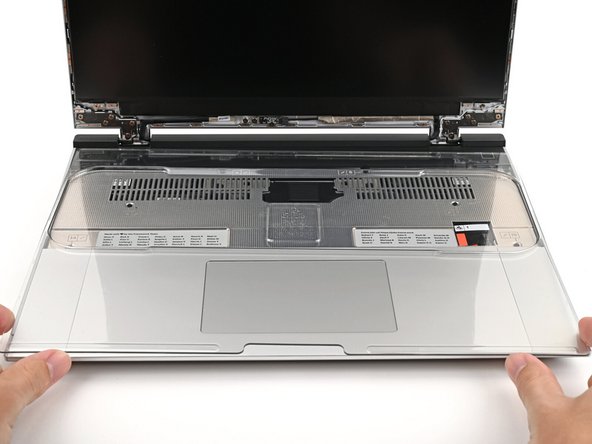
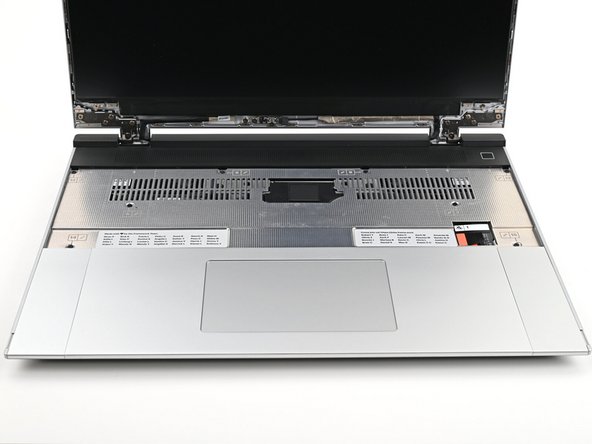
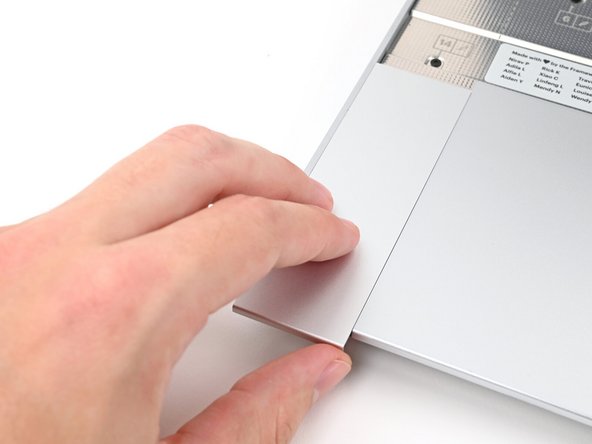
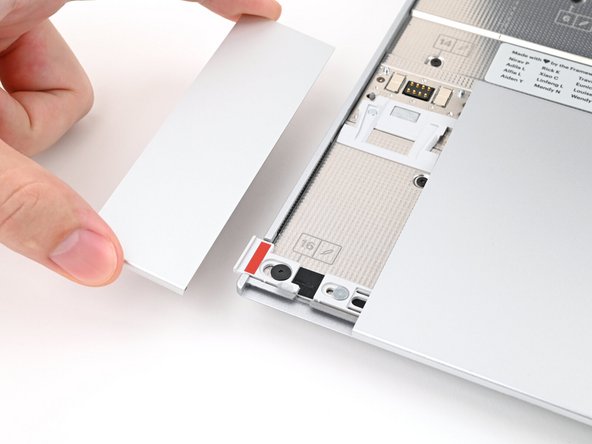
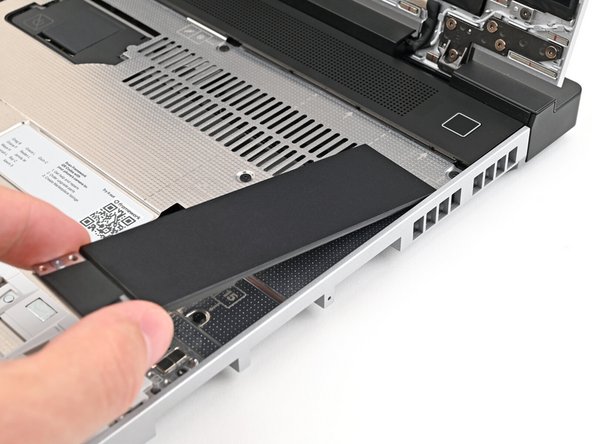
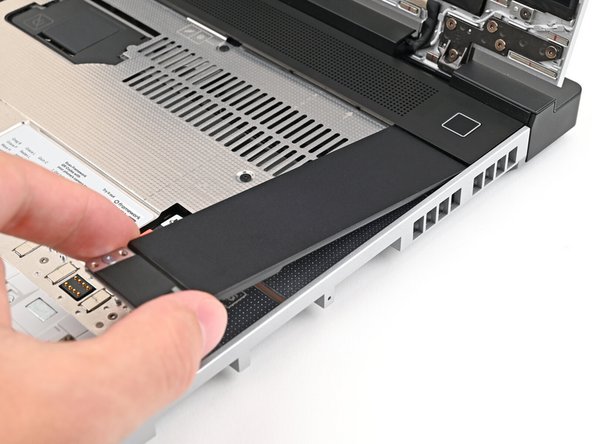
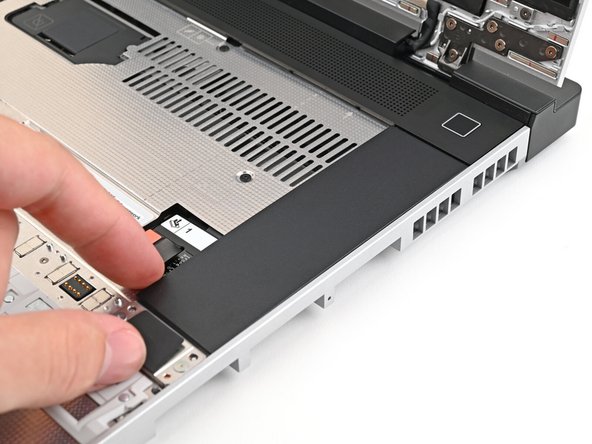
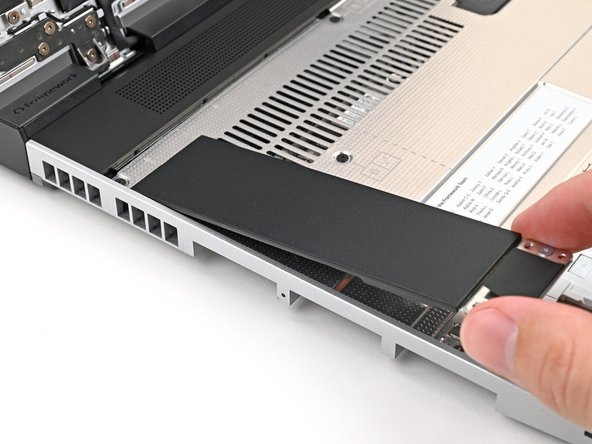
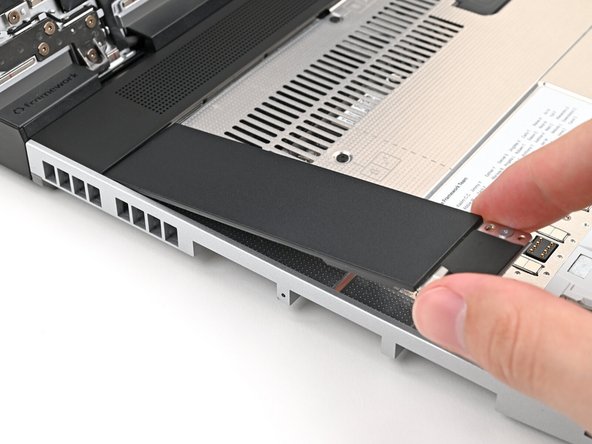
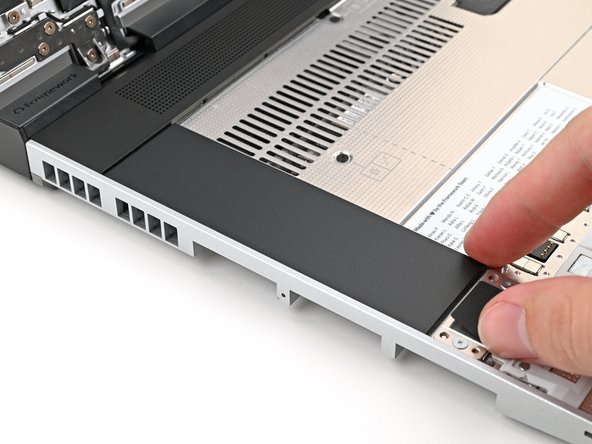
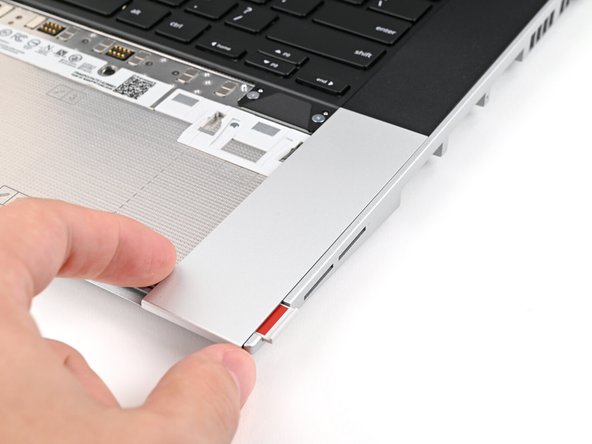
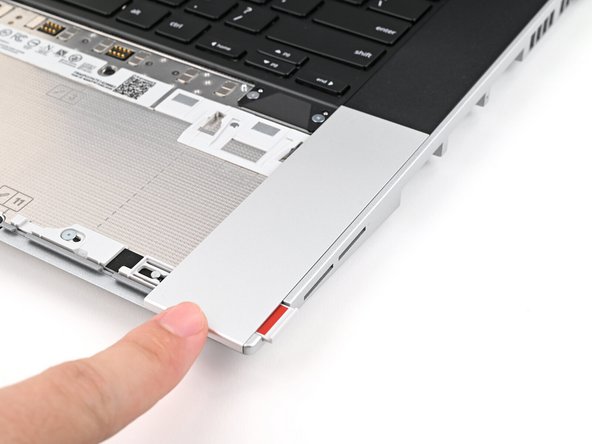
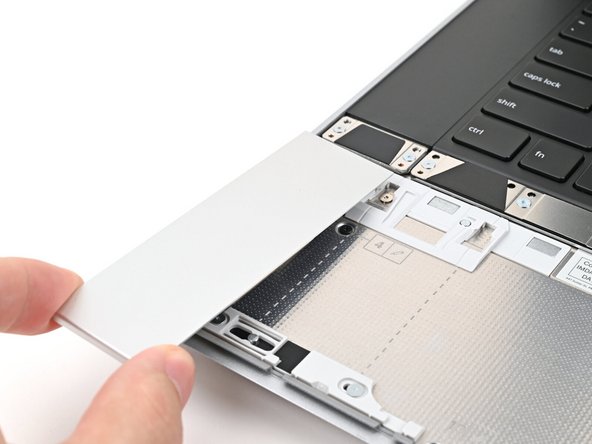
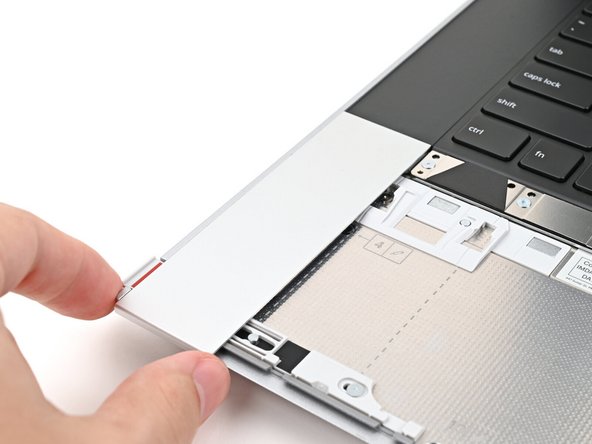
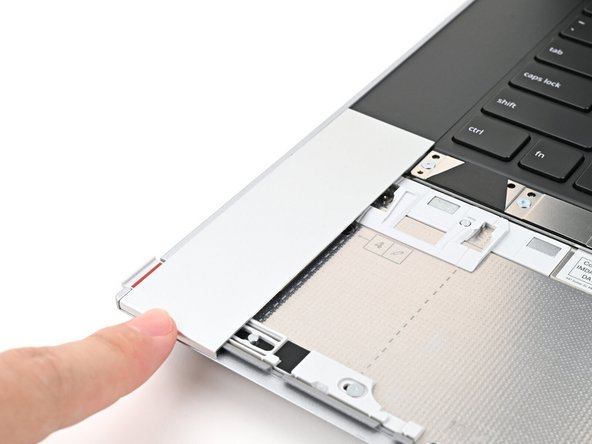
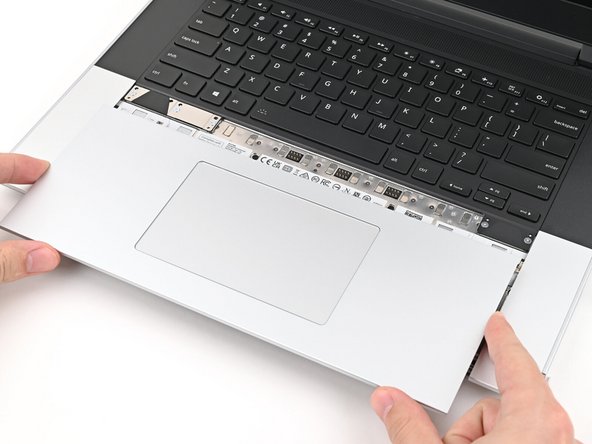
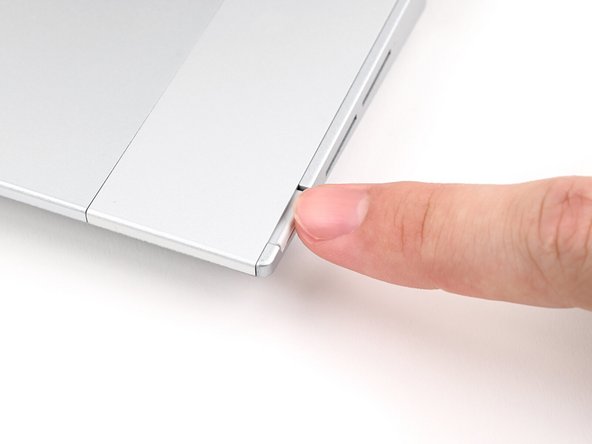
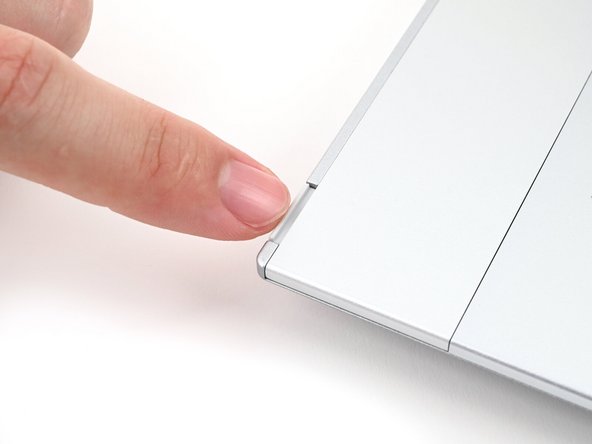
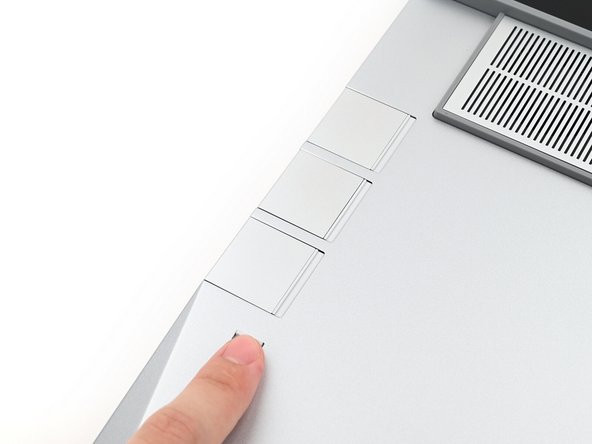
Remove the plastic cover.
-
The protective cover is made of post-consumer recycled PET and is highly recyclable. Please recycle this with your household recycling.
-
-
-
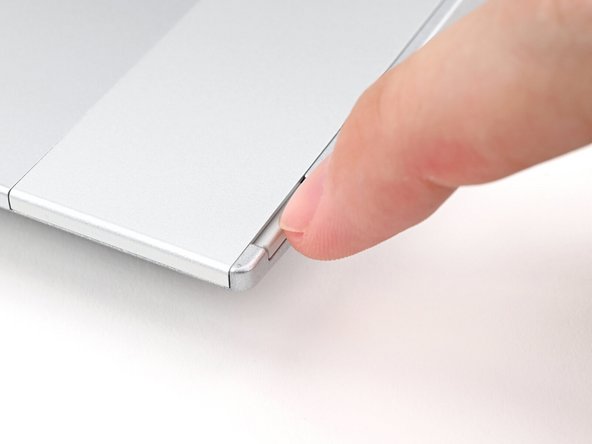
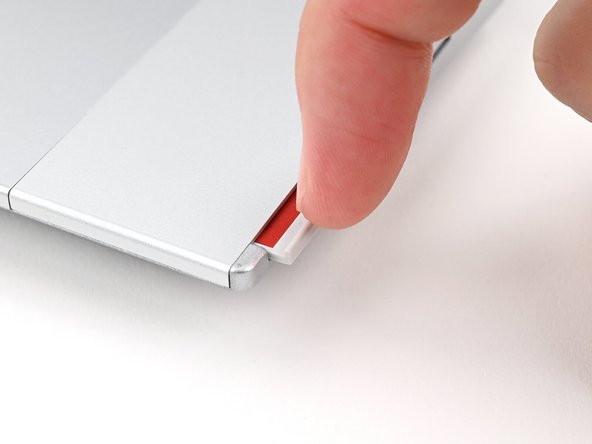
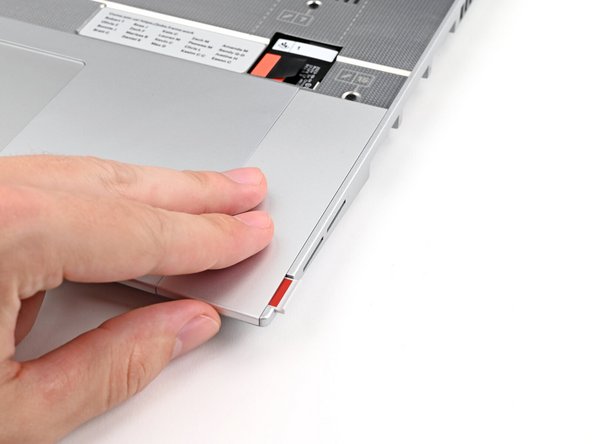
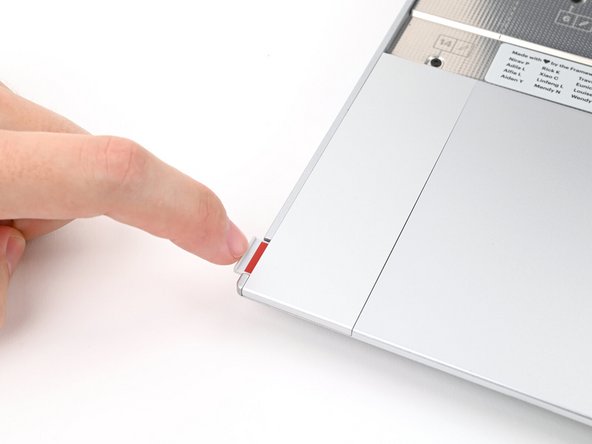
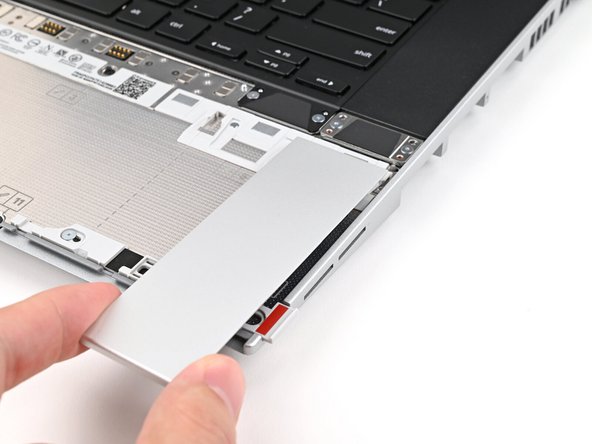
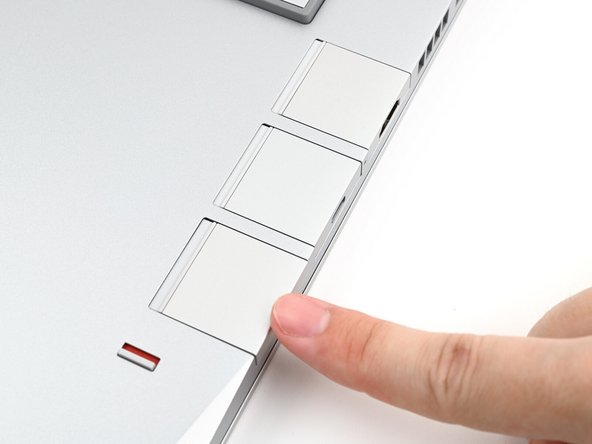
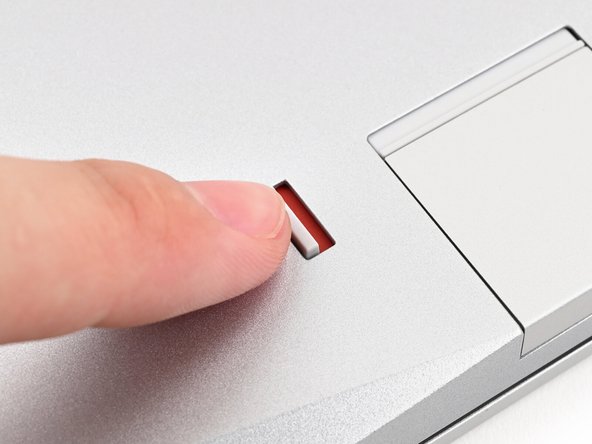
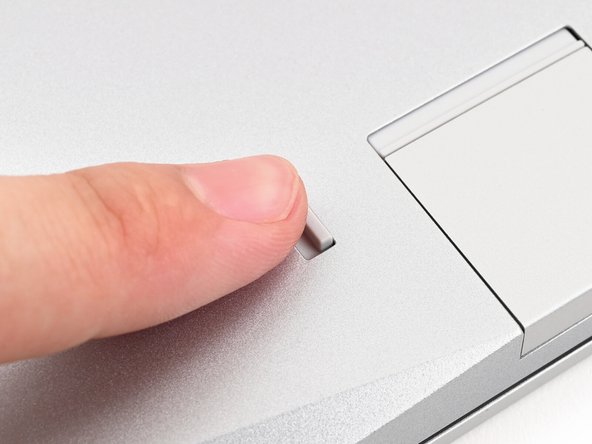
Use your fingernail to pull out the Input Module latch and unlock the Touchpad Spacer next to it.
-
-
-
Use your fingers to slide the Touchpad Spacer toward the bottom edge of the laptop and unclip it.
-
If you're having trouble, check if the corresponding Input Module latch is properly unlocked.
-
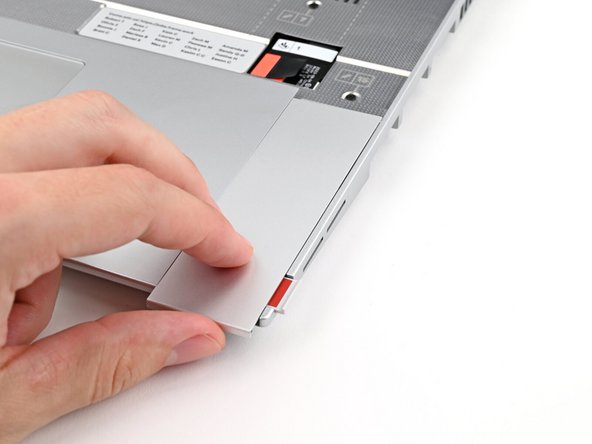
Lift the Touchpad Spacer off the laptop and remove it.
-
-
-
Repeat the previous two steps to remove the other Touchpad Spacer.
-
-
-
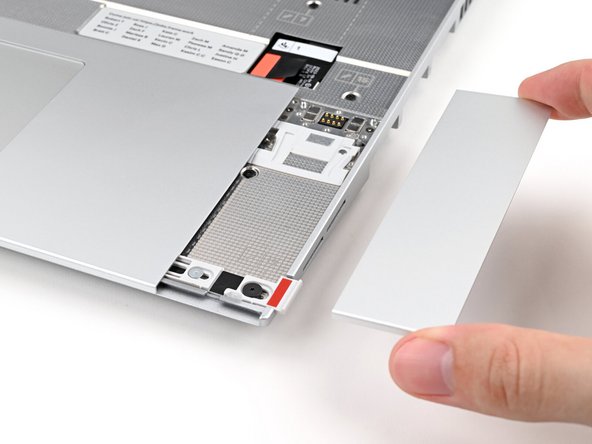
Use your fingers to slide the Touchpad Module toward the bottom edge of the laptop and disconnect it.
-
Lift the Touchpad Module and remove it.
-
-
-
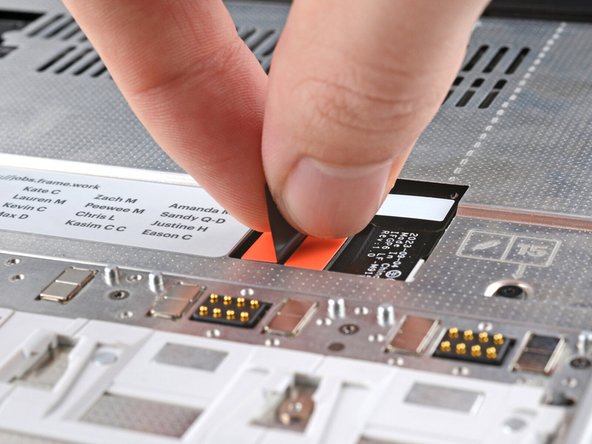
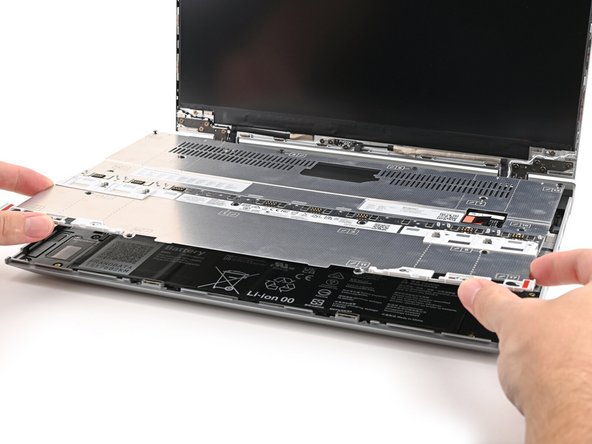
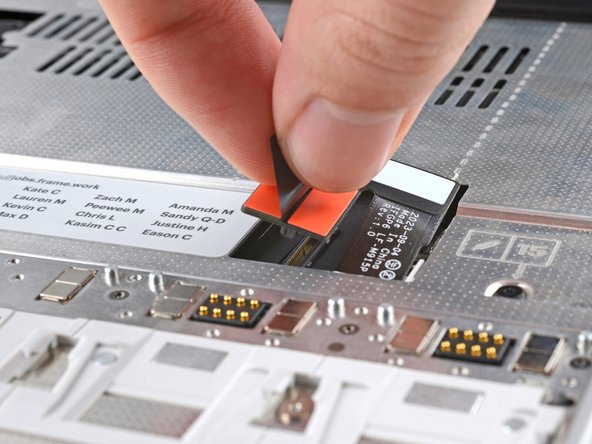
Grip the black pull tab on the Mid Plate cable press connector and lift up to disconnect it.
-
-
-
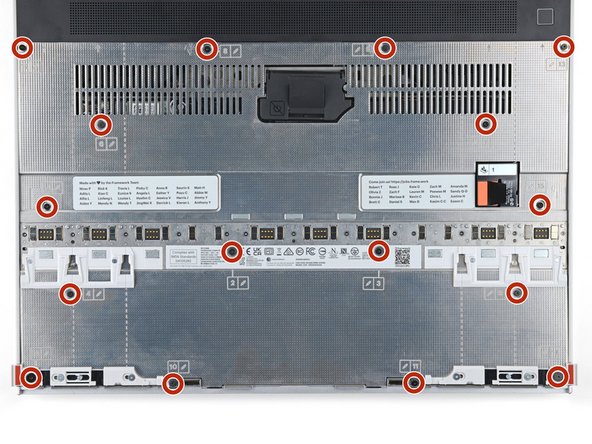
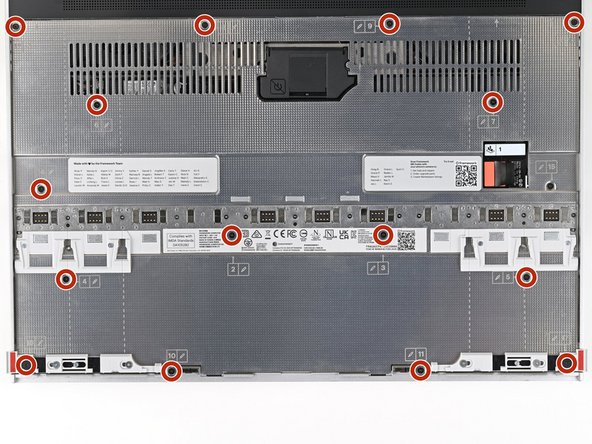
The Mid Plate screws are ordered from 2–17 (number 1 is the press connector). You don't have to follow the order, but you can use it to help keep track of the screws you've loosened.
-
Use your Framework Screwdriver to loosen the 16 captive T5 Torx screws securing the Mid Plate.
Maybe you should also mention that we are NOT supposed to REMOVE the screws, just make them loose.
For somebody that did some (albeit crappy) DIY laptop disassembly in the past, that fact is VERY easy to glance over. Usually, when told to loosen the screws, it is somewhat implicitly expected to remove them as well.
I was wondering why the first screw I tried to remove just wouldn't come off even when loose (some of them do, some of them don't), and I hope that I didn't damage something by attempting to remove the loose screw by force (after rechecking multiple times that it is indeed loose).
I even had a place prepared to put the screws into... 👀
-
-
-
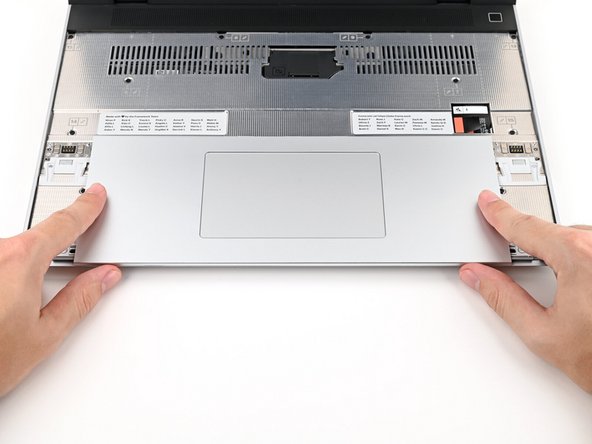
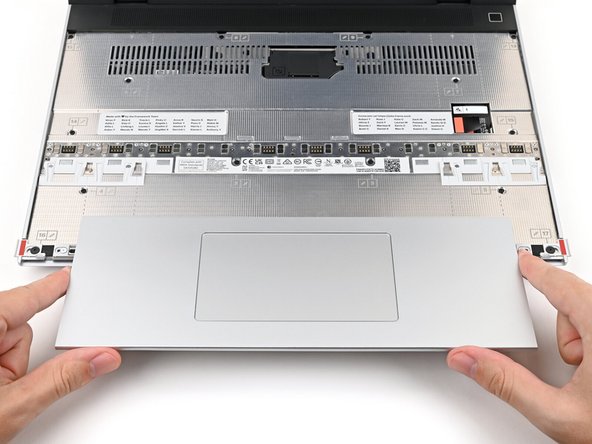
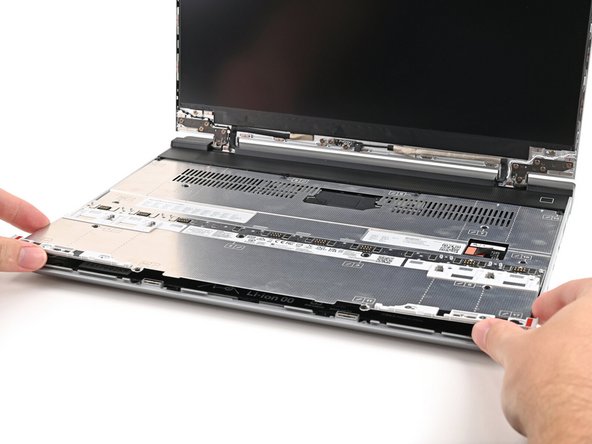
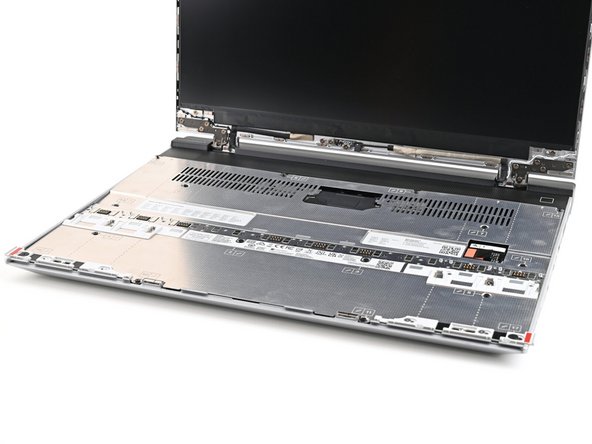
Use your fingers to lift the Mid Plate off the laptop and remove it.
-
-
-
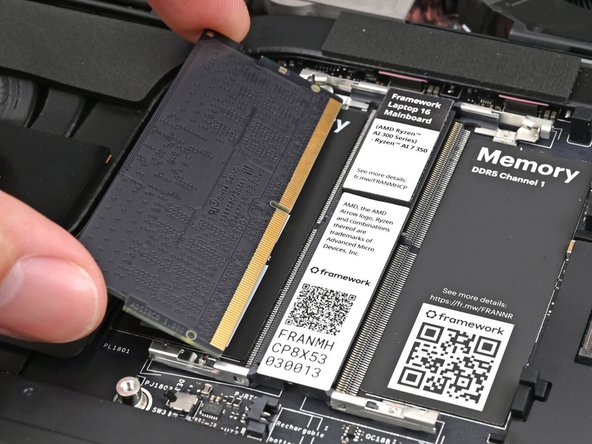
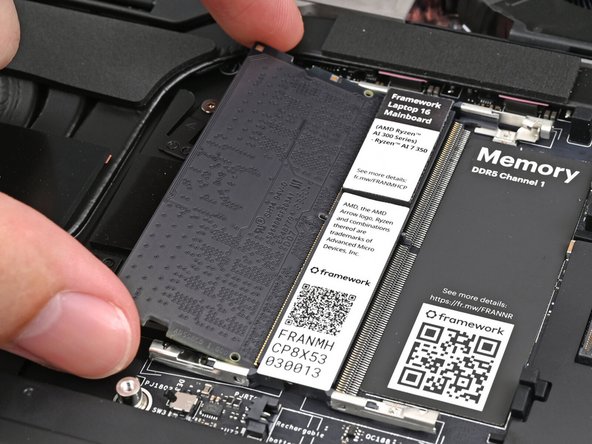
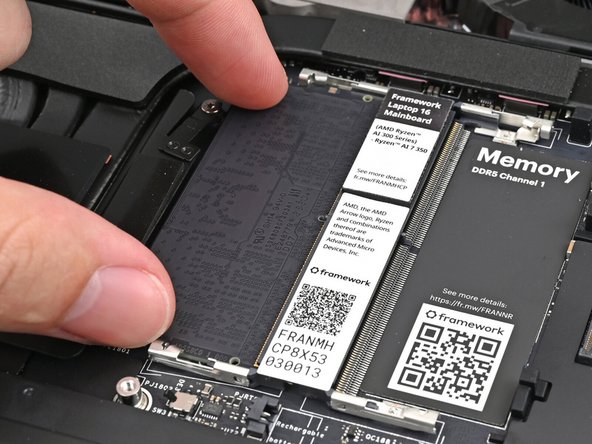
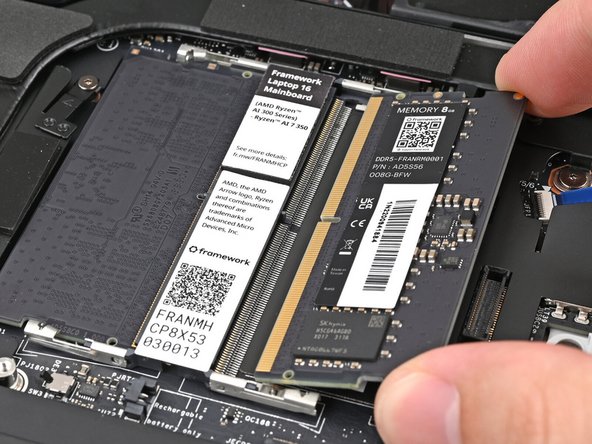
Hold the memory module by its edges. Don't touch the gold contacts with your fingers. If you do, wipe the contacts with a clean, lint-free cloth to remove any finger oils.
-
Orient the module with its label facing down and align the gold contacts with the left socket labeled DDR5 Channel 0.
-
Insert the contact edge into the socket at a shallow angle. The gold contacts should mostly be covered by the socket.
-
Press the edges of the memory module down until the side clips lock it in place.
-
-
-
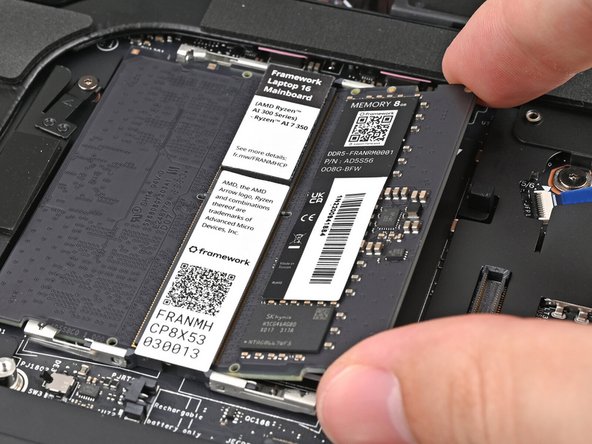
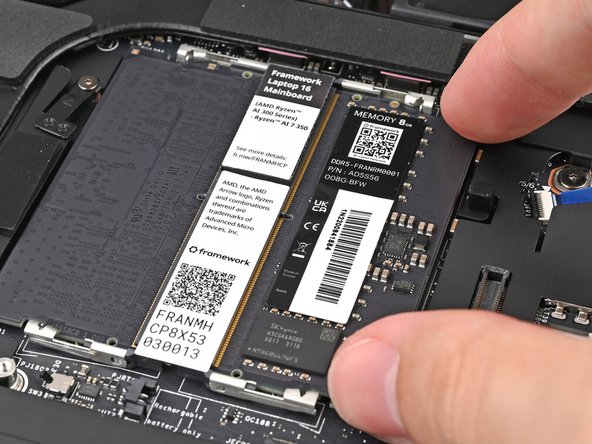
If you're using two memory modules, orient the other module so its label is facing upward and repeat the previous step for the other socket labeled DDR5 Channel 1.
-
-
-
If a Thermal Pad has fallen off over this section, please see our Knowledgebase page of where to re-attach it.
-
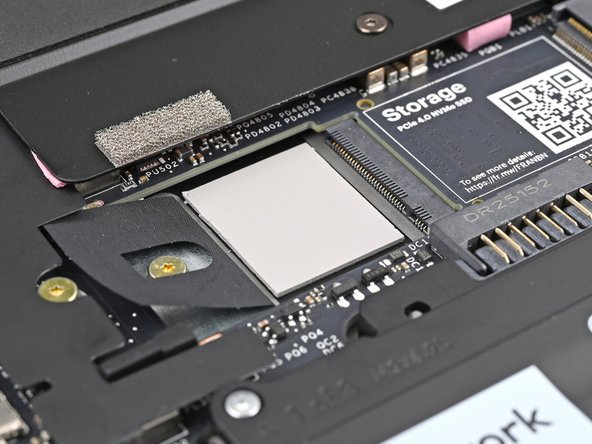
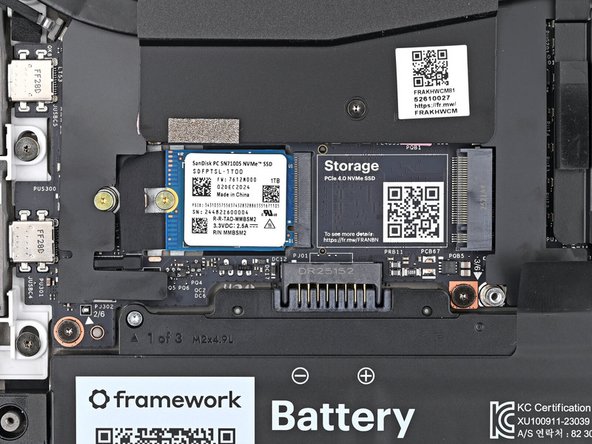
If you're installing a secondary SSD, follow the next five steps. Otherwise, skip to step titled "Remove the primary SSD screw".
-
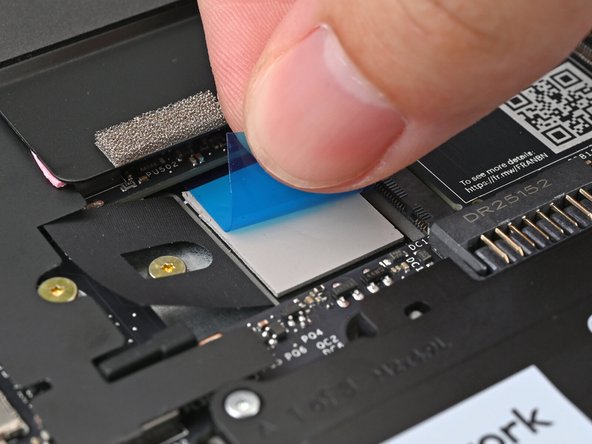
Remove the blue liner from the secondary SSD thermal pad.
The blue foil is missing. The soft gray part (thermal pad) is there. The same applies to the midplate: no blue strip, but the soft gray strip (thermal pad) is there. It hasn't really fallen off, because there's nothing lying around!
Markus Ursprung - Open Reply
The blue liner might be missing while the thermal pad is still there
Francesco Belladonna - Open Reply
-
-
-
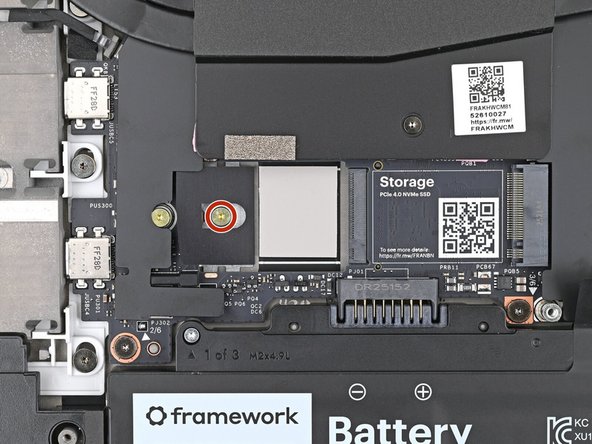
Use your Framework Screwdriver to remove the 2 mm‑long T5 Torx screw securing the secondary SSD.
-
-
-
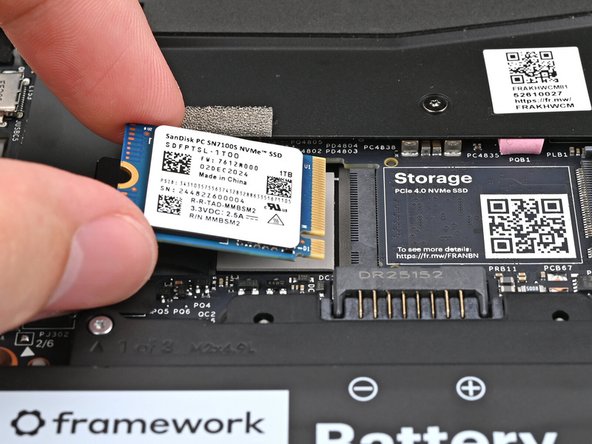
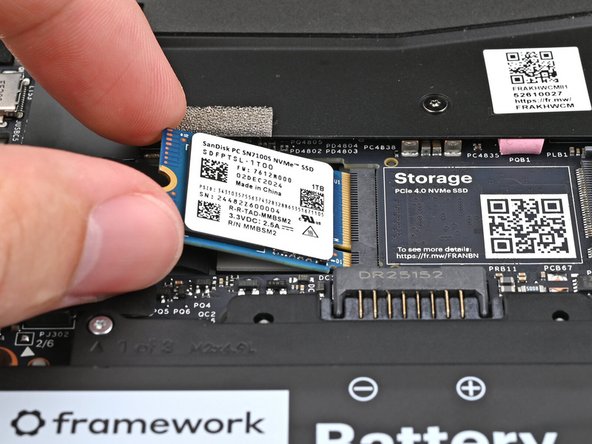
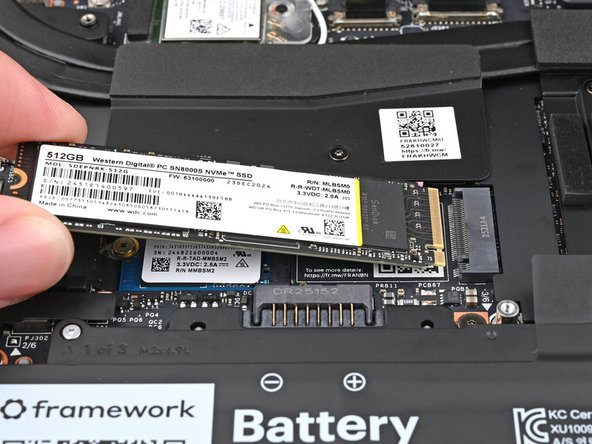
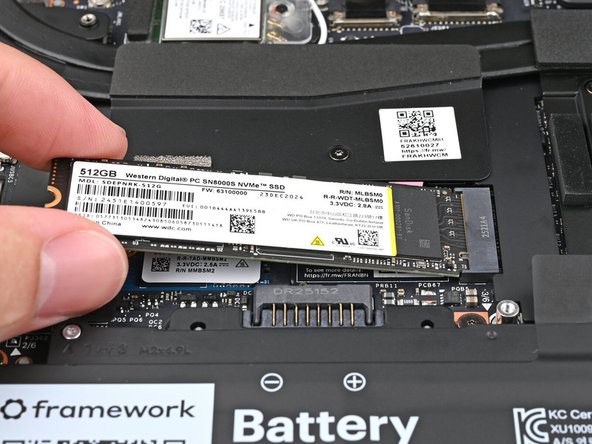
Hold the SSD by its edges. Don't touch the gold contacts with your fingers. If you do, wipe the contacts with a clean, lint-free cloth to remove any finger oils.
-
Align the SSD's gold contacts with its socket.
-
Insert the SSD partially into the socket at a shallow angle. You should still be able to see most of the gold contacts.
-
Press the SSD flat to the Mainboard.
-
-
-
While keeping the SSD flat to the Mainboard, use your finger to slide the SSD into its socket until its golden contacts are completely covered.
-
-
-
Use a Framework Screwdriver to install the 2 mm‑long T5 Torx screw securing the secondary SSD.
-
-
-
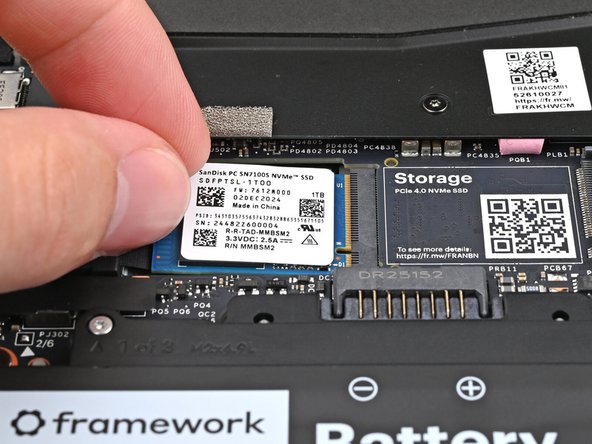
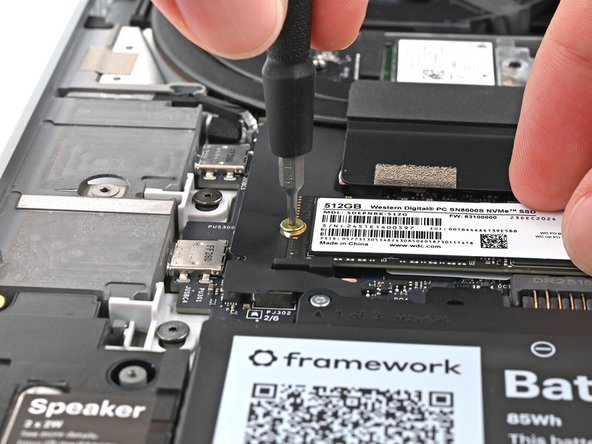
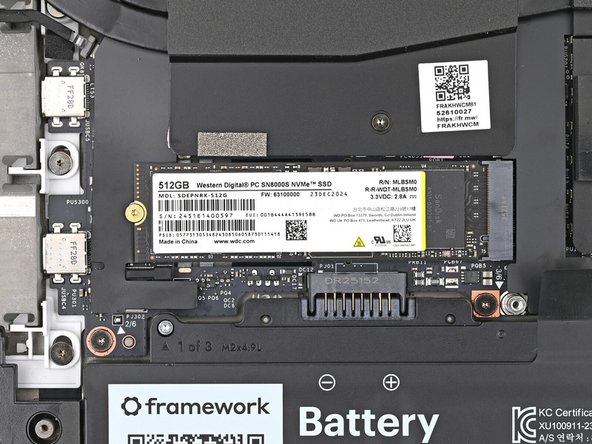
Use your Framework Screwdriver to remove the 2 mm‑long T5 Torx screw securing the primary SSD.
-
-
-
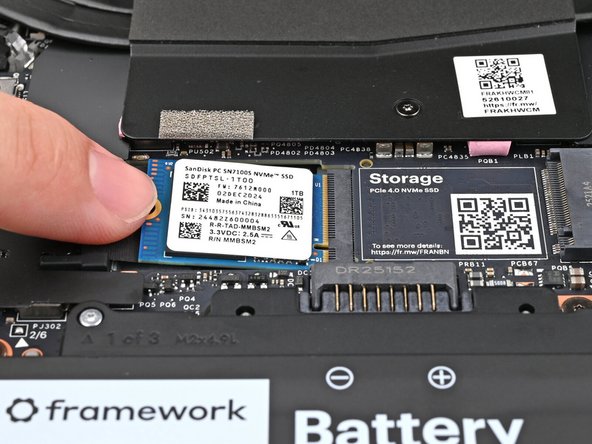
Hold the SSD by its edges. Don't touch the gold contacts with your fingers. If you do, wipe the contacts with a clean, lint-free cloth to remove any finger oils.
-
Insert the SSD into the socket at a shallow angle. The gold contacts should mostly be covered by the socket.
-
The SSD fits into the socket in one orientation. If it doesn't feel like it fits, try flipping the module.
-
-
-
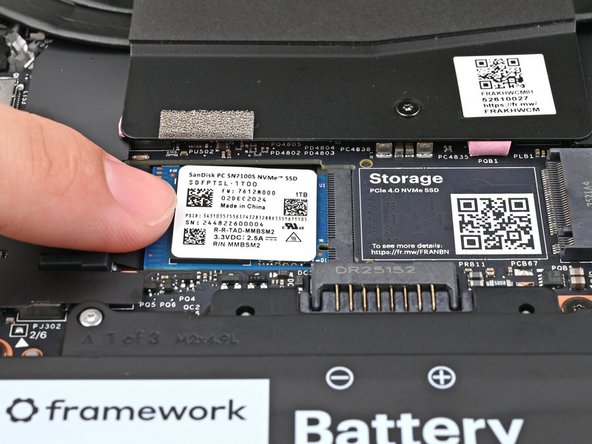
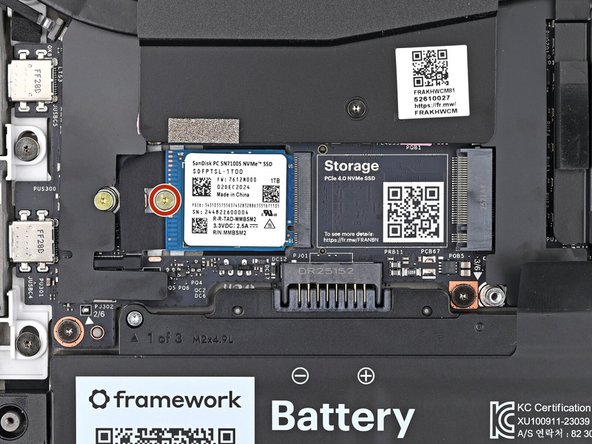
While holding the SSD flat to the Mainboard, use your Framework Screwdriver to install the 2 mm‑long T5 Torx screw securing the primary SSD.
-
-
-
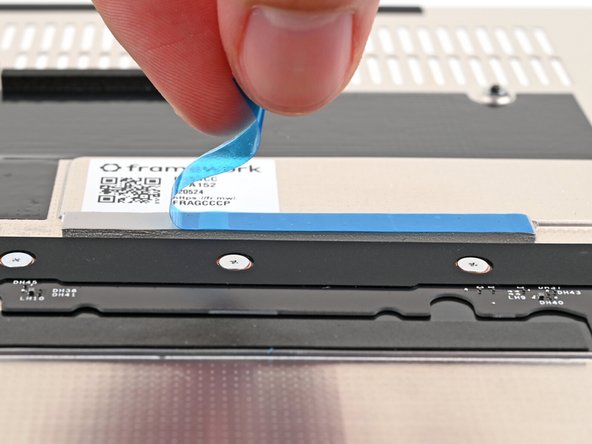
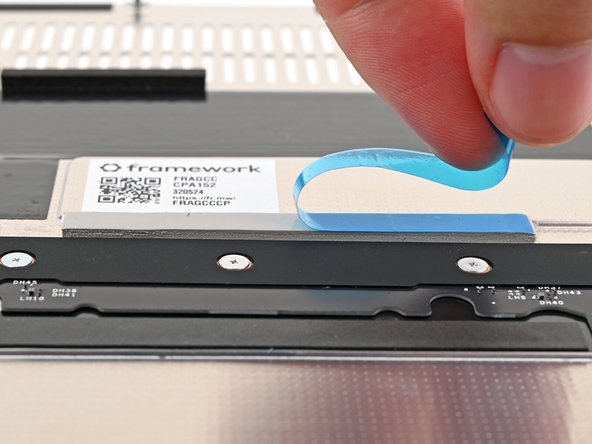
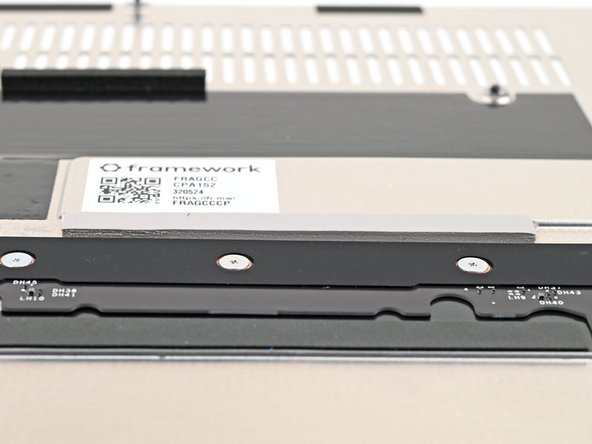
If there's a blue liner on the thermal pad located on the bottom of the Mid Plate, use your fingers to peel it off.
My 16-inch model is much newer (June 2026) and therefore doesn't have the blue foil, but it does have the grey thermal pad. Is that intentional?
Markus Ursprung - Open Reply
-
-
-
Place the Mid Plate on the laptop, making sure it sits evenly on its alignment pegs.
-
-
-
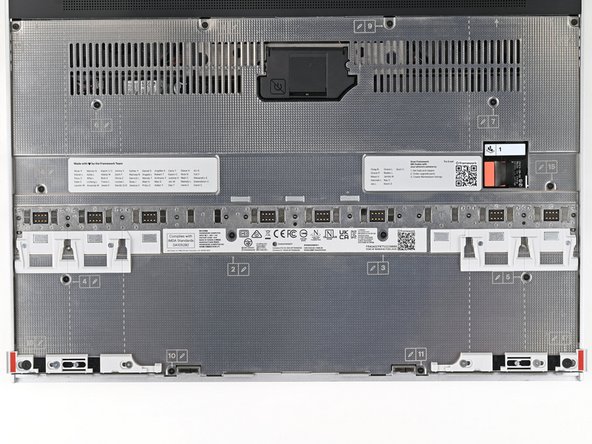
Use your Framework Screwdriver to tighten the 16 T5 Torx captive screws in order (starting with 2) to secure the Mid Plate evenly.
-
-
-
Align the Mid Plate cable press connector over its socket and press down to connect it.
-
-
-
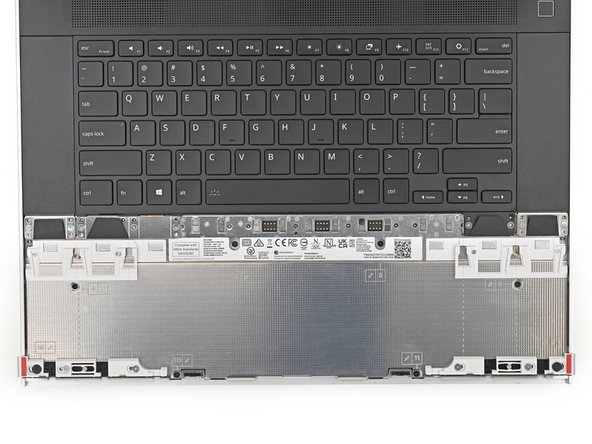
The top row of the laptop is fully customizable, but each Input Module follows the same installation procedure. The next three steps show installing the combination used in the first photo.
-
Check out this page for all of the possible Input Module combinations.
-
-
-
Hold the Input Module at a slight downward angle and align it with one of the dotted lines on the Mid Plate.
-
Slide the top lip of the Input Module underneath the ventilation plate and lay the module down flat to let the magnets pull it into place.
-
Make sure the alignment pegs are slotted into the Input Module and that it sits flat. Otherwise, pull the module off the laptop and readjust it.
-
-
-
Repeat the previous step for the other Input Module.
-
If you've already installed a numpad, you'll only have space for the keyboard and not another module.
-
-
-
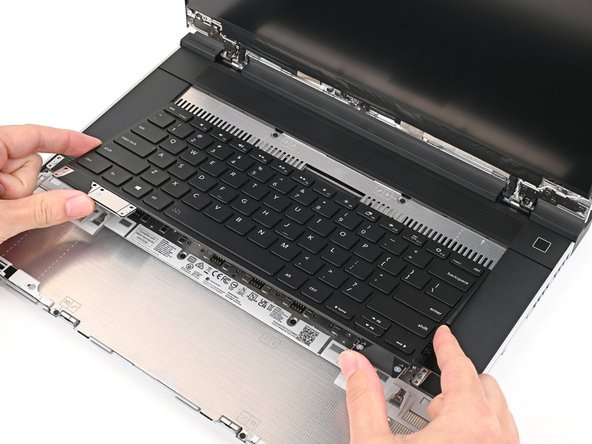
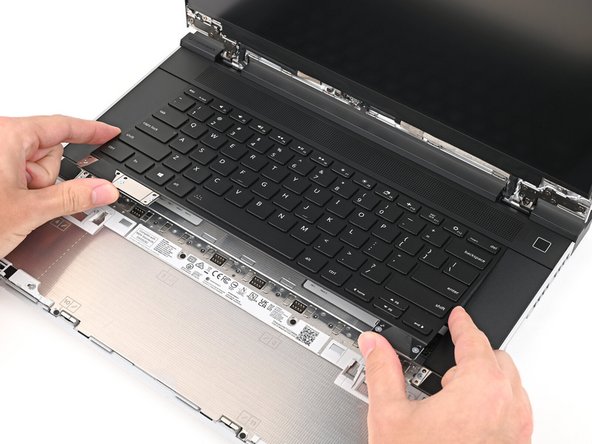
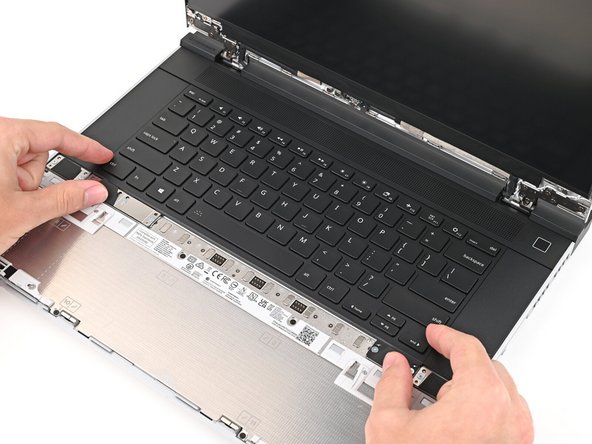
Hold the keyboard at a slight downward angle and align it with two of the dotted lines on the Mid Plate.
-
The keyboard can be placed on the left, center, or right edges of the laptop depending on which Input Modules you've installed.
-
Slide the top lip of the keyboard underneath the ventilation plate and lay the keyboard down flat to let the magnets pull it into place.
-
Make sure the alignment pegs are slotted into the keyboard and that it sits flat. Otherwise, pull the keyboard off the laptop and readjust it.
-
-
-
The bottom row of the laptop is fully customizable. The next four steps show installing the combination used in the first photo.
-
Note: for the Touchpad Module to be on the left, the keyboard can't be installed in the center.
-
-
-
Place the Touchpad Spacer over its spot on the laptop with the bottom edge overhanging slightly.
-
Slide the Touchpad Spacer towards the top of the laptop to secure it.
Is the the touchpad spacer supposed to slightly overhang the keyboard spacer above it?
Daniel Jochemsen-Maaskant - Open Reply
-
-
-
Repeat the previous step for the other Touchpad Spacer.
-
-
-
Place the Touchpad Module flat on its cutout so its clips are properly aligned.
-
Press the Touchpad Module down and slide it into place so it lines up evenly with the bottom edge of the laptop.
-
-
-
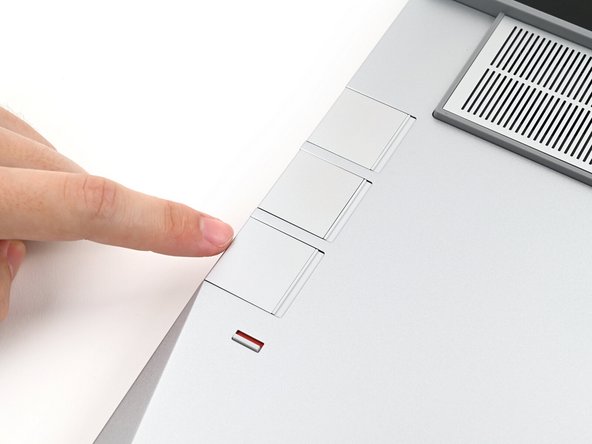
Push the Input Module latches back into place to lock them.
-
-
-
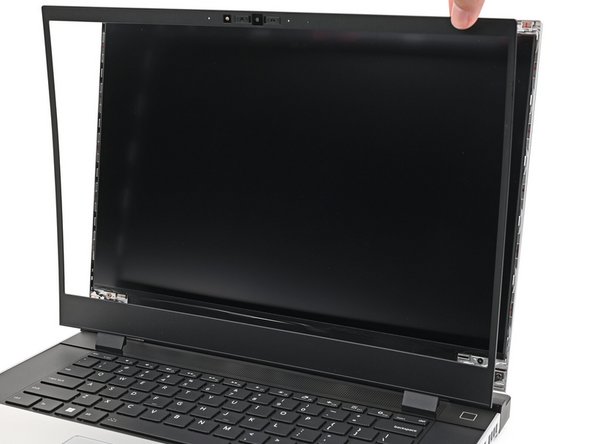
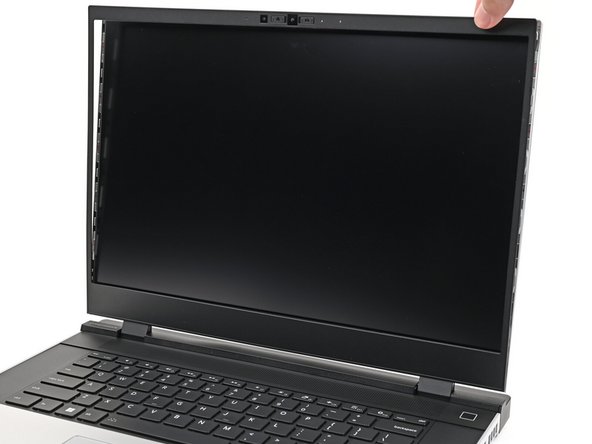
Align the bezel over the perimeter of the display and let the magnets pull the bezel into place.
-
The bezel should "snap" into place. If it doesn't, realign it and make sure it sits flush with the display.
-
-
-
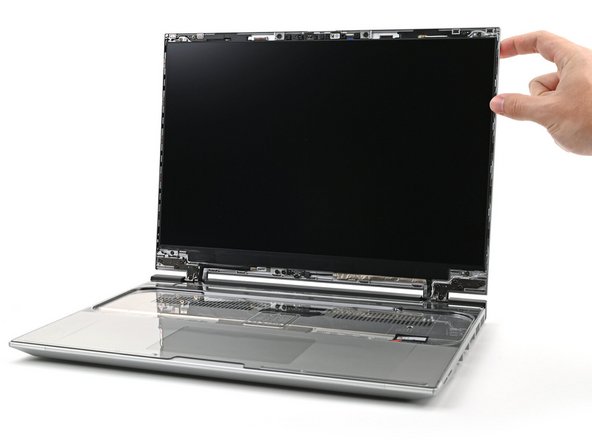
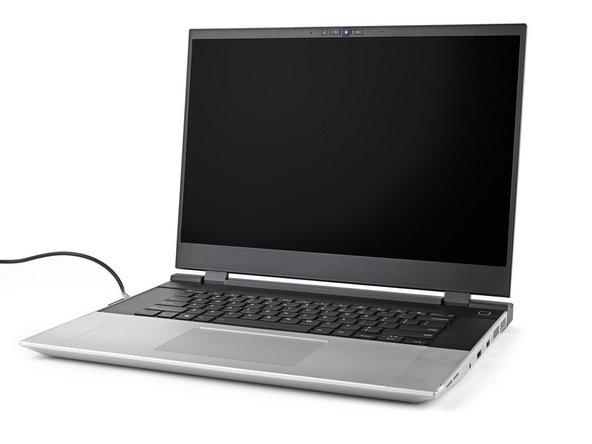
Close the laptop and flip it over.
-
-
-
If you have the AMD Ryzen™ 7040 Series, click here for information on Expansion Card compatibility.
-
If you have the AMD Ryzen™ AI 300 Series, click here for information on Expansion Card compatibility.
-
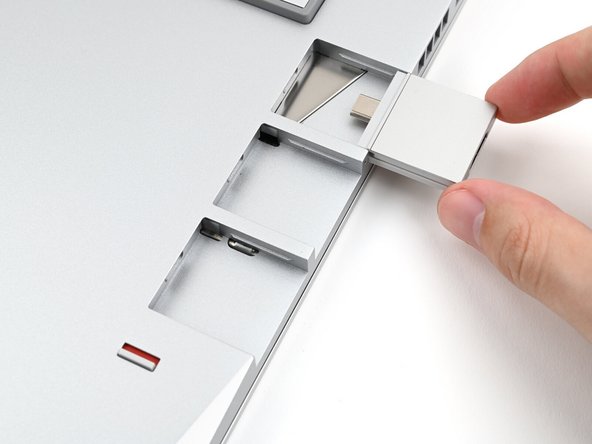
Slide an Expansion Card into an Expansion Card slot.
-
You don't need to unlock the latch to install the Expansion Cards—only when you want to remove them.
-
The Expansion Cards should click into place, and the front edge should be flush with the laptop.
-
Repeat for the remaining Expansion Cards along that edge.
-
-
-
If there's a red bar showing under the Expansion Card latch, use your finger to flip the latch and lock the row of Expansion Cards above it.
-
-
-
Repeat the previous two steps for the other row of Expansion Cards.
-
-
-
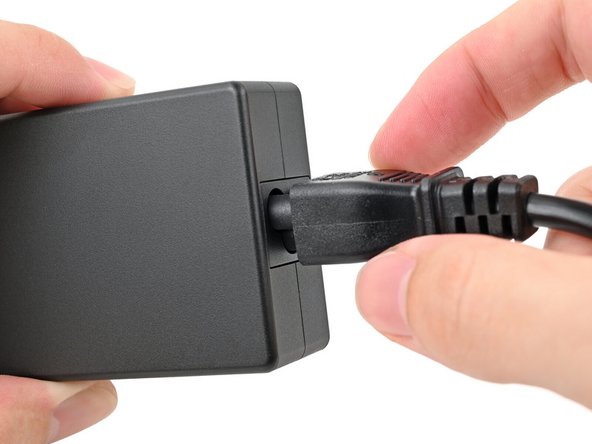
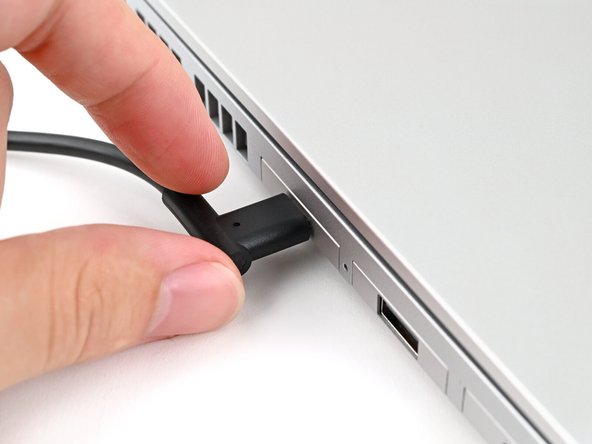
Plug the AC Cable into the Power Adapter.
-
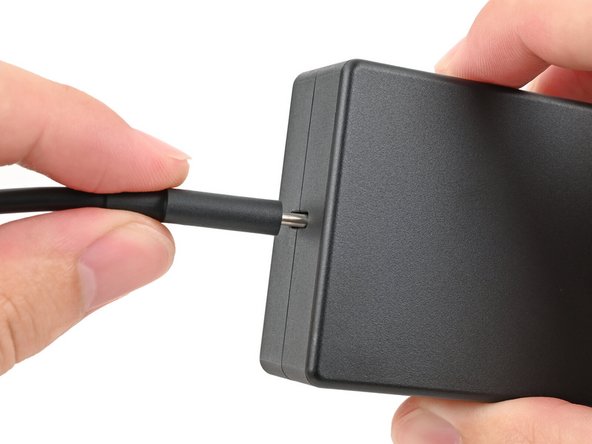
Plug the USB-C Cable into the Power Adapter.
-
You can plug either end of the USB-C cable into the adapter.
-
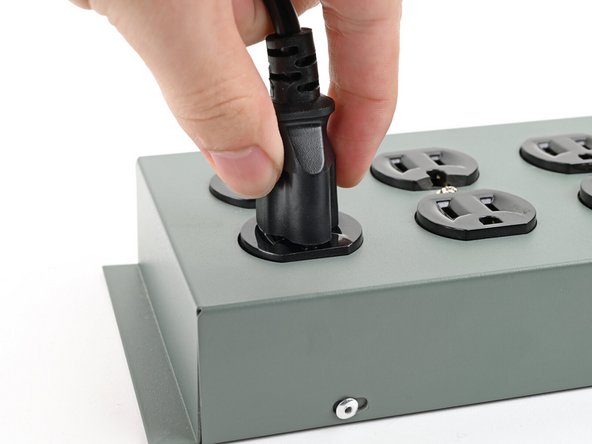
Plug the AC Cable into a power outlet.
-
-
-
Your Framework Laptop ships in shipping mode, where the battery is disabled until you plug the laptop in for the first time.
-
Plug the USB-C Cable into any USB-C port on your laptop.
"Any USB-C port" is not accurate. If you're using the AMD discrete GPU, that port does not support charging (according to the specs).
Timothy J. Lanza - Open Reply
The note about the battery being in 'shipping mode' should be referenced at the beginning of the guide. I was seriously considering disconnecting the battery before attempting the laptop; it would be a great heads up to other folks who are wary about power being supplied while working on the internals!
Baldwin Chang - Open Reply
-
-
-
You're done assembling your Framework Laptop! Now, you'll need to install an OS.
-
If you're installing Microsoft Windows, check out this guide.
-
If you're installing Linux, check this page for more details.
-
For drivers, firmware, and software updates, check out this page.
-


For drivers, firmware, and software updates, check out this page.
If you need help, contact Framework support.
For drivers, firmware, and software updates, check out this page.
If you need help, contact Framework support.
Cancel: I did not complete this guide.
125 other people completed this guide.
29 Comments
Mostly simple setup. Minor issues I ran across were the primary hard drive screw stripping with no effort and no plastic on the pads.
Also, instructions say you can plug the charger into any USB-C port. You should clarify this does not include the one on the Radeon GPU.
True. I thought that spot in the back was going to be an excellent place to charge from.
Few small points:
1. one screw of the midplate is "loose" doesn't really tighten completely anymore.
2. Some blue liners were not present (on the midplate for the M.2 and at the thermal plate for second storage)
3. It was quick and easy to setup! Took me 35mins while being very careful and taking my sweet time!
Lots of love for the team and the product, thanks for finally changing the game for laptops! <3
Daniel Jochemsen-Maaskant - Open Reply
Keep getting Input Module Connector Board not detected, but I've checked that plug several times and it's in all the way.
Fred Mastro - Open Reply
It was super easy to "assemble" (more like plug in) my new Framework laptop. The guide was extremely easy to follow. Not a single wire had to be connected anywhere, simply amazing. Very impressive quality of components.
One comment: you should number expansion slots. There is a video on step 22 (shows laptop upside down), and then the step references a guide on expansion cards which shows the laptop and expansion cards in reverse order to the video (laptop upright) - it's confusing.
Vlad Jebelev - Resolved on Release Reply
Amazing experience. This is what right to repair looks like.
Matt Harris - Resolved on Release Reply
It took me approximately 25 minutes if we count only the time it took to partially disassemble, put primary and secondary storage in, RAM in and assemble back with keyboard and NUMPAD plus putting Bezel on. And then expansion cards. Also I had 2 issues: 1. I found very thin strip of thermal pad around the area where primary storage is. IDK if I should put it on primary, because the only thing that it will have to to dissipate heat would be mid-plate. 2. One of the screws that are in latching mechanism came loose and it took me a moment to realize that screwdriver thankfully has 2 sided bit. Also this time doesn't include unboxing, installing OS and powering the device on. And I watched all tutorials beforehand. If someone does it while watching tutorials it might easily take twice as much time. I suspect then that time will be highly variable. For assembly itself it might be 20-60 minutes easily.
Jan Negrey - Resolved on Release Reply
For future refence: the loose, thin, strip of thermal pad is supposed to be attached to the bottom of the mid plate where the M2 2280 SSD is supposed to come. If this SSD installed, feel free to remove the blue protective foil before installing the mid plate.
I also found very thin strip of thermal pad around the area where primary storage is. Did you ever get an answer on whether/where that should be attached?
I also filmed myself unboxing and assembling it. It's on YouTube, but I don't know if rules here allow for linking the video.
Apologies for bad layout of my post. I'm used to Shift+Enter being new line and Enter alone being "send". Sadly more than 5 minutes have passed when I realized it.
I'd like to suggest a time of 25 minutes, but I don't seem to have time suggesting privileges, so I'm making that suggestion as a comment.
Keith Ammann - Resolved on Release Reply
I'm very happy with my purchase and ease of setup! Each step is simple to complete and the markings inside the laptop are a helpful guide. Things just click in place once installed properly. It took me ~25 minutes to complete. I can't wait to see what else this company has in store!
Alex McLeod - Resolved on Release Reply
There is an extra component that I'm not sure of its use. It looks like an internal webcam, and I don't see the instructions covering it. Anyone else know what I'm talking about?
Fletch Hasues - Resolved on Release Reply
When I pay North of £2 k I expect to be provided with a magnifying glass so that I can read the bloody instruction leaflet with its minute typeface. Ridiculous!
Bernard Marsden - Resolved on Release Reply
I received the Framework 16 today, installed memory, ssd and everything and just finished with the Linux install. This is really a laptop showcase of mastering the mechanical engineering. I think my next hope is to get expansion slot for swappable storage/usb stick which is in expansion card shape and stays there tightly when carrying the laptop from place to place.
Mika Laitio - Resolved on Release Reply
it seems to be a great product but its sad that the edge of the trackpad part are sharp and sticking out a bit, it can be dangerous and i fear that i may scratch the screen at one point
Vella Stéphane - Resolved on Release Reply
The OOB process and build was very simple. Kudos to you folks at Framework!
Windows 11 setup was a breeze with a default 23H2 installer. Only hiccup (if you want to call it that) was the (expected) lack of network support for the WiFi, but no big deal there. Continuing setup without networking isn't really a problem. All of this was outlined in your actual Windows installation guide listed at the bottom of the Quick Start Guide on this page.
The only item I can think of that you guys might want to address is the unmarked Expansion Bay Shell Interposer included when you purchase a video card and an Expansion Bay Shell. I had no idea what it was until I dug through the components list on the site.
Thanks!
Aaron Buehler - Resolved on Release Reply
This is one of the best designed modular DIY laptops I have ever invested in! The step-by-step videos were fantastic, the captive screws in the middle plate was an excellent design choice, the components being placed top side under the plate (RAM, CPU, SSDs, etc.) is another very well executed design choice, the keyboards and the electronic contact points for the add-ons are very well designed and thought out. I am also very excited for the detachable expansion cards!
The separate videos guiding the assembly of the Laptop 16 were very informative and useful. I had my moments where the touch pad module wasn't fitting correctly and I absolutely fumed that maybe I did something wrong. But after looking through the videos, I tried once more to mount the touch pad module and it mounted as it should. I guess my own OCD bothered me that the touch pad module was not perfectly straight facing the keyboard.
All in all, the assembly took 20 minutes for me, plus another 25 minutes for the OS. I chose Zorin OS Pro as my OS.
John Tarsus Aya - Resolved on Release Reply
It took me about 40 minutes to assemble the hardware, without updating the BIOS or installing the OS. Very easy to build and really helpful video sequences. Thanks!
It was my first time doing anything like this; it only took me an hour, also without updating the BIOS or installing the OS.
Good thing the screws are captive.
Didn't look at the time, nor hurry, could have been 1 h.
In my 16in machine, both touchpad module side edges rise about higher toward the back than the spacers to either side. On inspection, it's metal frame doesn't look bent, though.
Otherwise, impressively made!
Wolf Lichtenberger - Resolved on Release Reply
Touchpads are too long and hang of Laptop edge closest to user, and for some reason, although I PAID FOR IT, there is no GRAPHICS CARD!
Duncan Rigden - Resolved on Release Reply
You might want to reach out to support directly.
Open a ticket with the option at the bottom. Submit support request. Get your order info ready.
Tochpads are too long, and hang over edge of laptop nearest user. What, why, how? I am totally Lost!
Duncan Rigden - Resolved on Release Reply
This guide says "Suggest a time" -- not including the OS in Step 24, this guide took me 50 minutes to build my Framework 16 (coming from basically zero knowledge).
Paul Stephenson - Resolved on Release Reply
Hello, I have DDR5 memory but I haven't received my SSD. WD_BLACK™ SN7100 NVMe™ - M.2 2280 - 1TB
What should I do? This is extremely disappointing. I saw the RAM packaging, but no SSD.
I hope to receive a quick response; my project is on hold. My order number is R341623846
David - Open Reply