Introduction
The Framework Laptop 16 DIY Edition uses an AMD RZ616 or AMD RZ717 Wi-Fi card that the Windows 11 installer doesn't currently include drivers for. Follow the below steps to download OOBE Wi-Fi Drivers & get started.
Don't forget to install the Driver Bundle (Download here) after you complete Windows 11 installation. Because the hardware in the Framework Laptop is so new, a fresh Windows install doesn't have the needed drivers for full hardware support.
Tools
Parts
No parts specified.
-
-
If you purchased Windows from Framework, log into your Framework account and navigate to Digital Purchases to redeem your Product Key.
-
Once you redeem your Product Key for Windows, you will not be able to return it for a refund. You can always choose to redeem your key and activate Windows after you complete installation, as the installer lets you skip the Product Key entry step.
-
If you don't have a Windows Product Key yet, you can still proceed with installation and then activate Windows later. You can pick up a Windows Product Key from the Framework Marketplace.
-
-
-
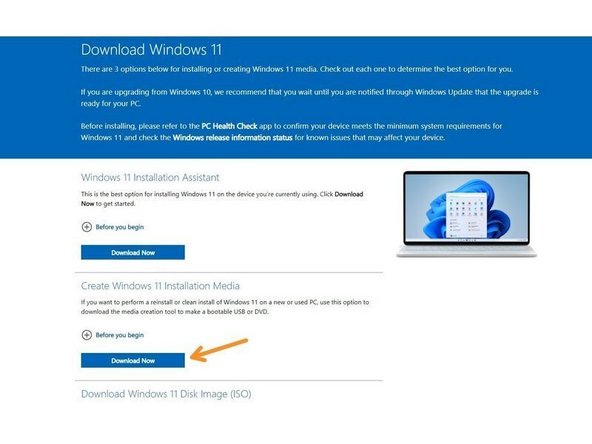
Download and launch Microsoft's Windows 11 Media Creation Tool.
-
This will download a file called "mediacreationtool.exe"
-
If you navigate to this page from a Linux or Mac system, it'll direct you to download a Windows .iso instead of the Media Creation Tool. We recommend finding a Windows machine instead to create the installer to avoid any issues.
-
Accept the license agreement.
-
For "Select language and edition", make sure the language is set to the one you want and "Edition" is set to "Windows 11".
-
Make sure "Use recommended options for this PC" is unchecked.
-
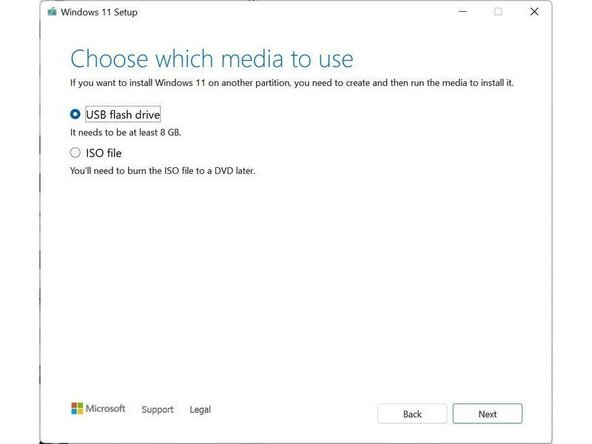
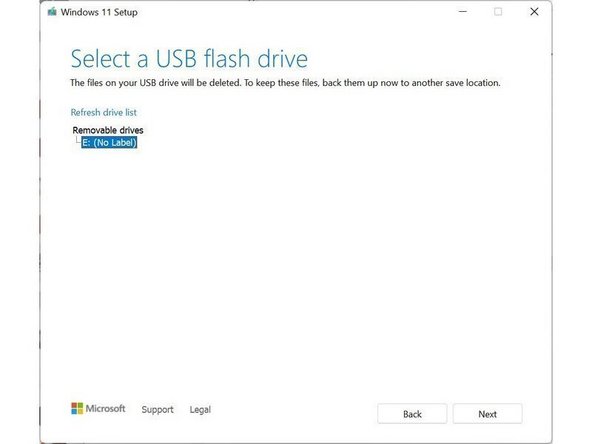
If launching from Windows 10, select "Create installation media for another PC," and click Next. Select the language and architecture, select "USB flash drive", then select the drive you'd like to use and wait for the installation media to be created.
-
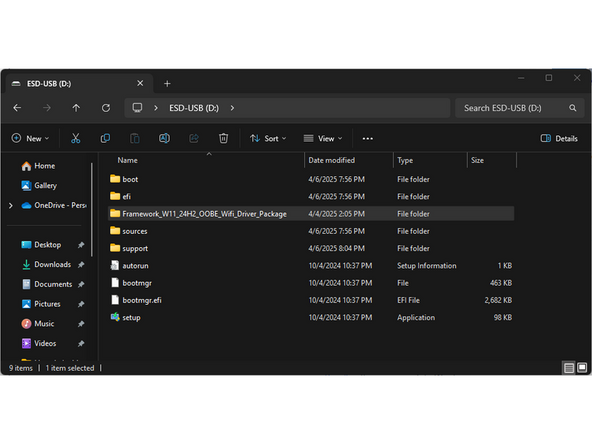
When finished, the USB should be titled "ESD-USB".
-
-
-
Download the OOBE Wi-Fi Driver Package here.
-
This will download a file called "Framework_W11_24H2_OOBE_Wifi_Driver_Package.zip"
-
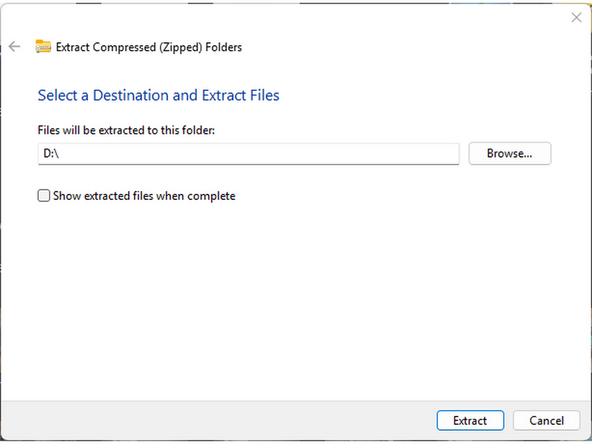
Extract this .zip to the "ESD-USB".
-
Once this completes, eject and remove your USB Flash Drive.
-
-
-
Power off your Framework Laptop if it is on.
-
Plug your bootable USB Flash Drive into your Framework Laptop.
-
Power on your Framework Laptop. If the Storage device installed in your laptop is blank, it will boot directly into the Windows Installer.
-
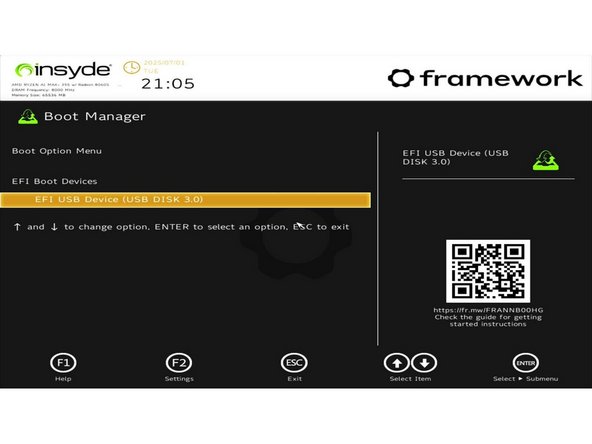
If you have an existing operating system installed on the laptop, you'll need to tap F12 repeatedly while booting in order to choose your USB Flash Drive to boot from.
-
This will take you to the Boot Manager menu shown in the screenshot. Use your arrow keys to select the "EFI USB Device", and then press Enter.
-
-
-
Select the appropriate locale options from the drop down menus on the first screen, click Next, and then click "Install Now" on the next screen.
-
The Windows installer uses a fallback driver for the touchpad, so the touchpad behavior may be somewhat janky. After you complete installation and install the Framework Laptop Driver Bundle, the touchpad will behave normally.
-
The cursor may not appear until after swiping on the touchpad for a few seconds. If the cursor still doesn't appear, hard power down the laptop by holding the power button until the system shuts off. Wait 15 seconds, and power on again. You can also use the Tab and Enter keys on the keyboard or an external USB mouse to complete the installation.
-
You can enter the Product Key now or click on "I don't have a product key" to enter it after installation is complete.
-
If you are entering a Product Key later, choose the version of Windows you'd like to install. This will usually be "Windows 11 Home" or "Windows 11 Pro".
-
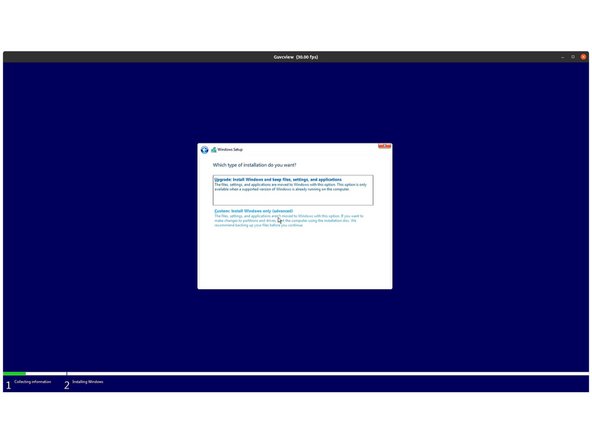
You can then accept the license terms. On the next page, select the Custom: Install Windows only (advanced) option, and Windows will now begin the installation process. Your laptop should restart when complete.
-
If your USB Flash Drive is large, the installer may prompt you to choose which drive to install Windows on. Select the internal drive (typically Drive 0), not the one labelled "ESD-USB". If you are overwriting an existing OS, you'll likely need to select and Delete the partitions on the drive to make space for your Windows install.
-
-
-
The installer will reboot and take you through the Windows setup process. Follow the on-screen prompts to select your region and keyboard layout.
-
Until you complete installation and install the Driver Bundle, the Touchpad will be operating in a compatibility mode where functions like two finger scrolling won't work. You can click and drag scrollbars or use the keyboard arrow keys to navigate lists during setup.
-
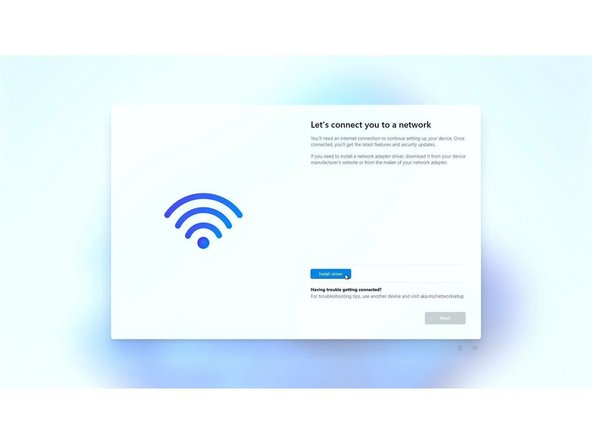
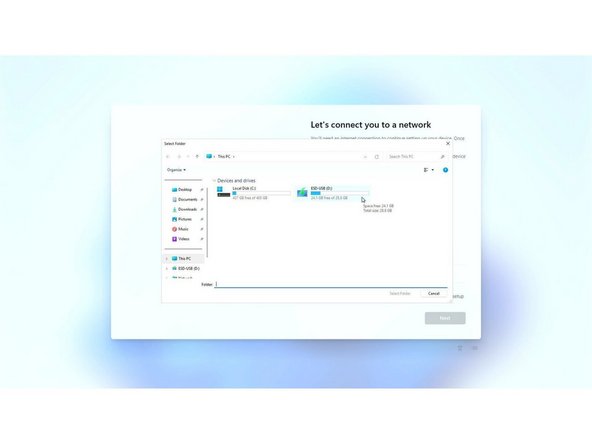
On the "Let's connect you to a network" screen, click the Blue "Install Driver" button in the middle of the page. This will open a File Explorer window.
-
Click on the "ESD-USB" device and click "Select Folder".
-
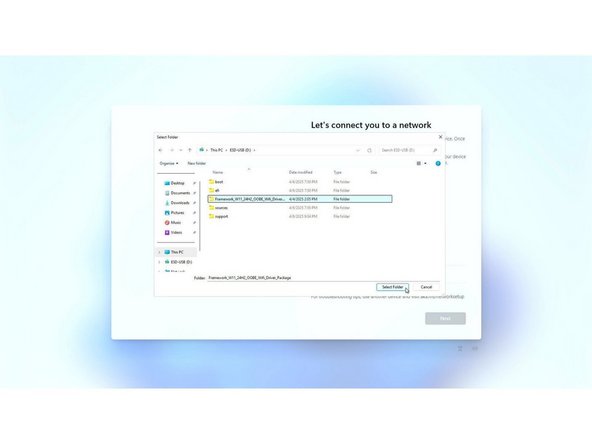
Click on the folder titled "Framework_W11_24H2_OOBE_Wifi_Driver_Package", then click "Select Folder".
-
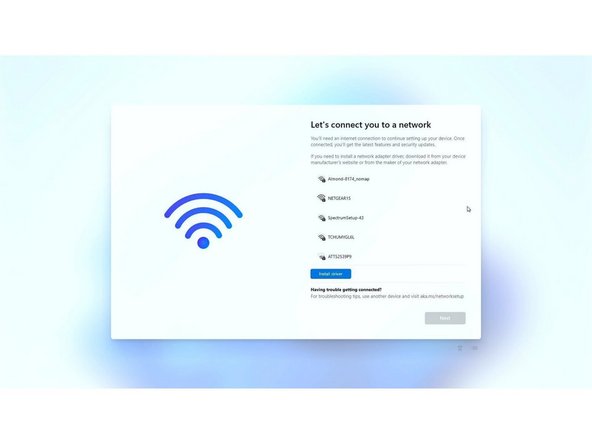
Once you do this, the Windows File Explorer should disappear and wireless networks should now appear.
-
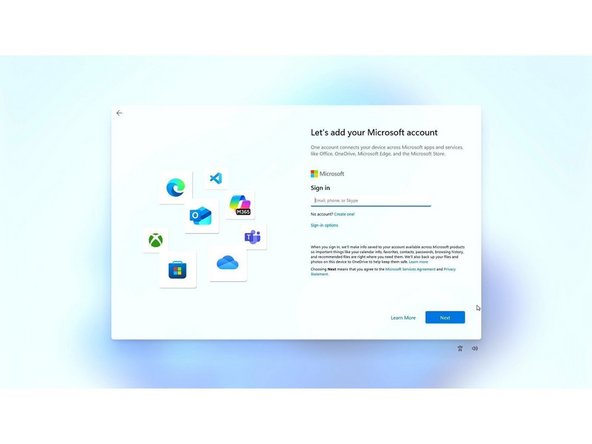
Note that Windows 11 now requires you to connect to a network and log into a Microsoft Account during installation. There are some workarounds for this floating around online, but it's unclear how long they will continue to work.
-
-
-
Once the driver loads, it will show a list of available networks to connect to. Connect to your local network and click "Next".
-
This will now take you through available Windows Updates which will reboot your system multiple times.
-
After the system reboots, set your system name. After it reboots again, if you connected to a network earlier, log in to your Microsoft account (or create one).
-
Create a pin if prompted. If you logged into a Microsoft account that has a previous OneDrive backup, you'll be presented an option to restore from it. Otherwise, you can set up as a new device.
-
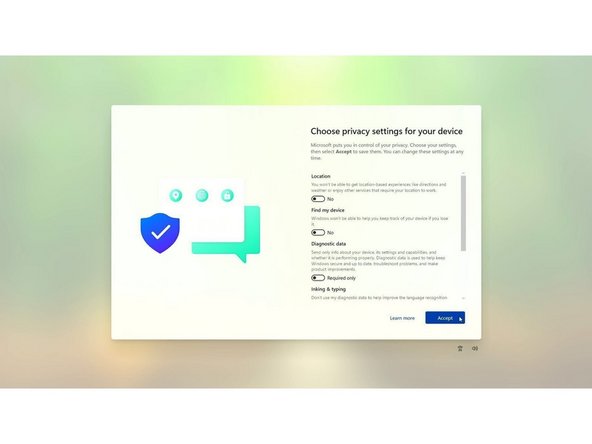
Select your preferred privacy settings, then select customization options or skip the step. Set up OneDrive or select "Only save files to this PC." Select or skip a few annoying upsell screens Microsoft puts in front of you. Setup will then complete and reboot into Windows.
-
-
-
You'll now need to install the Framework Laptop Driver Bundle to get your laptop fully functional.
-
First, download the Driver Bundle for your Framework Laptop from here. If you haven't connected to a network yet, you'll need to download this on another system and then copy it over using a USB Flash Drive.
-
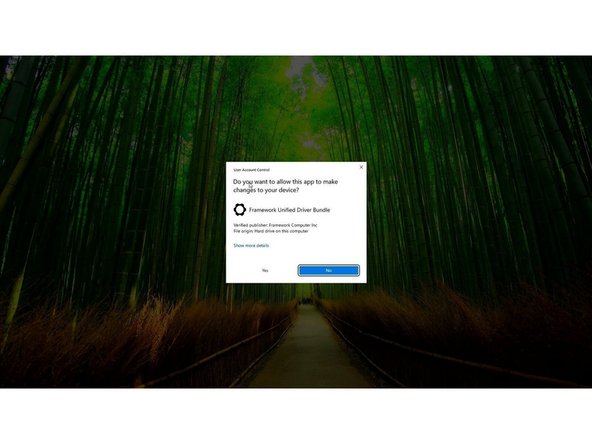
Navigate to the folder where the Framework Laptop Driver Bundle is, and double-click on it. Click Yes on the "Do you want to allow this app to make changes to your device?" prompt that comes up.
-
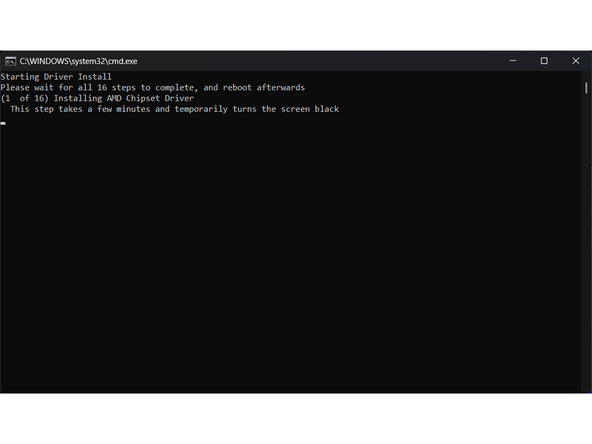
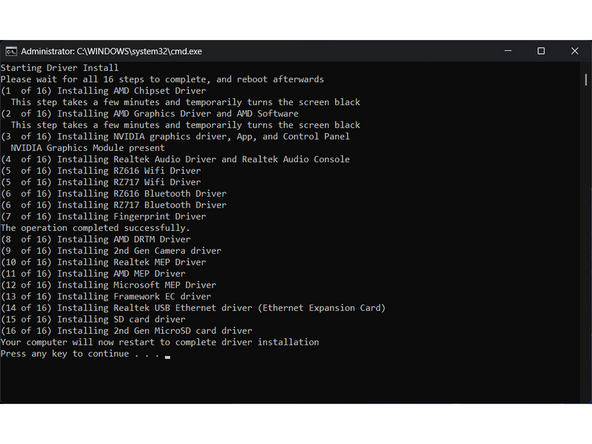
The Framework Laptop Driver Bundle will automatically install all of the drivers required to use the Framework Laptop. It will take several minutes to install. At the end of the install, you will be prompted to press any key to reboot. Press any key.
-
After the laptop reboots, you're done! You can connect to a network if you didn't do that earlier and also Activate Windows if you didn't enter a Product Key during installation.
-
Make sure to run Windows Update after you're connected to a network to get the latest security updates. In the future, you'll also be able to get driver and firmware updates through Windows Update.
-
- If you have any questions or concerns, feel free to reach out to Framework Support.
- If you have any questions or concerns, feel free to reach out to Framework Support.
Cancel: I did not complete this guide.
23 other people completed this guide.
6 Comments
The previous version of this guide used to have instructions on how to use Rufus to bypass the MSA requirements. But according to the date at the top, this guide was revised on 09/29/2025, and those steps are now gone. What happened?
In2itivity - Open Reply
The driver bundle did not successfully install the WiFi drivers for me, after contacting support I was directed to download the drivers from https://www.catalog.update.microsoft.com... (different version may be required in the future) then I had to unzip the file and install via device manager.
MythicalPaladin - Open Reply
Absolute lifesaver, I've been reinstalling the same drivers for the last three hours thinking something went wrong with the installation.
The guide mentions creating a bootable USB drive using Microsoft's Media Creation Tool. For users who might prefer alternative methods, does Framework offer instructions or recommendations for creating a bootable USB drive using other tools like Rufus? <a href="https://www.richmondgeneralcontractors.c...">Richmond General Contractors</a>

