
Introduction
In the event your Framework Laptop 13 (11th Gen Intel® Core™) isn’t powering on, it may be necessary to reset the state of the Mainboard by fully cycling power to it. Usually you’ll only need to do this if directed to by a Knowledge Base article or by the Framework Support team.
If you're on a Framework Laptop 13 (11th Gen Intel® Core™) and have needed to reset your Mainboard more than once, it may be that your RTC battery has reached the end of its cycle life and is no longer holding a full charge. You can reach out to Framework Support to request a free replacement RTC battery or if you have expertise with soldering, an RTC Battery Substitute module that removes the need for an RTC battery. To make the request process go smoothly, enter the email address that you ordered the 11th Gen product on and/or include photos of the system and Mainboard serial numbers.
Tools
Parts
No parts specified.
-
-
Power off the Framework Laptop by navigating to the Windows icon on the bottom left and clicking on "Power" followed by "Shut down," or if on Linux, the equivalent action there.
-
-
-
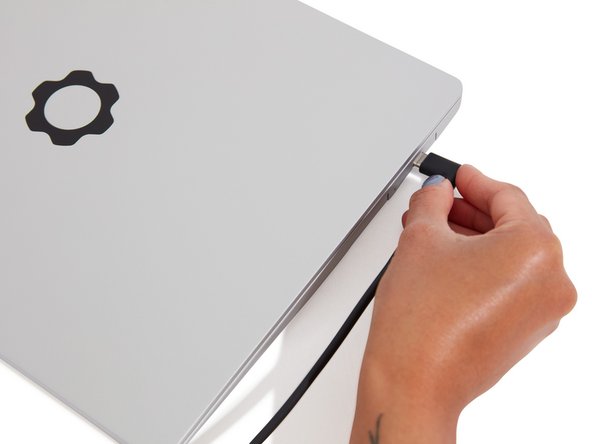
Unplug your power cable from the USB-C Expansion Card in your Framework Laptop.
-
-
-
Close the lid on your Framework Laptop and place it upside down on a soft, non-marring surface, such as the bag that it shipped in.
-
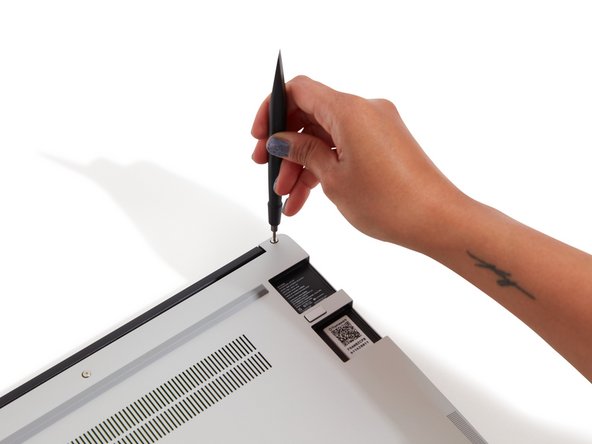
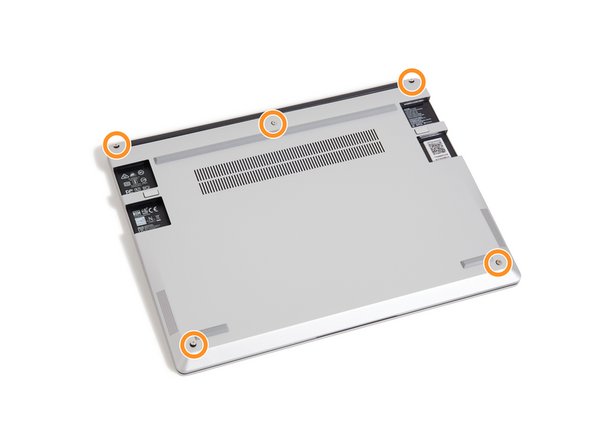
Using the T5 bit in the Framework Screwdriver, unscrew the 5 fasteners on the Bottom Cover. These fasteners will remain attached in the Bottom Cover so that you do not lose them.
-
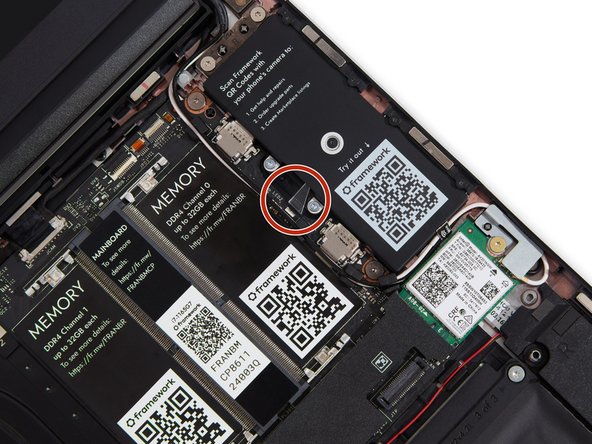
The fastener on the bottom left (circled in red) will not unscrew as far as the others, as it is acting as a lifter for the Input Cover.
-
You'll hear this fastener start clicking as you rotate when it is unscrewed far enough.
-
Do not use a powered tool for these steps, as this will likely result in damage to the fasteners.
-
-
-
Flip the Framework Laptop back over and open the lid to around 120 degrees.
-
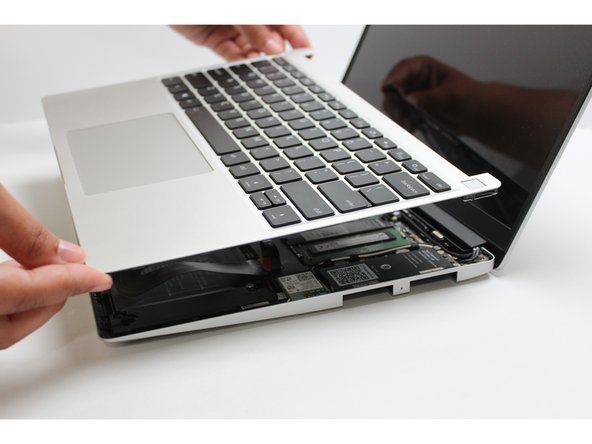
Important: Pull the Input Cover off carefully as it is still attached to the Mainboard via the Touchpad Cable. You don't need to disconnect this cable to do most repairs. You can just flip the Input Cover over. If you do want to disconnect it though, make sure to disconnect the Mainboard side using the finger loop over the orange label.
-
The bottom right corner of the Input Cover lifts up when the five fasteners are properly unscrewed from the previous step. You should not have to use any excessive force to remove the Input Cover.
-
Carefully lift the cover up from the bottom right corner. If you need to, you can use the spudger end of the Framework Screwdriver to lift it as well. Lift the Input Cover off the Mainboard, flip it over (keyboard side down), and place it about halfway on the Bottom Cover.
-
Be sure not to put too much force on the Touchpad Cable when doing this.
-
If the LEDs on the left and right sides of the system are flashing red when you lift off the cover, it means the system is still powered on. Make sure your power cable isn't plugged in and that you have shut down correctly.
-
Note that it may take up to 30 seconds after shutting down for the system to fully power off. Wait until the LEDs stop flashing before proceeding.
-
You should keep the Battery connector plugged in unless you need to replace the Battery, Mainboard, or Speakers. This connector is easy to accidentally damage, so it's better to not handle it.
-
-
-
Using a SIM Eject tool or another small pin (such as a paperclip), carefully insert the pin into the hole at the bottom edge of the coin cell receptacle, and tilt it down to eject the coin cell battery. Please use caution here as improper removal can potentially result in damage to the RTC cradle
-
Place the coin cell off to the side for now.
-
-
-
Be extremely careful when sliding the Battery connector out, as it is very easy to accidently bend the pins. Make sure to slide straight down, and avoid letting the connector twist or bend.
-
Carefully disconnect the Battery by gripping the connector edges with both fingers and slide the connector straight down from the socket.
-
With all power now removed from the Mainboard, let it sit for two minutes to allow any residual power to discharge.
-
-
-
Now with the Battery still disconnected and the RTC Coin Cell still removed, plug your Power Adapter back into the laptop. At this point, you should see the LEDs on the left and right sides of the Mainboard start to blink red. This confirms that the board is powered on and in a reset state.
-
If the LEDs do not blink red, confirm that the Power Adapter is working by plugging it into any other USB-C device you have available, or by trying a different USB-C power adapter on the laptop.
-
If you still do not see blinking red or ran into any other issues along the way, make sure to reach out to Framework Support. We're here to help.
-
-
-
Disconnect AC power from the laptop.
-
Re-insert the RTC Coin Cell battery by sliding in the top edge first, and then pushing down on it until it clicks into the receptacle. Make sure the Coin Cell is aligned well, and don't apply too much force, as forcing the cell in could damage the receptacle.
-
-
-
Before plugging the Battery connector back in, double check the pins on the Battery receptacle on the Mainboard, and make sure none of them look bent.
-
Don't plug the Battery connector in if pins look bent, as that will bend them even further. Reach out to Framework Support for guidance.
-
If you feel resistance when plugging in the Battery connector, stop, slide the connector back out, and make sure that no pins are being bent.
-
-
-
Carefully slide the Battery connector back into the mainboard, gripping both edges of the connector and sliding in straight without letting the connector twist or bend.
-
At this point, plug the Power Adapter back into the laptop and let it charge for five minutes. The LEDs on the sides of the Mainboard should blink red when the Power Adapter is plugged in.
-
If the LEDs did not blink red, with the Power Adapter still plugged in the the laptop, follow the earlier instructions to unplug the main Battery and plug it back in. After this, the LEDs should start blinking, confirming power. If not, please reach out to Framework support.
-
After five minutes, you can disconnect the Power Adapter and reassemble the laptop.
-
After reassembling the laptop, keep it plugged into power for 24 hours to let the RTC Coin Cell fully recharge.
-
-
-
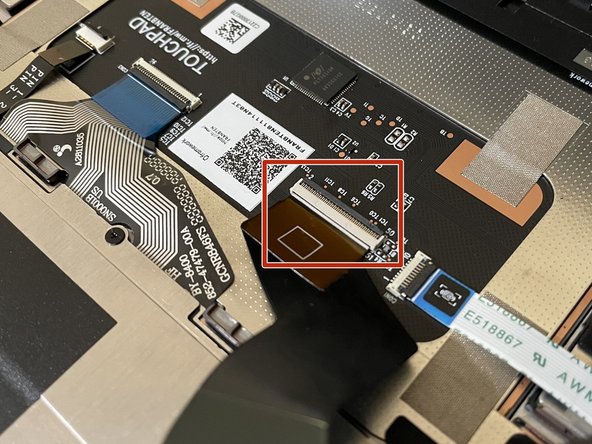
Before closing up the laptop, make sure that the Touchpad end of the Touchpad Cable is fully seated in the receptacle.
-
The cable should be inserted far enough that the white line almost touches the receptacle.
-
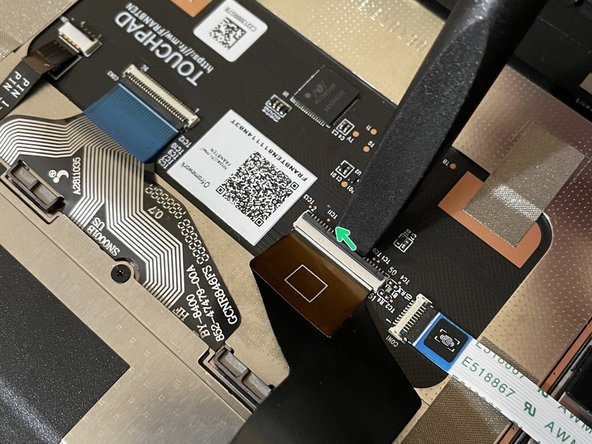
If it is not inserted far enough, you'll need to flip up the black latch on the other side of the connector, slide the cable in further, and then close the black latch again.
-
-
-
Flip the Input Cover over the Bottom Cover so that the keyboard is facing up and attach it to the Bottom Cover by aligning the top and bottom edges of both covers.
-
The covers are magnetic and should fit into one another easily. If you feel any resistance simply lift the Input Cover up and try again.
-
-
-
Close the Framework Laptop and turn it upside down to reveal fasteners on the Bottom Cover.
-
Using the T5 bit in the Framework Screwdriver, screw all 5 fasteners back in.
-
Be sure to not over-tighten the fasteners.
-
-
-
Plug your Power Adapter back in and let the laptop charge for 24 hours. You can use your laptop during this time, but keep it plugged in to let the RTC Coin Cell fully recharge.
-


If you run into any issues during this process, please reach out to the Framework Support team. We’re here to help.
And again, if you're on a Framework Laptop 13 (11th Gen Intel® Core™) and have needed to reset your Mainboard more than once, it may be that your RTC battery has reached the end of its cycle life and is no longer holding a full charge. You can reach out to Framework Support to request a free replacement RTC battery or if you have expertise with soldering, an RTC Battery Substitute module that removes the need for an RTC battery. To make the request process go smoothly, enter the email address that you ordered the 11th Gen product on and/or include photos of the system and Mainboard serial numbers.
Cancel: I did not complete this guide.
37 other people completed this guide.
21 Comments
Hi, for anyone testing this board - make sure to have the board in a home-server case (https://frame.work/de/de/products/framew...) or in a laptop chassis. The reason is that there is a micro switch called SW3 which needs to be depressed, or the system won't boot. You only need a USB-C power source, the motherboard and one RAM module and the system should NOT then constantly blink the two red LEDs. It will then continue through the POST process, until you add a SSD, OS etc.
Thanks a bunch, this worked like a charm after I thought my original charging cable failed. Will have to see how long the RTC battery is stable, I'll try and keep it plugged in for longer periods.
Andrew H Burdick - Open Reply
It appears my 2nd RTC cell is going on me. I got a new one not very long ago, from Framework, and have had the same issue again. I could not get it to reboot at all unless I left the A/C plugged in when replacing everything (very cautious not to touch any other trace or wires) or the board won't charge once the RTC cell is back in.
I performed all these steps and the time is not staying correct just 2 weeks later... I hate this pos laptop totally "fixable" garbage sure...
Andrew Hansen - Resolved on Release Reply
I cant seem to make a framework laptop 13 AMD DIY edition reset its bios password using this guide. this guide, the LED colors blinking etc. is not exactly matching the behavior on the AMD edition of framework. what am I doing wrong here? any update or more precise information for more framework laptop models etc? thanks.