
Introduction
How exciting, you got your hands on a Framework Laptop 13 DIY Edition! This guide will walk you through each step from unboxing to powering on your laptop so you can start using it right away. As with all of our guides, make sure you read the directions in each step and view each image first.
After finishing the Quick Start Guide, if you’re installing Windows, check out our Windows 11 Installation Guide and don’t forget to install the Framework Laptop Driver Bundle. You can also check out our Linux compatibility page for the distros that work great on the Framework Laptop.
If you have questions or run into any issues, check out the Support pages.
Note: If you have a 13th Gen Intel Core system, you should follow this newer guide, and if you have an AMD Ryzen 7040 Series system, you should follow this guide.
Tools
Parts
No parts specified.
-
-
Unbox your Framework Laptop. Don't power it on just yet, since you'll need to install some modules first.
-
-
-
Locate the Framework Screwdriver in the package underneath the Framework Laptop and keep it handy - it's the only tool you'll need to assemble the Framework Laptop DIY Edition.
-
-
-
Depending on how you customized the configuration, your package may include a combination of memory, storage, a WiFi card, and a mix of Expansion Cards. You can find all of your modules in the accessory box or bag in your shipment.
-
Unpack all of these modules so that you are ready for your install!
-
-
-
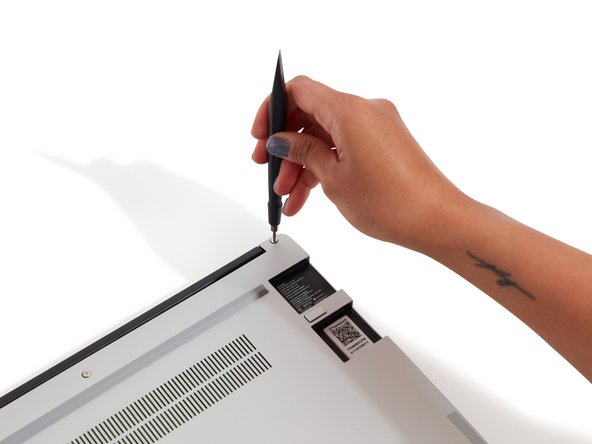
The fastener on the bottom left (circled in orange) won't unscrew as far as the others, as it is acting as a lifter for the Input Cover. You'll hear it start clicking as you rotate when it is unscrewed far enough.
-
Using the T5 bit in the Framework Screwdriver, unscrew the 5 fasteners on the Bottom Cover. These fasteners will remain attached in the Bottom Cover so that you don't lose them.
-
Turn the Framework Laptop over and open it to 120 degrees.
-
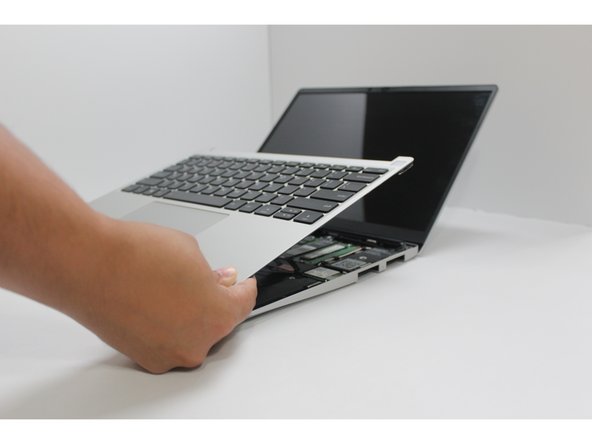
Important: Do not pull off the Input Cover too fast as it is still attached to the Mainboard by the Touchpad Cable.
-
You don't need to disconnect the Touchpad Cable to do most repairs. You can just flip the Input Cover over. If you do want to disconnect it though, make sure to disconnect the Mainboard side using the finger loop over the orange label, while keeping the Touchpad side connected.
-
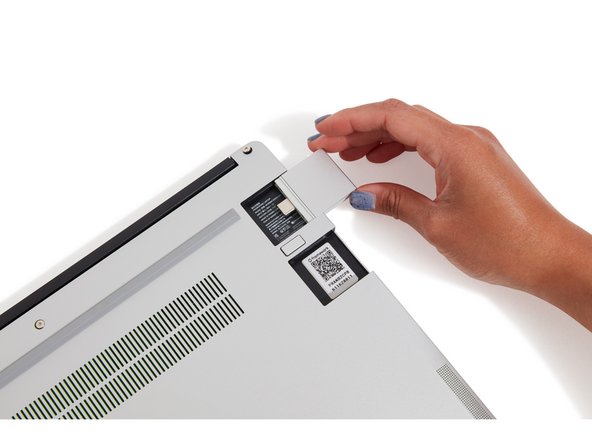
The bottom right corner of the Input Cover lifts up when the five fasteners are properly unscrewed. You should not have to use excessive force to remove the Input Cover.
-
Carefully lift the Input Cover up from the bottom right corner. If you need to, you can use the spudger end of the Framework Screwdriver to lift it as well. Lift the Input Cover off the Mainboard and flip it over (keyboard side down) and place it about halfway on the Bottom Cover.
-
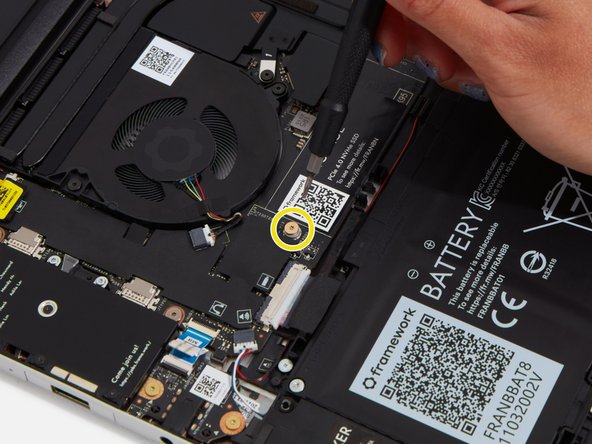
You should keep the Battery connector plugged in unless you need to replace the Battery, Mainboard, or Speakers. This connector is easy to accidentally damage, so it's better to not handle it.
-
-
-
Get ready to install the Storage module by removing the fastener for it from the Mainboard using the T5 bit in your Framework Screwdriver.
-
Align the notch on the Storage module with the notch on the socket and slide the module into the Mainboard at a 20 degree angle.
-
Using one finger, gently hold the Storage module down to the Mainboard and use your other hand to screw in the fastener using the T5 bit in the Framework Screwdriver.
-
Be sure to not over-tighten the fastener.
-
-
-
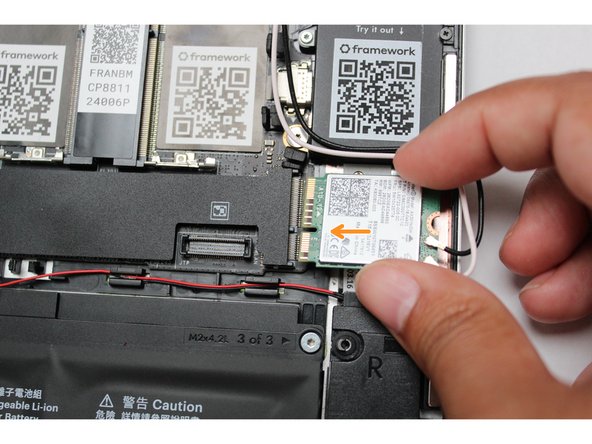
Insert the Memory module into the Mainboard at around a 25 degree angle, aligning the notch on the Memory module with the notch on the socket.
-
Once the module is fully inserted, it will sit at a 25 degree angle. Gently press it down towards the Mainboard until the clips located at the top and bottom of the receptacle snap into place (see the red arrows in the second image).
-
If you are using one Memory module, place it in the right socket that is labelled “Channel 0."
-
The first boot after installing a new Memory module will take longer than normal, as the system prepares itself for the new module.
-
-
-
If your WiFi module came pre-installed, lucky you! You can skip over the WiFi steps, but don't forget to install the Driver Bundle when you're done setting up.
-
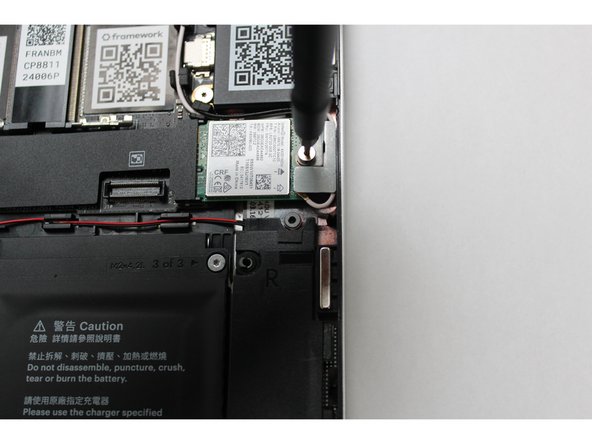
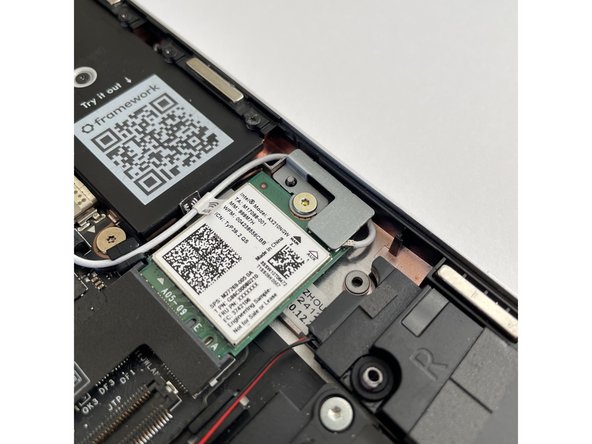
Unscrew the fastener using the T5 bit in your Framework Screwdriver, and remove and save the silver-colored WiFi Bracket that is holding down the cables.
-
Remove the clear plastic covers from the antenna cables, and carefully connect the black and white WiFi antenna cables into their respective sockets on the module. Make sure to align them well before applying force to click them into place, as the connectors are small and fragile.
-
If you need a video overview on this, check this out.
-
Once both the black and white WiFi Antenna cables are connected to the module, make sure they are rotated downwards as indicated in the second picture with the blue arrows.
-
While keeping a finger on top of the antennas to hold them in place, insert the WiFi module into the socket on the Mainboard.
-
-
-
Once the module is properly inserted into the Mainboard, carefully route both the black and white WiFi Antenna cables into the black rubber holders as indicated in the first image. Route both of the cables through the channel located near the top right of the WiFi module as well.
-
It's ok for the metal parts of the antenna cables to touch each other and touch the WiFi Bracket. These are all part of a common ground path.
-
The antenna cables should not touch the Speaker located below. Use the spudger end of the Framework Screwdriver to carefully push the white cable away from the Speaker if it is touching it.
-
Place the WiFi Bracket over the WiFi module, matching the orientation that is shown in the image, and place the fastener in the hole. Using the T5 bit in the Framework Screwdriver, screw the fastener into place.
-
Be sure to not over-tighten the fastener.
-
Don't forget to install the Driver Bundle at the end if you're using Windows! WiFi may not work until you do that.
-
-
-
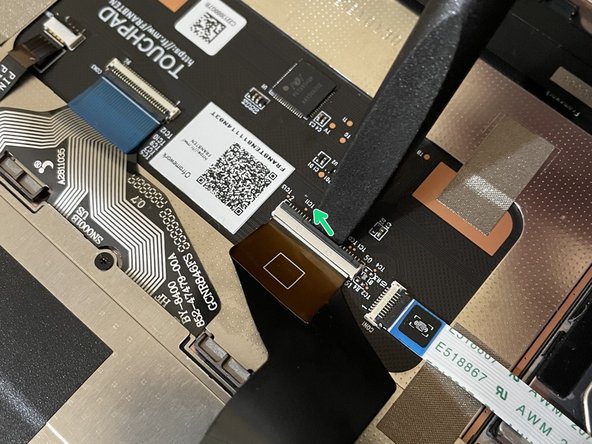
Before closing up the laptop, make sure that the Touchpad end of the Touchpad Cable is fully seated in the receptacle on the underside of the Touchpad.
-
If your Framework Laptop came with an envelope with instructions around adding tape to the Touchpad Cable, you can follow the Touchpad Cable Fix Guide now to add the tape to keep the cable in place.
-
If your Touchpad Cable already has double sided tape holding it in place on the Touchpad, you're all set!
-
The cable should be inserted far enough that the white line almost touches the receptacle.
-
If it is not inserted far enough, you'll need to flip up the black latch on the other side of the connector, slide the cable in further, and then close the black latch again.
-
-
-
Flip the Input Cover over the Bottom Cover so that the keyboard is facing up and attach it to the Bottom Cover by aligning the top and bottom edges of both covers.
-
The covers are magnetic and should fit into one another easily. If you feel any resistance simply lift the Input Cover up and try again.
-
-
-
Close the Framework Laptop and turn it upside down to reveal the empty Expansion Card bays and fasteners on the Bottom Cover.
-
Using the T5 bit in the Framework Screwdriver, screw all 5 fasteners back in.
-
Be sure to not over-tighten the fasteners.
-
-
-
Insert the Expansion Cards of your choice into any of the empty bays.
-
The text, logo, and QR code on the Expansion Card must be facing down (facing the laptop). Slide the Expansion card into the bay. Using two or more fingers push the card until into the bay until it clicks.
-
You will have to use a slight amount of force to ensure proper installation of the Expansion Cards.
-
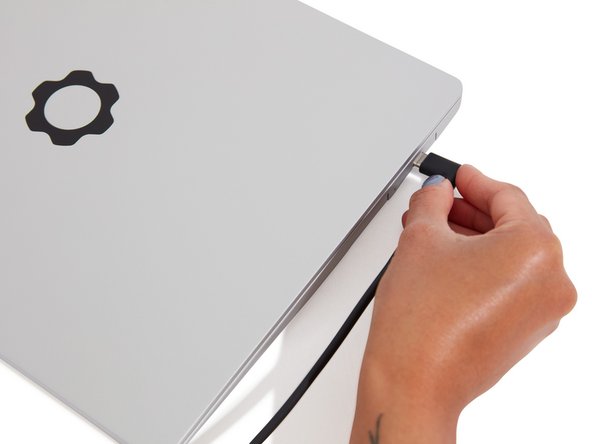
Plug your power cable into the USB-C Expansion Card.
-
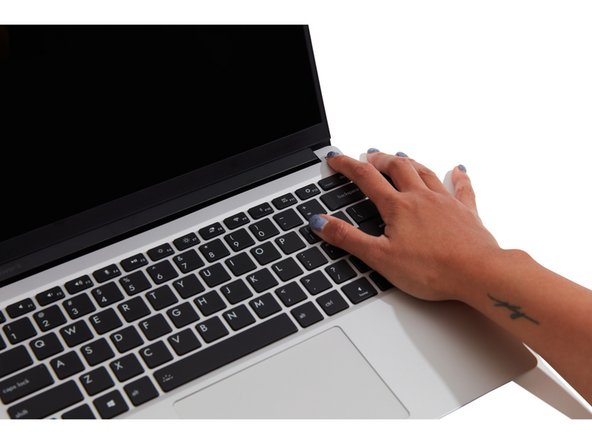
Open the lid on your Framework Laptop and press the power button.
-
Note that your first boot will take a while before the logo comes up on screen as the system does memory training. The more memory you've installed, the longer this could take (on the order of a minute or two with 64GB!)
-
-
-
Find the instructions for installing Windows 11 here.
-
Don't forget to install the Driver Bundle!
-
The Framework Laptop is designed to work great with Linux too. Check out our Linux compatibility page for distros we recommend, like:
-
Fedora 38 - Essentially fully functional out of the box.
-
Ubuntu 22.04 - Essentially fully functional out of the box.
-
On both Windows and Linux, we recommend updating to the latest BIOS available to make sure the laptop is running at optimal performance and stability.
-


- To purchase a Framework Laptop visit the Framework website
- Want to learn more about the Framework Laptop? Take a look at our blog
- If you have any questions or concerns, feel free to reach out to Framework Support
- To purchase a Framework Laptop visit the Framework website
- Want to learn more about the Framework Laptop? Take a look at our blog
- If you have any questions or concerns, feel free to reach out to Framework Support
Cancel: I did not complete this guide.
115 other people completed this guide.
26 Comments
In reference to my earlier comment, I think this is the resource I was looking for. Could I humbly encourage Framework to consider adding a link to this Quick Start guide?
David Mathias - Resolved on Release Reply
While links to driver bundles and BIOS are helpful, I was hoping there would also be a link to a walkthrough of the BIOS features, settings and recommendations for configuration - perhaps for Win and non-Win operating systems. I presume I'll need to dig around in Support or Community now for this information. My DIY seconds laptop shows up this morning, and I wanted to have a clear sense of the entire configuration process in advance of assembly.
David Mathias - Resolved on Release Reply
Thank you. This was helpful and concise.Great guide Nirav.
Reuben Thigpen - Resolved on Release Reply
One thing that was not clear, for the 13" Ryzen 7k, there is a large black sticker covering both memory slots. The form factor leads you to install the memory correctly but also leave the sticker. The sticker is a bit thicker, not sure if it has heat shielding on it or is intended to be left in (or removed?).
Dwayne Negron - Resolved on Release Reply
Can anyone tell us about the weight of this diy laptops?
Albert einstein - Resolved on Release Reply