Introduction
In case you ever mix up or lose the fasteners in your Framework Laptop, this guide goes over the different sizes and types used. All of the fasteners we use have either a T5 or PH0 head, making the Framework Screwdriver the only tool you need for them. Unless otherwise noted, all of the fasteners use ISO standard thread pitches and shaft diameters.
There are also five spare fasteners screwed into the inside of the bottom cover of the Framework Laptop for some of the more common ones.
Tools
Parts
No parts specified.
-
-
In the first image, marked with pink markers, we have the gold colored fastener that is used for WiFi, Storage, and the Audio Board. This is an M2 3.0mm fastener with a T5 head which is 4.5mm in diameter and 0.7mm thick. The right-most fastener in the top three spares above the Mainboard is an extra of these.
-
In the second image, marked with yellow markers, we have the gray colored fastener that is used for the Mainboard. This is an M1.6 1.5mm fastener with a T5 head which is 5.5mm in diameter and 0.6mm thick. The left-most fastener in the top three spares above the Mainboard is an extra of these. These are also used for the Webcam.
-
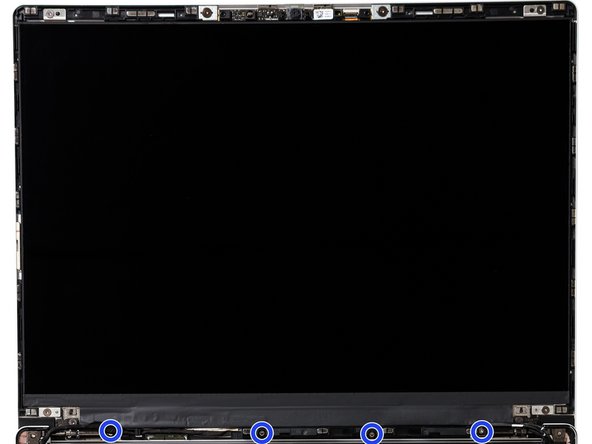
In the third image, marked with blue markers, we have the silver colored fastener that is used for the Hinges where they attach to the Bottom Cover. This is an M2 4.0mm fastener with a T5 head which is 4.6mm in diameter and 0.6mm thick. The middle fastener in the top three spares above the Mainboard is an extra of these.
-
The five fasteners that attach the Bottom Cover to the Input Cover are captive (meaning they don't come out), but in case you somehow pulled out and lost one, they are M2 5.75mm with a T5 head which 4.6mm diameter and 0.8mm thick.
-
-
-
In the first image, marked with pink markers, we have the silver colored fastener that is used for the Fingerprint Reader Bracket. This is an M1.4 3.5mm fastener with a T5 head which is 3.0mm in diameter and 0.6mm thick. These are also used as part of the Expansion Card bracket in the Bottom Cover.
-
In the second image, marked with yellow markers, we have the gray colored fastener that is used for the Fingerprint Reader, Touchpad, and Touchpad Bracket. This is an M1.4 1.8mm fastener with a PH0 head which is 4.0mm diameter and 0.4mm thick.
-
-
-
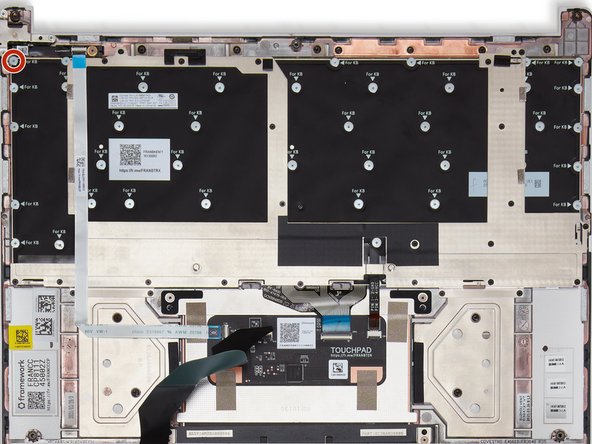
These are the fun ones (for some definitions of fun). The 48 silver fasteners that hold the keyboard in (one is circled in red in the first image) are M1.2 1mm with a PH0 head which is 4.4mm in diameter and 0.25mm thick. There is a spare in the Bottom Cover to the lower left of the battery connector.
-
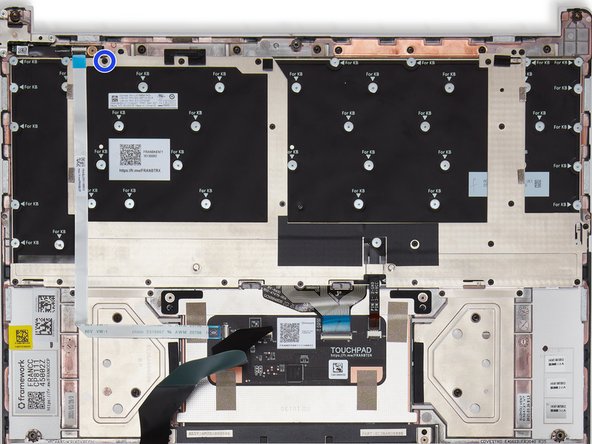
The 25 black fasteners (one is circled in blue in the second image) hold the Keyboard Bracket. These are M1.2 1.3mm with a PH0 head which is 3.2mm in diameter and 0.3mm thick. There is a spare in the Bottom Cover to the lower left of the battery connector. These are also used for the Expansion Card brackets in the Bottom Cover.
-
-
-
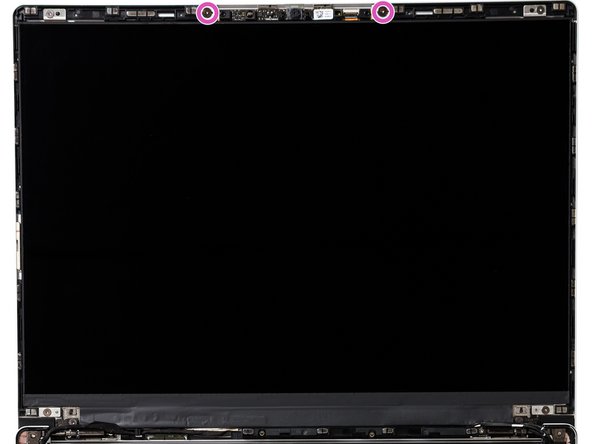
In the first image, marked with pink markers, we have the gray colored fastener that is used for the Webcam Module. This is an M1.6 1.5mm fastener with a T5 head which is 5.5mm in diameter and 0.6mm thick. These are also used for the Mainboard, and so there is a spare in the Bottom Cover (the left-most of the top three fasteners).
-
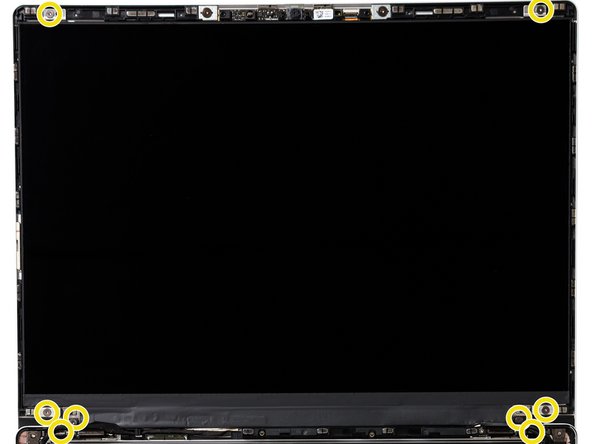
In the second image, marked with yellow markers, we have the gray colored fastener that is used for the Display and for the Hinges where they attach to the Top Cover. This is an M2 2.0mm fastener with a T5 head which is 4.5mm in diameter and 0.5mm thick.
-
In the third image, marked with blue markers, we have the silver colored fastener that is used for the Antenna Module and for the Hinges where they attach to the Top Cover. This is an M1.6 3.0mm fastener with a T5 head which is 3.0mm in diameter and 0.65mm thick.
-
-
-
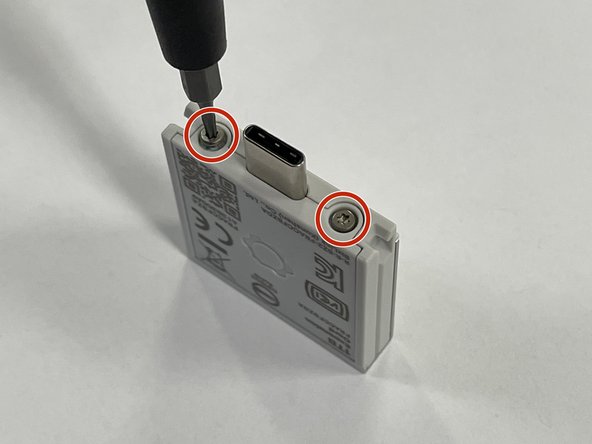
You'll probably never need to open an Expansion Card, but if you do and one of the tiny fasteners goes "poof!", here are the specs. In the first image, marked in red, there are two silver M1.2 3.0mm fasteners with a 2.9mm T5 head.
-
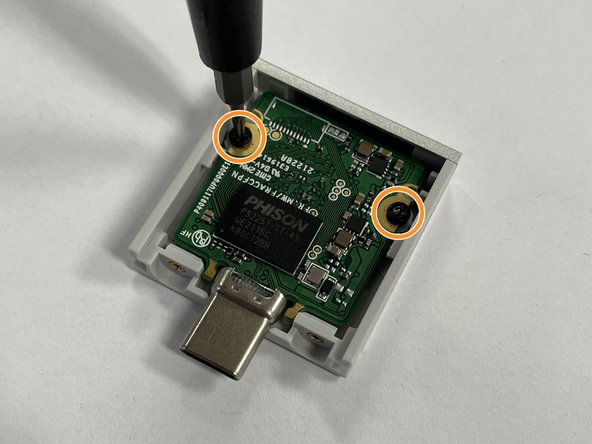
In the second image, marked in orange, are the two black M1.6 3.0mm fasteners with a 3.0mm T5 head.
-
If you ever find that you’ve lost the fastener you need and it isn’t one of the five spares that are included in the Framework Laptop, reach out to our Support team and we’ll do what we can to help you.
If you ever find that you’ve lost the fastener you need and it isn’t one of the five spares that are included in the Framework Laptop, reach out to our Support team and we’ll do what we can to help you.
Cancel: I did not complete this guide.
2 other people completed this guide.
16 Comments
I have partially stripped one of the screws on the bottom cover of the framework 13. I was wondering what were the specifications for the screw as well as the washer that holds it captive and are there any recommended sellers for the EU?
Maxime Muller - Open Reply
"There are also five spare fasteners screwed into the inside of the bottom cover of the Framework Laptop for some of the more common ones."
By my count, there's only 3 spare fasteners? where are the other 2?
Mike Bridge - Resolved on Release Reply
Big +1 to the requests for fastener kits... there are numerous reports across the Guides, Community, and Reddit without a proper solution. Framework have provided neither a kit in the Marketplace nor a link to an external supplier (which they have in other cases, e.g. recommended thermal pads from Digi-Key to address the throttling issues with storage expansion modules). This has a significant impact to long-term repairability of these devices (accidents happen, even in an appropriate environment technicians strip screw head and drop tiny components from time to time).
It's a bit bold of me as an outsider to make this statement, but I find the decision to use virtually unsourceable fasteners highly questionable in light of the goal of end-user repairability (I realize a decision to go with different fasteners is in tension with a compact laptop as well as the one-tool DIY experience, but it has led to a situation that isn't reasonable for end users to solve by themselves).
Vince Cali - Resolved on Release Reply
Inevitably, right after posting this I see one of the Community threads received an update today from a Framework team member :) (the reply: https://community.frame.work/t/has-anyon...)


