Introduction
The magnetic Framework Bezel is one of the easiest components to swap. No tools needed, just align it to the Display and you are all set. We plan on having more color options as we go so that you can further customize your very own Framework Laptop.
Tools
No tools specified.
Parts
-
-
Open the Framework Laptop 180 degrees to remove the Bezel.
-
The Framework Bezel is attached by magnets so you will not require any tools to remove it. Just use your fingernail and pry the Bezel away from the display from one of the top corners of the Framework Laptop.
-
Once the Bezel starts peeling off towards the bottom of the Display, lift it up using caution. You might feel a little resistance due to the adhesive at the bottom of the display.
-
-
-
If installing a new Bezel, remove the liner pieces on the bottom of the Bezel to expose the adhesive (if present).
-
-
-
Open the Framework Laptop 180 degrees to attach the Bezel.
-
Starting with the bottom of the Bezel which covers the hinges and cables, align the corners of the Bezel to the display and place it down. The Bezel is attached by magnets and should easily click into place.
-
We recommend feeling along each edge of the Bezel to make sure it is seated correctly before proceeding, if it doesn't seem to be sitting flush, lift it back up and try lowering it into place again.
-
Do not try to install the Bezel without first opening the Laptop fully, doing so could damage the Bezel and potentially the Display.
-
If the bottom of the Bezel doesn't seem to fit, lift it back off and check that the cables are seated correctly on both sides. If the Bezel doesn't seem to fit at all, please contact support and do not force it into place.
-
- To purchase a Framework Laptop visit the Framework website
- Want to learn more about the Framework Laptop? Take a look at our blog
- If you have any questions or concerns, feel free to reach out to Framework Support
- To purchase a Framework Laptop visit the Framework website
- Want to learn more about the Framework Laptop? Take a look at our blog
- If you have any questions or concerns, feel free to reach out to Framework Support
Cancel: I did not complete this guide.
22 other people completed this guide.
7 Comments
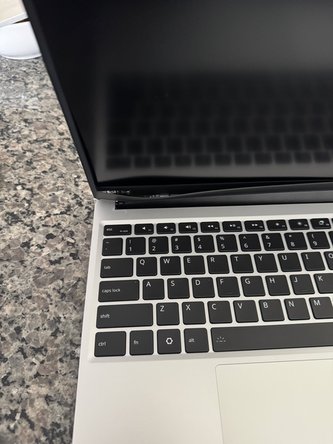
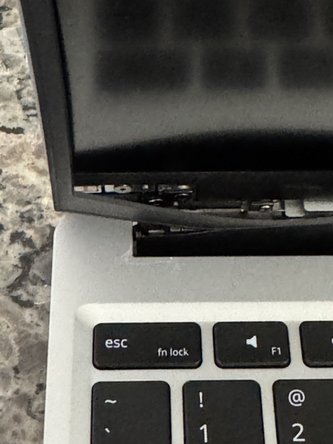
I was installing my Bezel for the first time w/ the DIY kit. The magnets snapped on quite easily and It looked like it was secure to my eye, and the 4 second video in this guide matched my experience. However when I closed the laptop and opened it for the first time, the bottom left side caught, breaking the bezel. I'm ordering a replacement, but I'm curious if anyone has another guide/tips for verifying that the Bezel is properly secured before closing and opening so I don't make this same mistake again.


So I got my new bezel in and was able to replace it with no issues. The other comment from Fred Eisele was helpful, it turns out the display cable was not in it's channel routing properly. See the link they provided for an image:
Make sure the cable is routed on the proper side of the hinge as shown in Display Replacement Guide
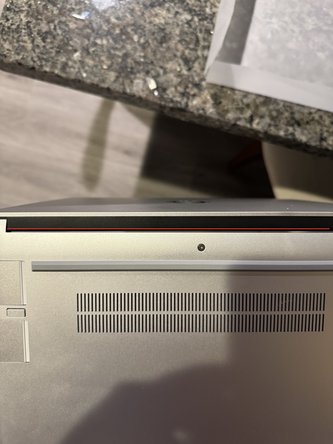
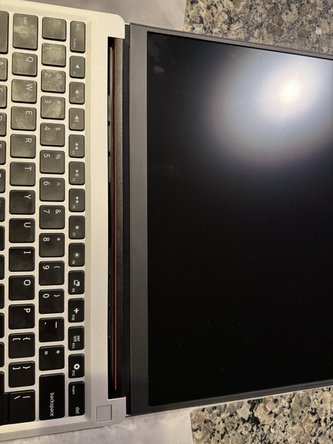
The other thing I did was ensure that the bottom edge of the bezel (along red line) looked straight while the laptop was still open to 180 degrees. Then I folded it to 90 degrees and checked the back side to ensure the bezel was still straight. I had to press it in a bit more here. Then closed and re-opened successfully!


Mikael -
I had some issues with the routing of the cable around the hinges. Could you provide some images of proper routing of the cable?
Fred Eisele - Resolved on Release Reply
This one caused more problems/annoyance for me, than initially expected. It becomes very easy however, after you get the hang of it.
1. The captive screws stick out when the top cover is removed, interfering with opening the display 180 degrees. It's best to open the device 180 degrees, whilst holding it bottom up in the air. This way the captive screws fall inside their holes, and don't interfere with the hinges anymore.
2. My display back-light didn't work, initially. Got it to work by gently pressing the on-screen side display connection, hidden under the bezel. So not the connector on the mother-board, but the other side of the cable where it connects to the screen. I'm a bit wary about this, but will see how long it lasts. So it's best to test if everything works, before installing the bezel!
3. Be careful when opening and closing the lid the first couple of times, the bezel could bend and break at the bottom of the screen if it isn't installed correctly.

