
Introduction
The Framework Laptop supports M.2 2230 WiFi modules. We recommend using one of the modules listed in the Knowledge Base. After installing your new module, make sure to install the necessary drivers. If you’re using the AX210 WiFi module that Framework offers with Windows, you’ll need to install the Framework Laptop Driver Bundle (11th Gen Intel Core or 12th Gen Intel Core).
Tools
Parts
-
-
Power off the Framework Laptop by navigating to the Windows icon on the bottom left and clicking on "Power" followed by "Shut down," or if on Linux, the equivalent action there.
-
-
-
Unplug your power cable from the USB-C Expansion Card in your Framework Laptop.
-
-
-
Close the lid on your Framework Laptop and place it upside down on a soft, non-marring surface, such as the bag that it shipped in.
-
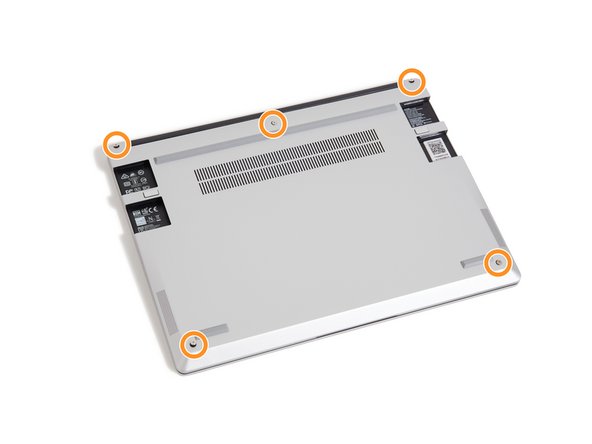
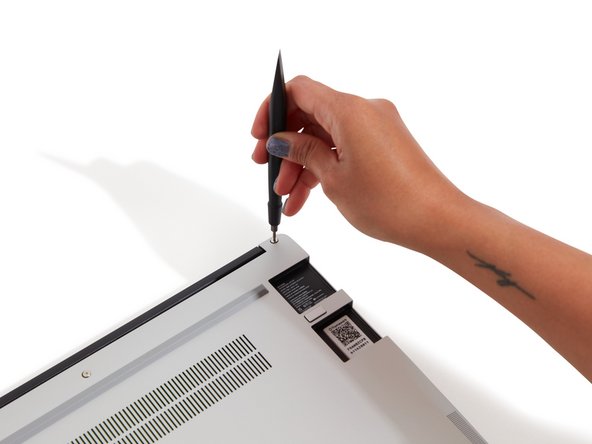
Using the T5 bit in the Framework Screwdriver, unscrew the 5 fasteners on the Bottom Cover. These fasteners will remain attached in the Bottom Cover so that you do not lose them.
-
The fastener on the bottom left (circled in red) will not unscrew as far as the others, as it is acting as a lifter for the Input Cover.
-
You'll hear this fastener start clicking as you rotate when it is unscrewed far enough.
-
Do not use a powered tool for these steps, as this will likely result in damage to the fasteners.
-
-
-
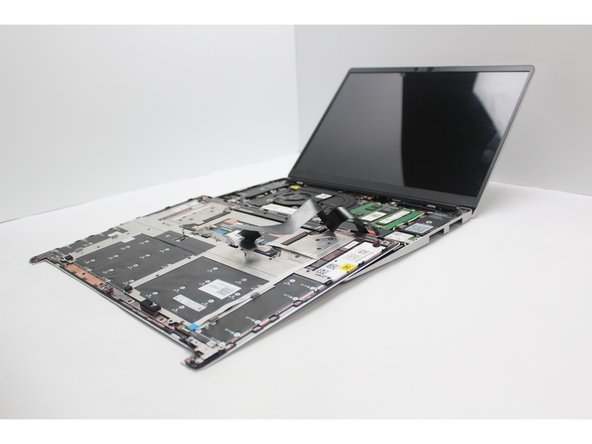
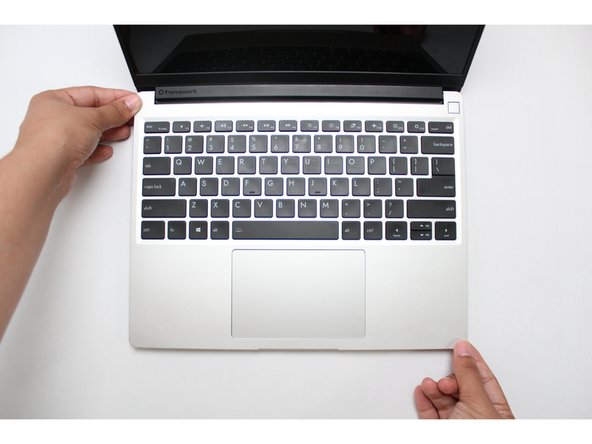
Flip the Framework Laptop back over and open the lid to around 120 degrees.
-
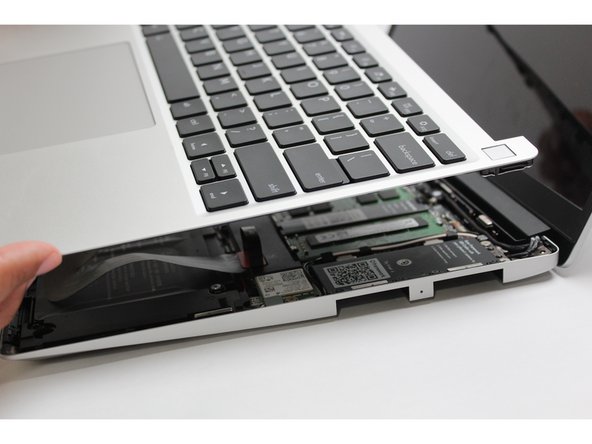
Important: Pull the Input Cover off carefully as it is still attached to the Mainboard via the Touchpad Cable. You don't need to disconnect this cable to do most repairs. You can just flip the Input Cover over. If you do want to disconnect it though, make sure to disconnect the Mainboard side using the finger loop over the orange label.
-
The bottom right corner of the Input Cover lifts up when the five fasteners are properly unscrewed from the previous step. You should not have to use any excessive force to remove the Input Cover.
-
Carefully lift the cover up from the bottom right corner. If you need to, you can use the spudger end of the Framework Screwdriver to lift it as well. Lift the Input Cover off the Mainboard, flip it over (keyboard side down), and place it about halfway on the Bottom Cover.
-
Be sure not to put too much force on the Touchpad Cable when doing this.
-
If the LEDs on the left and right sides of the system are flashing red when you lift off the cover, it means the system is still powered on. Make sure your power cable isn't plugged in and that you have shut down correctly.
-
Note that it may take up to 30 seconds after shutting down for the system to fully power off. Wait until the LEDs stop flashing before proceeding.
-
You should keep the Battery connector plugged in unless you need to replace the Battery, Mainboard, or Speakers. This connector is easy to accidentally damage, so it's better to not handle it.
-
-
-
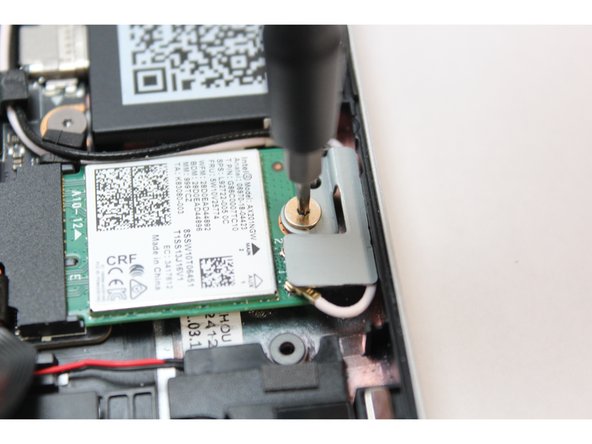
Using the T5 bit in the Framework Screwdriver, unscrew the fastener on the WiFi module.
-
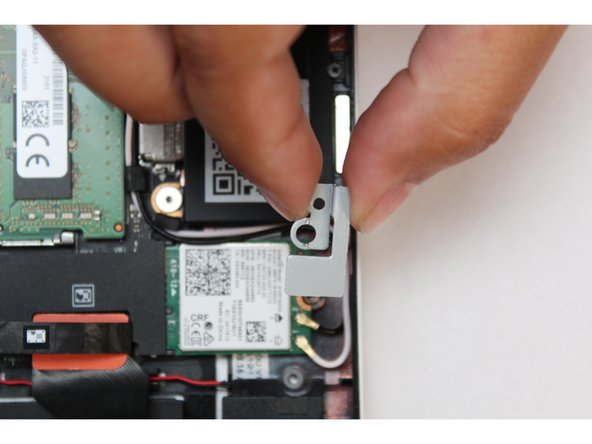
Remove the fastener and gently lift off the WiFi Bracket.
-
-
-
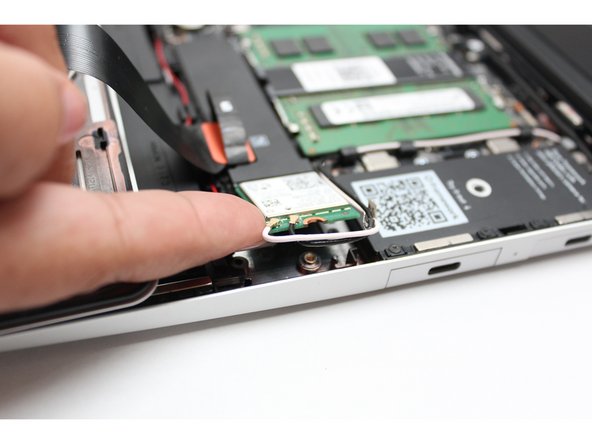
Using your fingers gently pull the WiFi module out of the socket.
-
Tip: You may have to lift it up using one finger to properly be able to grip it to fully remove it from the socket.
-
-
-
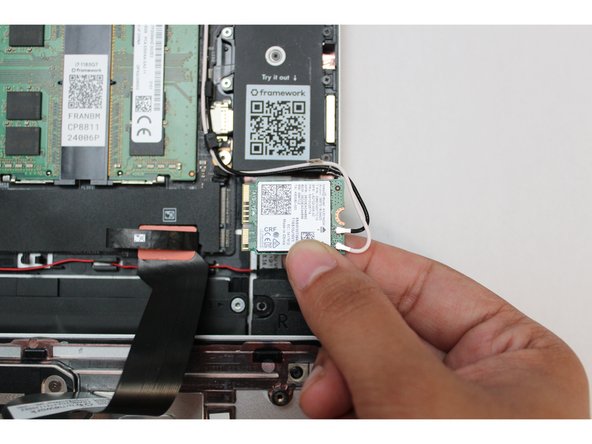
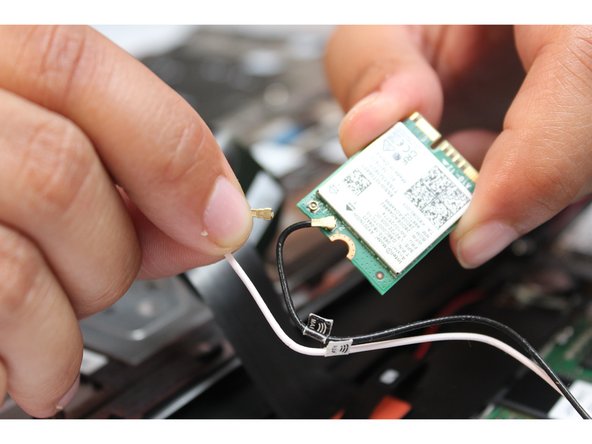
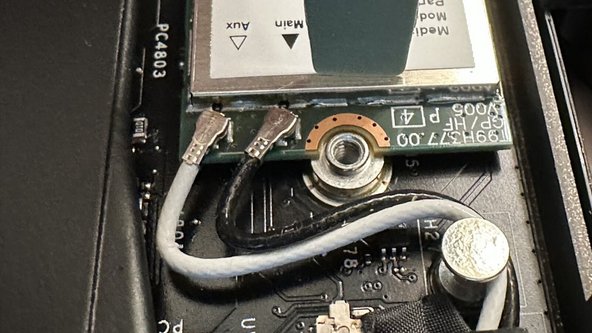
Carefully grip the white antenna cable and using a slight amount of force pull it off the module.
-
Repeat for the black antenna.
-
-
-
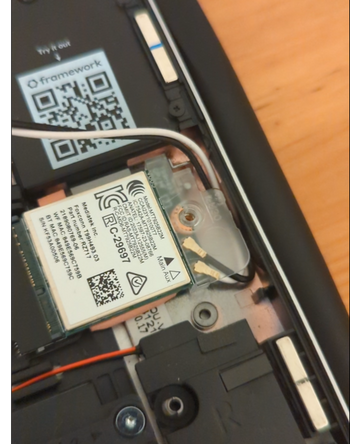
Connect the black and white WiFi Antennas into their respective sockets on the module. You can see a little triangular indicator on the module's label pointing out which color goes where. Make sure to align them well before applying force to click them into place, as the connectors are small and fragile.
-
If you need a video overview on this, check this out.
-
Once both the black and white WiFi Antenna cables are connected to the module, make sure they are rotated downwards as indicated in the second picture with the blue arrows.
-
While keeping a finger on top of the antennas to hold them in place, insert the WiFi module into the socket on the Mainboard.
-
-
-
Once the module is properly inserted into the Mainboard, carefully route both the black and white WiFi Antenna cables into the black rubber routers as indicated in the first image. Place both the cables behind the metal structure located near the top right of the WiFi module as well.
-
The antenna cables should not touch the Speaker located below. Use the spudger end of the Framework Screwdriver to carefully push the white cable away from the Speaker if it is touching it.
-
Place the WiFi Bracket over the WiFi module and place the fastener in the hole. Using the T5 bit in the Framework Screwdriver, screw the fastener into place.
-
Be sure to not over-tighten the fastener.
-
-
-
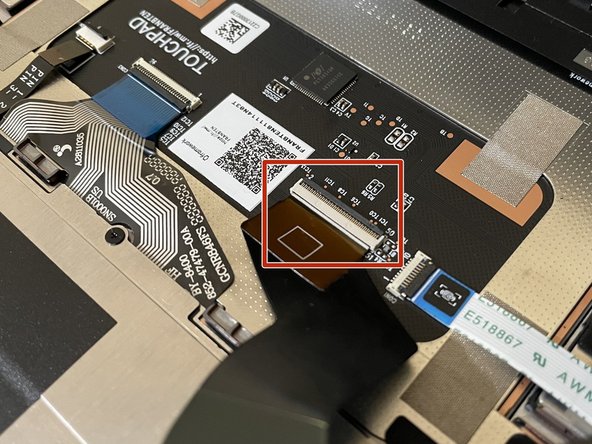
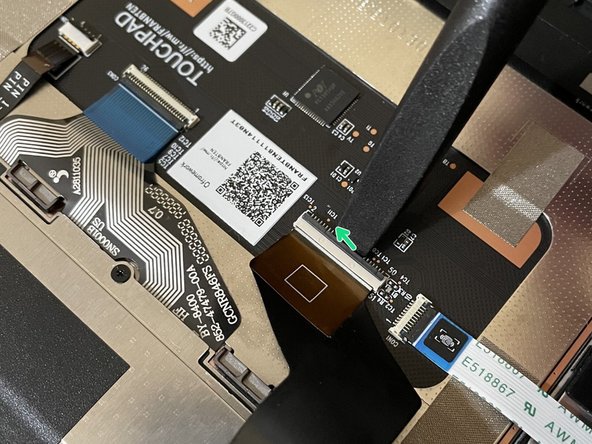
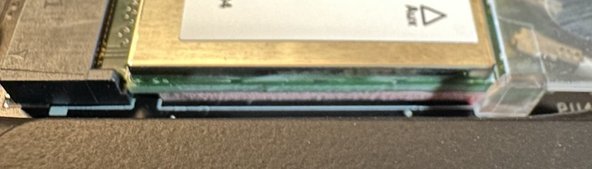
Before closing up the laptop, make sure that the Touchpad end of the Touchpad Cable is fully seated in the receptacle.
-
The cable should be inserted far enough that the white line almost touches the receptacle.
-
If it is not inserted far enough, you'll need to flip up the black latch on the other side of the connector, slide the cable in further, and then close the black latch again.
-
-
-
Flip the Input Cover over the Bottom Cover so that the keyboard is facing up and attach it to the Bottom Cover by aligning the top and bottom edges of both covers.
-
Tip: The covers are magnetic and should fit into one another easily. If you feel any resistance simply lift the Input Cover up and try again.
-
-
-
Close the Framework Laptop and turn it upside down to reveal the five fasteners on the Bottom Cover.
-
Using the T5 bit in the Framework Screwdriver, screw all 5 fasteners back into the Bottom Cover.
-
Be sure to not over-tighten the fasteners.
-
If you haven't already, make sure to install the Driver Bundle (11th Gen Intel Core or 12th Gen Intel Core) if you're using Windows, as this is needed for AX210 WiFi cards.
-


- To purchase a Framework Laptop visit the Framework website
- Want to learn more about the Framework Laptop? Take a look at our blog
- If you have any questions or concerns, feel free to reach out to Framework Support
- To purchase a Framework Laptop visit the Framework website
- Want to learn more about the Framework Laptop? Take a look at our blog
- If you have any questions or concerns, feel free to reach out to Framework Support
Cancel: I did not complete this guide.
20 other people completed this guide.
6 Comments
Please update this guide to include instructions for the newer, plastic fastener. It took me quite a while to understand how to reattach it. You need to ensure the white and black connectors are angled in such a way as to let you slide the fastener over the end of the WiFi module. The attached picture helped me figure it out.
Kent Richards - Open Reply
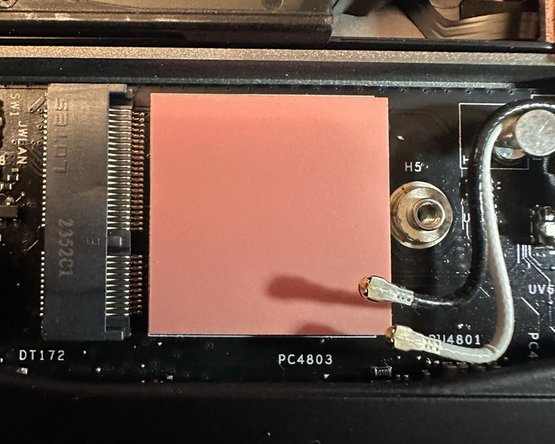
I have the same question, but on a Framework 16. On the Framework Desktop the thermal pad goes underneath the wifi card (see the ifixit guide at the link). I think that seems reasonable as long as there is space. (https://www.ifixit.com/Guide/Framework+D...).
There is space under the original wifi card. Placing the thermal pad under the wifi card remains a reasonable choice.
With the wifi card removed, align the thermal pad in the square with the plastic side up. After removing the plastic, I was still able to position the thermal pad.
From the shape of Framework 13 wifi thermal pad, it must fit with a specific orientation.
Install the new Wifi7 card.
my laptop wifi module wire came out and its long to join it again. Somehow I managed to joined using other spare wire. But now wifi range is not good and feels too slow. Please provide an answer as soon u see this. Thank You
edit: if there is any extender type of thing please let me know