Introduction
Once you have your Framework Laptop 16 set up following the Quick Start Guide, you’re ready to install your preferred OS. Ubuntu 25.10 works fantastically well.
Tools
No tools specified.
Parts
-
-
First, download Ubuntu 25.10 Desktop image from Ubuntu's website. We'll go through the steps in this Guide assuming you have a simple installation scenario of a fresh install on a blank drive.
-
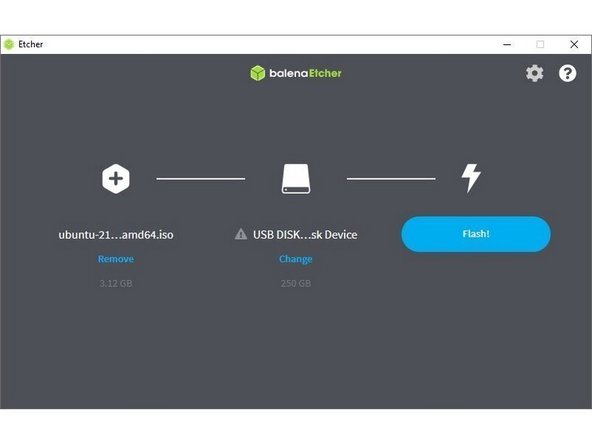
Download balenaEtcher as a tool to create the USB installer from the ISO. balenaEtcher is available for MacOS. Install it.
-
Launch balenaEtcher. Insert your USB drive (8GB or larger). Click on "Flash from file" and select the ubuntu-25.10-desktop-amd64.iso that you downloaded. Click on "Select target" and choose your USB drive. Click "Flash" and wait a minute or two for it to complete.
-
Once the USB drive creation is complete, you can close balenaEtcher and eject the USB drive from your OS.
-
-
-
First, download Ubuntu 25.10 Desktop image from Ubuntu's website. We'll go through the steps in this Guide assuming you have a simple installation scenario of a fresh install on a blank drive.
-
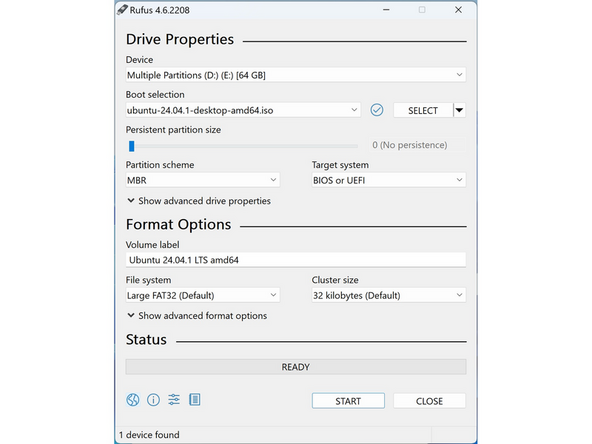
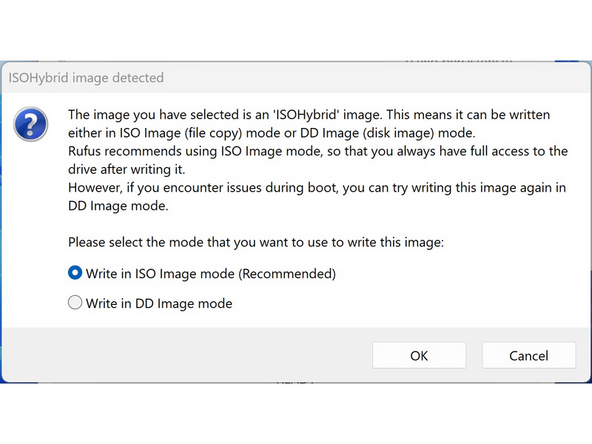
Download Rufus as a tool to create the USB installer from the ISO - select the top download option from the link provided. Rufus is available for Windows. Install it.
-
Launch Rufus. Insert your USB drive (8GB or larger). Click on "Flash from file" and select the ubuntu-25.10-desktop-amd64.iso that you downloaded. Click on "SELECT" and choose your USB drive. Click "START" and wait a minute or two for it to complete.
-
-
-
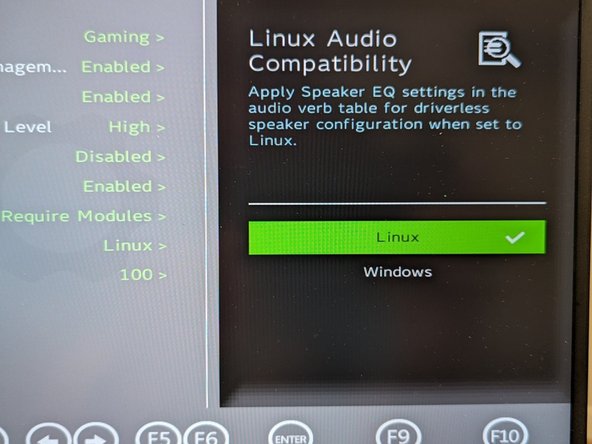
Before we begin the installation process with the Live USB, let's make sure you have your Linux Audio Compatibility set to Linux in the BIOS. Explanation as to what this does can be found here.
-
Power on the laptop, repeatedly tapping F2 in order to get into the BIOS. Note: If you're having trouble with this, try again, holding down the Fn key while rapidly tapping F2.
-
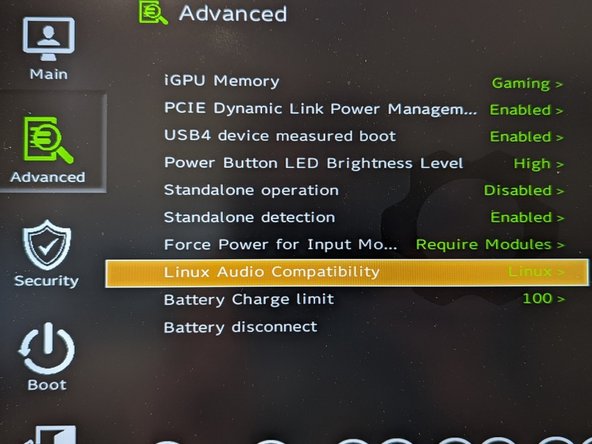
In BIOS mode, arrow key over to Setup Utility. Press the enter key. Arrow down to Advanced. Then arrow right, then arrow down to Linux Audio Compatibility. Press enter.
-
A new box for Linux Audio Compatibility will appear, arrow to Linux, then press enter. Now press F10 key to reboot.
-
Now we don't have an OS installed yet. So the reboot won't get us to a running operating system and we fully expect to see an error to this point. Simply press the power button to shutdown.
-
The next step is to install Ubuntu.
-
-
-
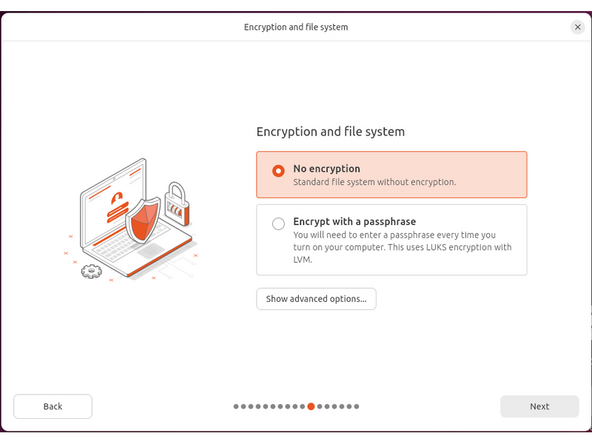
Secure Boot is optional: Enabling secure boot is completely optional and not necessary for normal operation, it's a personal choice - but there are trade offs to be aware of. Follow this link if you wish to enable it before installing Ubuntu. More about secure boot here.
-
If you have decided to disable secure boot. You will do so by booting into the BIOS menu:
-
Power on, then tap F2 rapidly at the Framework splash screen
-
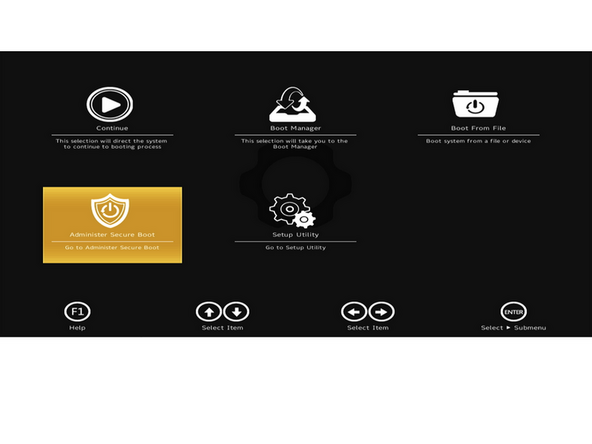
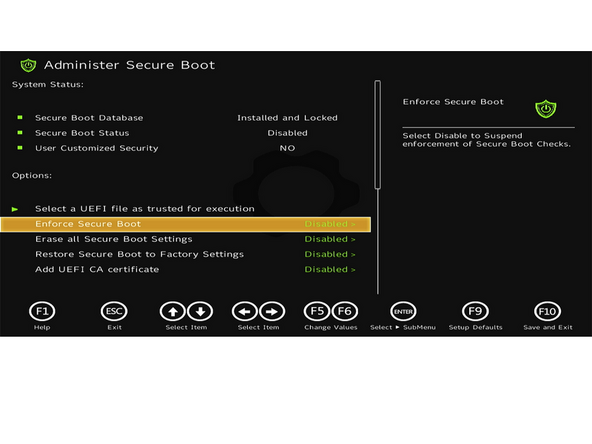
Select Administer Secure Boot tile on the screen. Press enter.
-
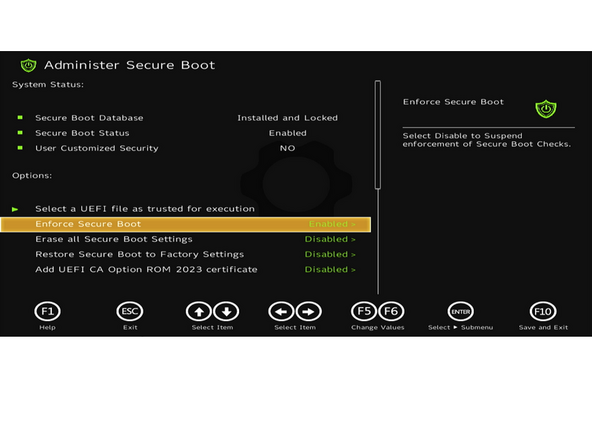
Go to Enforce Secure Boot, it will show as Enabled. Click the enter key, arrow it to Disabled. Press F10 key to save and reboot.
-
IMPORTANT: If you're planning on booting with Windows at all, do not disable it.
-
Should you wish to enable it later in the future, repeat the above steps but select Enable this time.
-
-
-
Once you have reviewed the previous step, continue
-
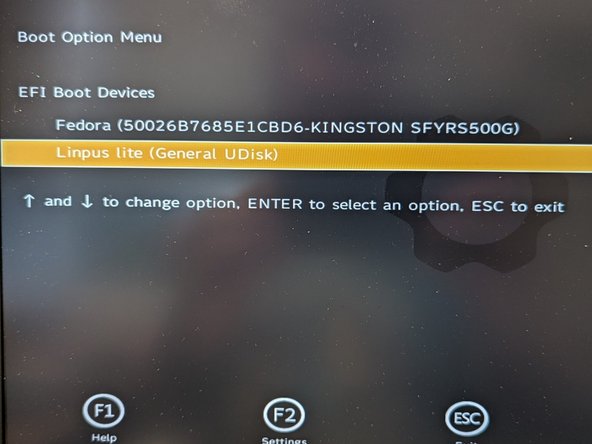
Insert the USB drive into your powered off Framework Laptop 16, and then power on. If you have an existing OS installed on the Storage drive in your laptop, immediately after the power light comes on begin rapidly tapping (continuously ) the F12 key - you must begin tapping well before you see the Framework logo.
-
Select Linpus lite (General UDisk) with your arrow keys. Enter key.
-
Next, you will see a white box with Preparing Ubuntu. From there, you will be presented with the option to select your language.
-
Next option is to select your accessibility options. Then keyboard layout and your option for how you wish to connect to the Internet. We recommend you do at this stage.
-
Important for non-US keyboard users! Please open this link in a new tab and read carefully.
-
Soon, you may be asked to "update your installer. Do so if connected to the internet. Close the installer, then open it again from the desktop on the lower right corner.
-
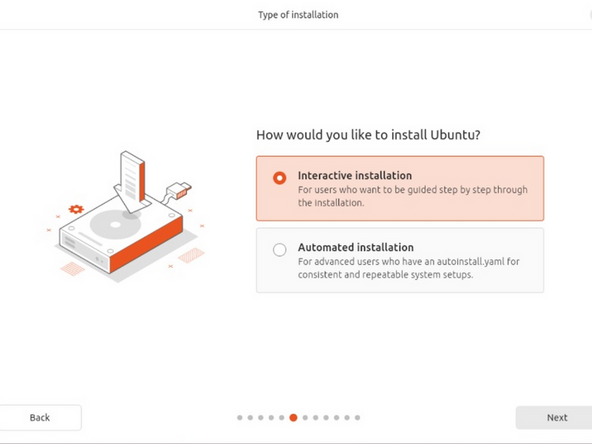
Go through the steps you did previously, then select your install type - most people will want interactive.
-
-
-
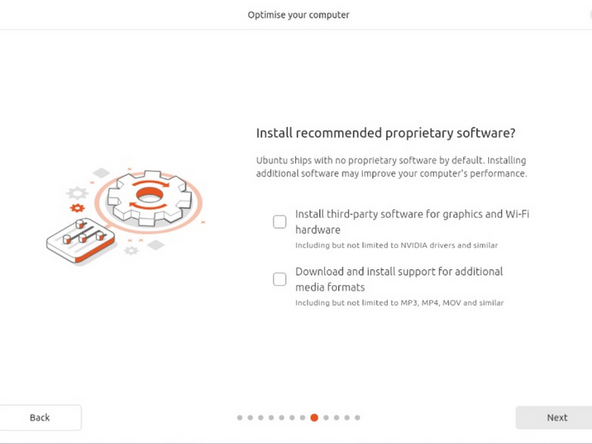
While connected to your network, select Normal installation, Download updates while installing Ubuntu and Install third party software, then press continue. This process may take a few minutes and appear to idle a bit, then the next screen appears - installation type.
-
NVIDIA users: Please make sure to check the "Install Proprietary Software" boxes! This will ensure your NVIDIA driver for the dGPU is installed and activated, right out of the box without any extra work.
-
-
-
Next we’ll choose the installation type. Erase everything is the correct choice for users with a new Framework Laptop 16 (AMD Ryzen™ 7040 Series) or (AMD Ryzen AI 300 Series) looking to use the entire hard drive for Ubuntu.
-
Press Install Now, then when prompted, then click on Continue.
-
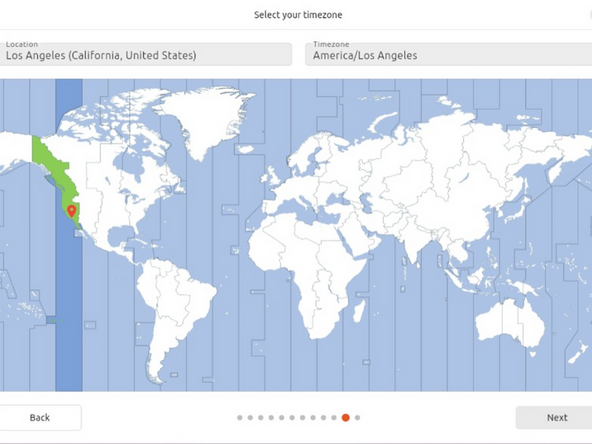
Next you’ll be prompted to choose your location on the world map. Select your time zone location, click Continue.
-
Create a username, a computer name (anything will do), and a password to login with. Also make sure you select Require a password to log in. Then press Continue.
-
-
-
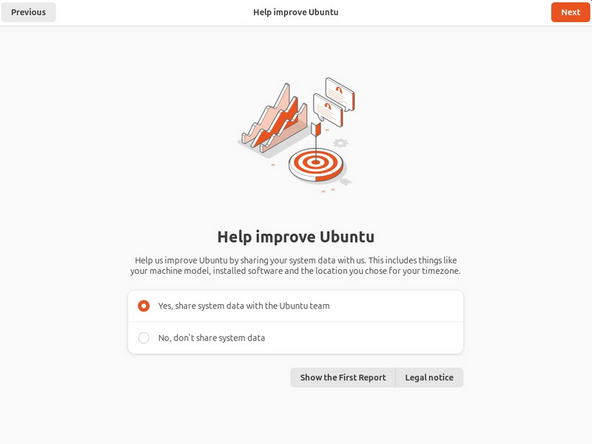
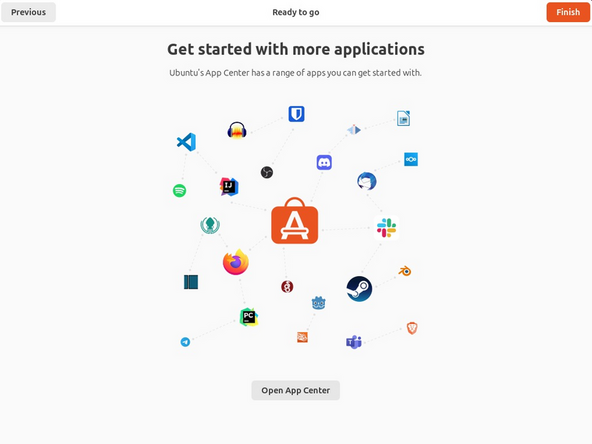
Once rebooted, simply follow the prompts for whether or not you are using Ubuntu Pro and if you wish to send back error reports.
-
Repeat this process with the other screens as seen in the provided images, while making selections and choices that best match your needs.
-
-
-
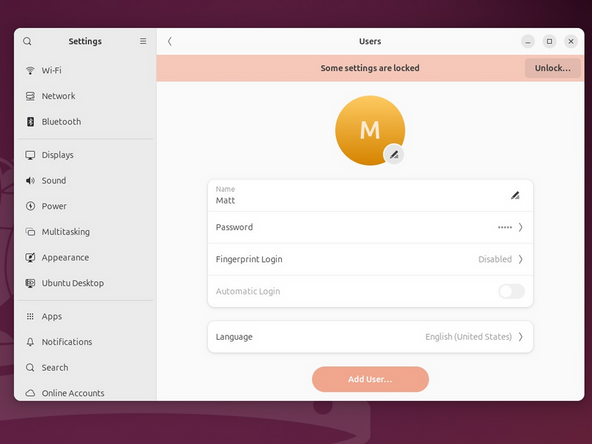
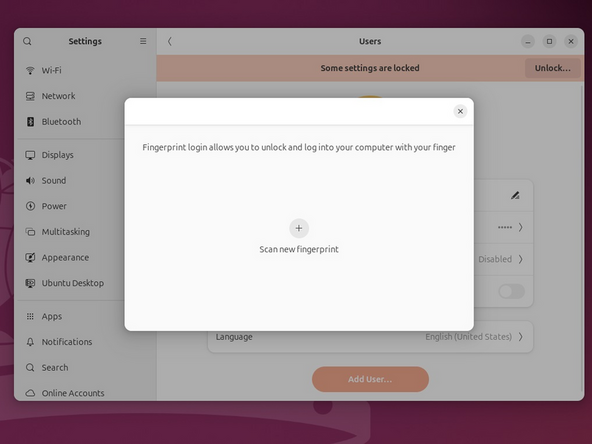
Let's setup fingerprint login. Click on the horizontal bar in the upper left, search for user.
-
Choose Fingerprint Login. Then select Scan new fingerprint. Select your desired fingerprint. Carefully tap your finger tip on the sensor (power button). You may need to try a few attempts as everyone's prints are different.
-
Once it's successful, you will see the word Complete.
-
-
-
We're almost done. Please follow the links to your individual Framework Laptop 16.
-
Click here for the completion guide for Framework Laptop 16 (AMD Ryzen™ 7040 Series).
-
Click here for the completion guide for Framework Laptop 16 (AMD Ryzen™ AI 300 Series).
-
Our recommendations for Optimizing Ubuntu Battery Life. This includes important expansion card behavior.
-
Need richer sound? We have collected suitable Easy Effects profiles to help.
-
-
-
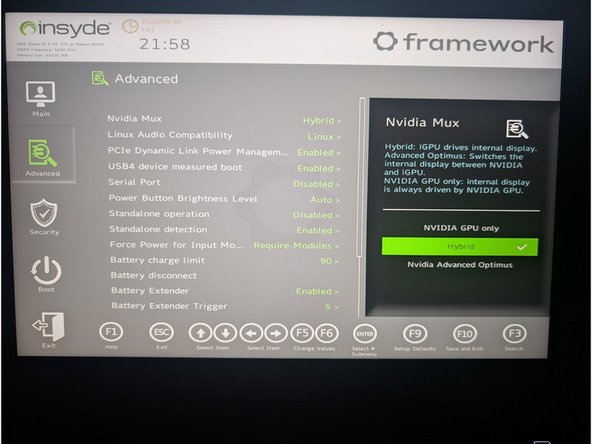
Your Framework Laptop 16 with the NVIDIA dGPU module can operate in two primary graphics modes you will want to explore. You can switch between them in your laptop's BIOS settings.
-
To access this section of your BIOS: Tap F2 when you boot and see your Framework Splash screen (Framework logo). Arrow over to Setup utility. Click enter. Down arrow to Advanced on the left side. Right arrow to NVIDIA Mux. Enter key. Make your selection, press enter. Press F10 and press enter again to save changes and reboot.
-
The third option, Advanced Optimus, behaves like NVIDIA Hybrid Mode on Linux. So we will forgo it for this guide.
-
NVIDIA Hybrid Mode (Traditional Optimus): This is the default and most battery-efficient mode.
-
Display Path: The integrated AMD GPU (iGPU) is always connected to the display. When the NVIDIA GPU (dGPU) is used for a demanding task, it renders the frames and copies them to the iGPU to be shown on the screen.
-
Switching: Applications run on the power-saving iGPU by default. Steam uses dGPU this automatically for games.
-
Performance: Small but measurable latency and FPS penalty compared to direct dGPU output because every frame must traverse the iGPU.
-
-
-
Your Framework Laptop 16 with the NVIDIA dGPU module can operate in two primary graphics modes you will want to explore. You can switch between them in your laptop's BIOS settings.
-
To access this section of your BIOS: Tap F2 when you boot and see your Framework Splash screen (Framework logo). Arrow over to Setup utility. Click enter. Down arrow to Advanced on the left side. Right arrow to NVIDIA Mux. Enter key. Make your selection, press enter. Press F10 and press enter again to save changes and reboot.
-
The third option, Advanced Optimus, behaves like NVIDIA Hybrid Mode on Linux. So we will forgo it for this guide.
-
NVIDIA GPU-Only (Discrete Mode)
-
Display Path The dGPU drives the panel 100% of the time. The iGPU is fully disabled.
-
Switching: No switching possible without reboot — you must go back into BIOS or flip the MUX manually to return to Hybrid mode.
-
Performance: Maximum performance and lowest latency, because there is no iGPU in the pipeline.
-
-
-
GPUMode is designed to provided extended functionality to EnvyControl, thus allowing GUI controls to manage GPU switching modes.
-
Download EnvyControl deb package for Ubuntu from this link.
-
Download GPUMode deb package for Ubuntu from this link.
-
Install EnvyControl by double clicking on the downloaded deb package, then choose install.
-
Install GPUMode by double clicking on the downloaded deb package, then choose install. Reboot.
-
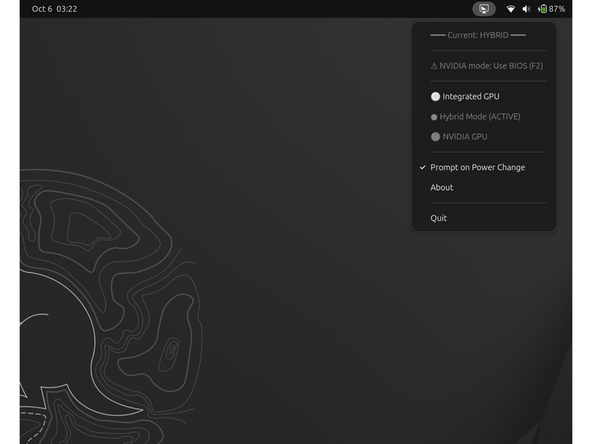
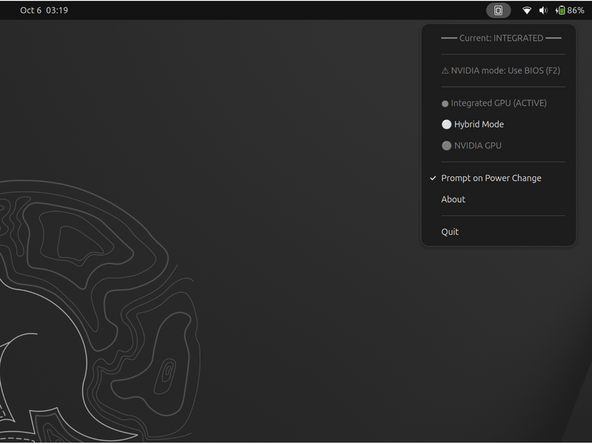
Upon reboot, you will notice a new applet that appears in the upper right. Clicking on it, you will see what is shown in the image in this step. You're currently in hybrid mode.
-
Note: When switching from the pop up prompts, rebooting is automatic if you choose Yes from a prompt. Manual switching from the menu pull down, requires a manual reboot.
-
-
-
With your laptop plugged into power, this is a good place to be for gaming and standard workloads. If the NVIDIA GPU is needed, it will be called upon by applications like Steam and various other applications that will benefit form the GPU boost.
-
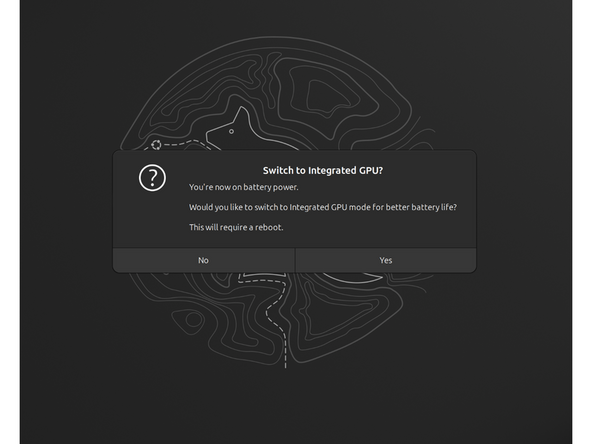
When you unplug your laptop, two things happen immediately.
-
First, you will automatically have your power profile switched to power save.
-
Second thing that happens is shown in the image for this step. You will be prompted to switch to the iGPU setting known as integrated mode and automatically reboot, to save you even from the NVIDIA draining power while detached from your power cord.
-
Wish to not be asked again to switch graphics profiles when disconnecting power from your laptop? Select the pull down menu, uncheck "Prompt on Power Change."
-
-
-
If you elected to allow the system to reboot into integrated mode, you will notice the applet pulled down now looks like this. Currently in integrated mode. The NVIDIA GPU is no longer active and you will see a significant power savings from this.
-
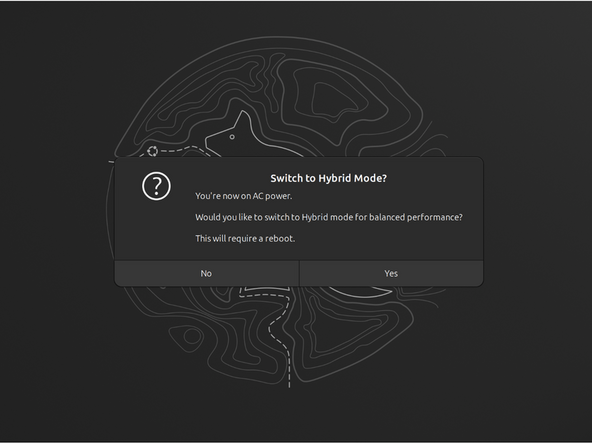
If you re-attach power, you will be notice your power profile is switched back to performance.
-
You will also be promoted with with the pop up asking if you would like to reboot to return to hybrid mode. Selecting Yes will reboot you back to Hybrid graphics mode.
-
Wish to not be asked again to switch graphics profiles when disconnecting power from your laptop? Select the pull down menu, uncheck "Prompt on Power Change."
-
-
-
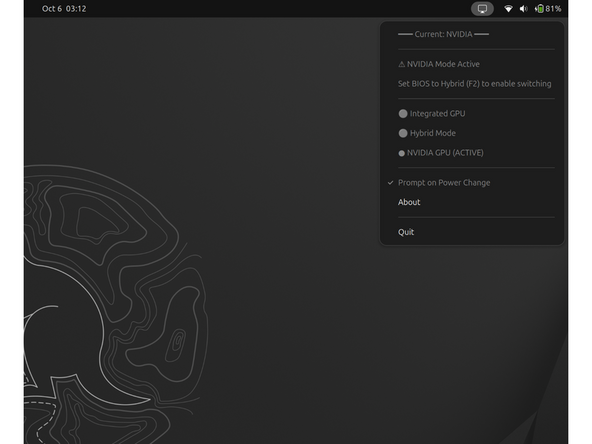
You must reboot and rapidly press F2 to gain access to the BIOS menu. Follow the instructions in step 12 above.
-
Once booted back into your computer, you will notice the pull down menu for GPUMode will be totally not usable and explains you are in NVIDIA mode.
-
This is the setting you would use for heavy compute work or LLMs.
-
To return to hybrid mode, reboot, again pressing F2 at the Framework splash screen. Follow step 11 above.
-
-
-
Before updating to the latest firmware, let's make sure we verify which BIOS were running. Please follow this guide.
-
For Framework Laptop 16 AMD Ryzen 7040 Series, you can check here for the latest firmware.
-
For Framework Laptop 16 AMD Ryzen AI 300 Series, you can check here for the latest firmware.
-
-
-
Framework Laptop (7040 Series): If you are looking to run Steam games, please follow our guide links below.
-
-
-
Framework Laptop (AI 300 Series): If you are looking to run Steam games, please follow our guide links below.
-
Gaming on Steam with Ubuntu; One or Two NVME Drives Guides.
-
With the proprietary NVIDIA driver installed, Steam games work with the dGPU without any extra work.
-
If you are unsure if something is using the dGPU, install and run nvtop. Look to the GPU section to see which is running during game play. You can alt-tab key to access this from within a game.
-
-
-
Expecting two-finger right clicking and need help? The touchpad help guide is here.
-
Please visit our troubleshooting guide first.
-
If you need additional help, feel free to visit our active support community.
-


Enjoy using Ubuntu on your Framework Laptop 16!
Enjoy using Ubuntu on your Framework Laptop 16!
Cancel: I did not complete this guide.
One other person completed this guide.