Introduction
Once you have your Framework Laptop 12 set up following the Quick Start Guide, you’re ready to install your preferred OS. With the latest release of NixOS, everything works pretty smoothly. You can check our Linux page for additional Linux compatibility notes.
NOTE: This is a Compatible Community Supported Linux Distribution. Learn more here.
Tools
No tools specified.
Parts
-
-
This guide is for NixOS on both Framework Laptop 12 (13th Gen Intel® Core™) and Intel® Core™ Series 3).
-
-
-
First, download NixOS from NixOS' website. NixOS has a detailed installation guide that you can follow. We'll go through the steps in this Guide assuming you have a simple installation scenario of a fresh install on a blank drive.
-
Download balenaEtcher as a tool to create the USB installer from the ISO. balenaEtcher is available for MacOS. Install it.
-
Before booting to the Live USB drive, a note about secure boot.
-
Launch balenaEtcher. Insert your USB drive (8GB or larger). Click on "Flash from file" and select the NixOS iso that you downloaded. Click on "Select target" and choose your USB drive. Click "Flash" and wait a minute or two for it to complete.
-
Once the USB drive creation is complete, you can close balenaEtcher and eject the USB drive from your OS.
-
-
-
First, download NixOS from NixOS' website. NixOS has a detailed installation guide that you can follow. We'll go through the steps in this Guide assuming you have a simple installation scenario of a fresh install on a blank drive.
-
Download Rufus as a tool to create the USB installer from the ISO - select the top download option from the link provided. Rufus is available for Windows. Install it.
-
Before booting to the Live USB drive, a note about secure boot.
-
If you are removing Windows to install Linux, you may run into the "Device is Active" error. This will provide you with guidance to overcome this error.
-
Launch Rufus. Insert your USB drive (8GB or larger). Click on "Flash from file" and select the NixOS iso that you downloaded. Click on "SELECT" and choose your USB drive. Click "START" and wait a minute or two for it to complete.
-
-
-
To install NixOS, Secure Boot must be disabled! By default NixOS will not boot with Secure Boot enabled. Learn more about secure boot on NixOS here. More information about Secure Boot on Framework Computers can be found here.
-
To disable secure boot:
-
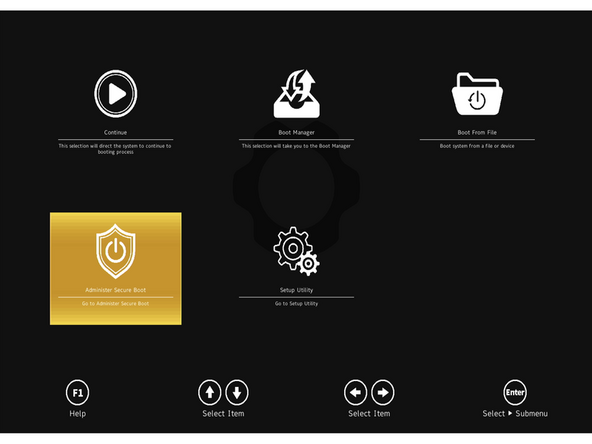
Boot into BIOS by tapping F2 just before the Framework splash screen.
-
Arrow down to Administer Secure Boot. Press enter.
-
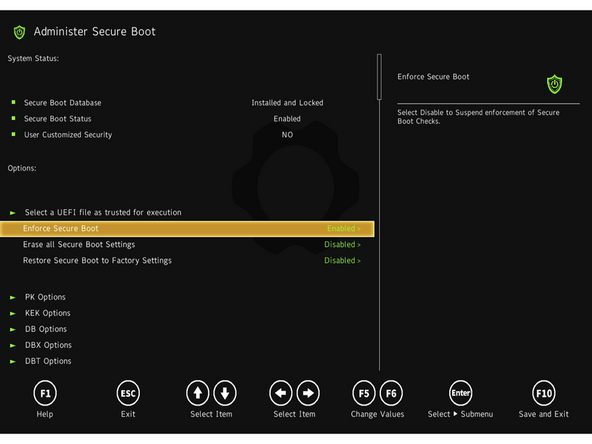
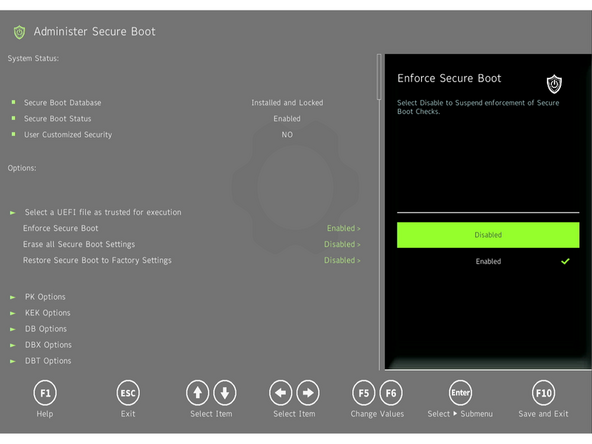
Arrow down to Enforce Secure Boot. Press enter, select Disabled, and press enter.
-
Press F10 to save and reboot. With Yes selected, press Enter.
-
To enable Secure Boot again, repeat the above steps but select Enable this time.
-
-
-
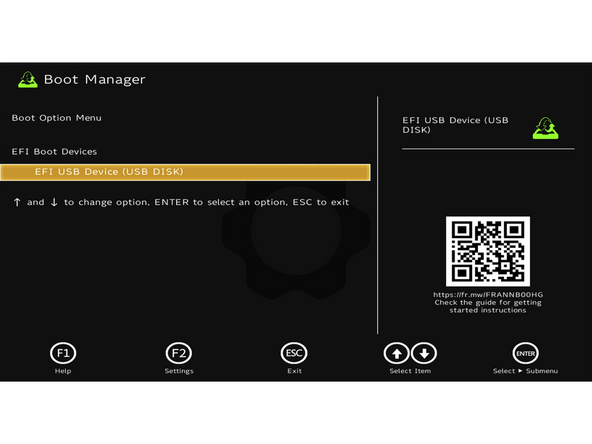
Insert the USB drive into the powered off Framework Computer, and then power on. Immediately after the power light comes on begin tapping the F12 key before the Framework logo is visible.
-
If the computer does not have an existing OS installed, tapping F12 is not necessary and the system will automatically boot the Live USB.
-
Use the arrows to select the Live USB, typically named "EFI USB Device (USB Disk)" and press enter to boot from it.
-
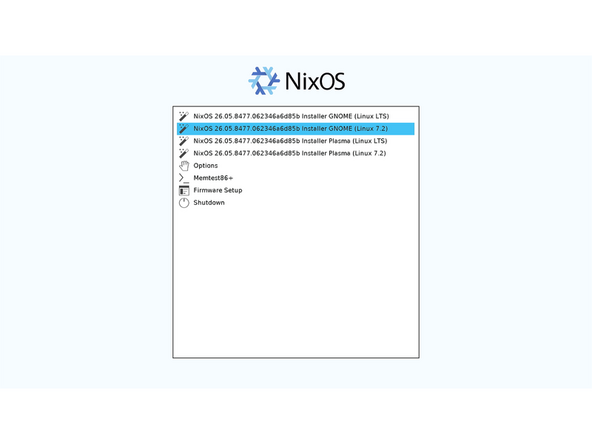
Arrow down to either of the options for Linux 7.2.5 (or newer) and press the Enter key again to boot into NixOS Live.
-
This guide will use images captured from the Gnome environment as reference. This will not effect the graphical environment of the final install.
-
-
-
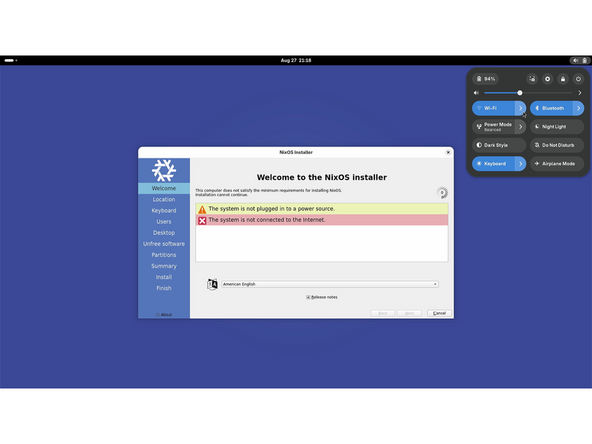
An internet connection is required to install NixOS. Use the system tray in the upper right corner of the display to connect to a wireless network if an ethernet expansion card is not being used.
-
Being connected to the charger is also strongly recommended to avoid any potential interruptions to the install process.
-
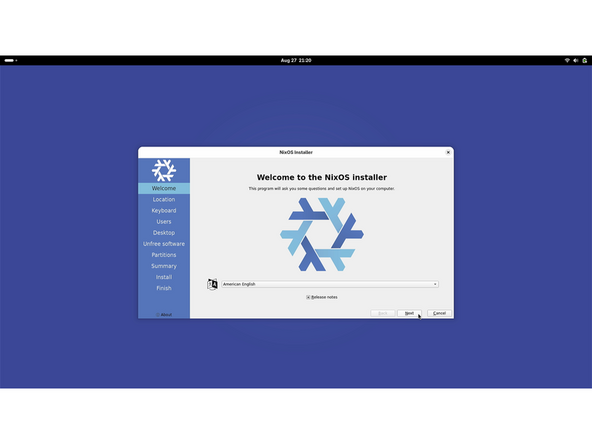
After an internet connection is established, the install process can begin by selecting a system language.
-
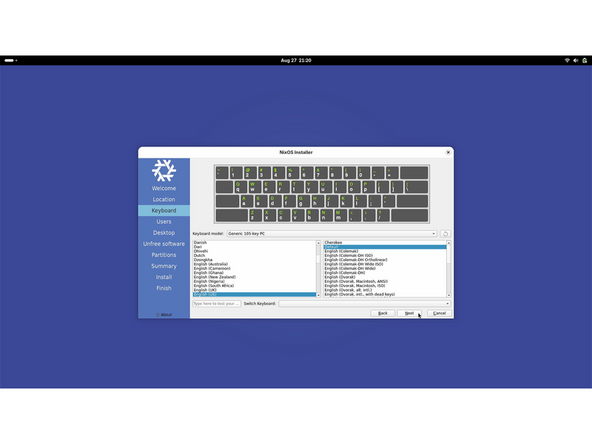
Next select the system region, time zone, and keyboard layout.
-
-
-
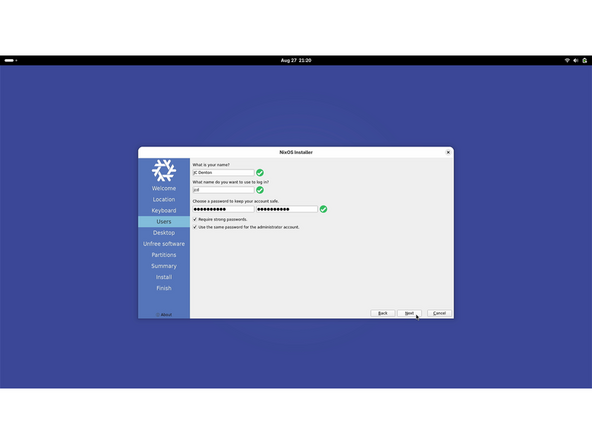
Create a user by setting a name, username, and password.
-
Setting a separate password for the admin account is optional.
-
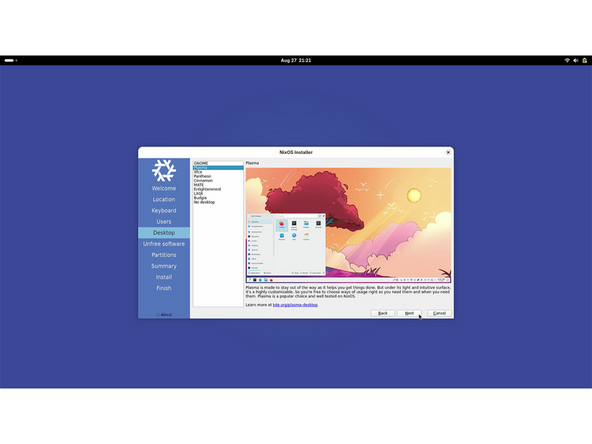
The next selection is a list of possible user interfaces to select from.
-
Windows users may prefer KDE and Mac users may prefer Gnome.
-
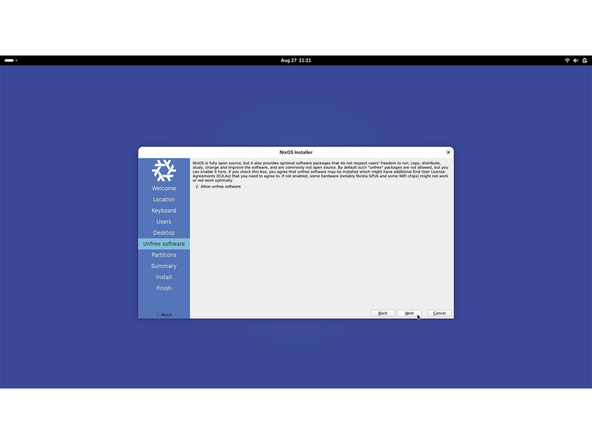
It is generally recommended for most users to select the checkbox to allow unfree software.
-
-
-
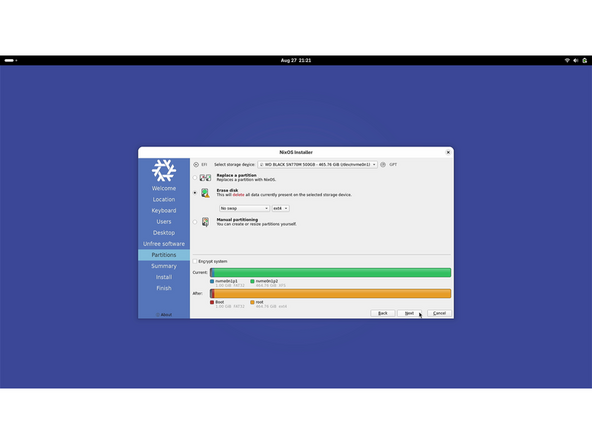
For simplicity's sake this guide will just assume a basic default setup. So select the internal storage using the dropdown at the top of this section and select "Erase disk"
-
While one of the options in the dropdown for swap indicates an option for hibernation, hibernation is supported on a best effort basis on Framework Computers.
-
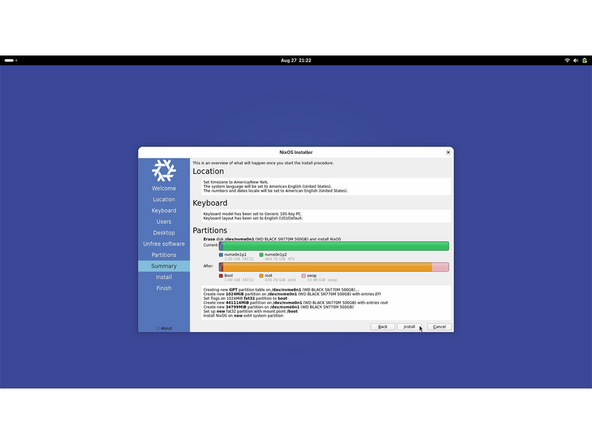
After this the summary page will be the last chance to review all of the selections made previously and confirm them before they are written to the disk. Select install once finished reviewing the selections.
-
After installation is finished, check the "Restart Now" box and click Finish.
-
-
-
Framework hardware quirks and fixes for NixOS are maintained in the nixos-hardware project, which isn't part of NixOS by default. Add the module for your CPU generation.
-
Click here for the completion guide for Framework Laptop 12 (13th Gen)
-
Click here for the completion guide for Framework Laptop 12 (Core Series 3)
-
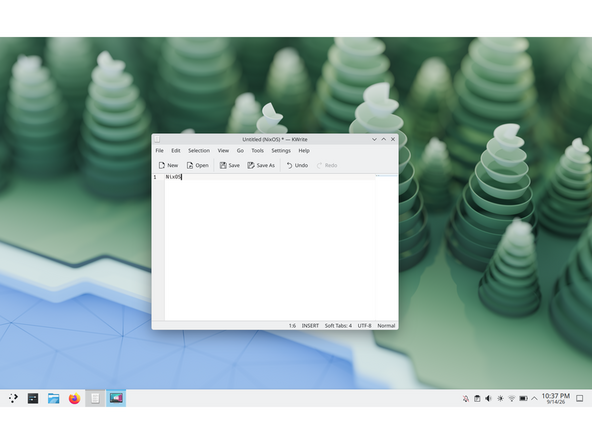
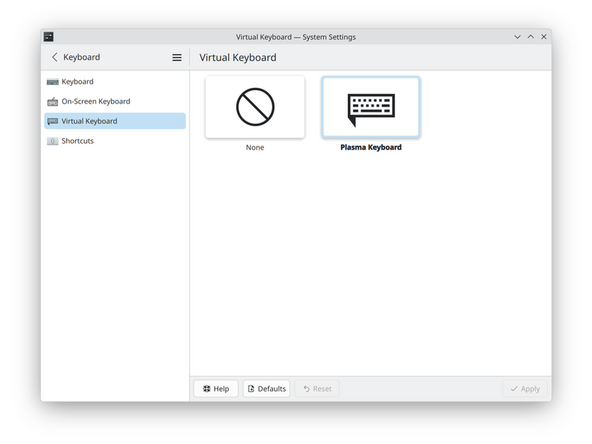
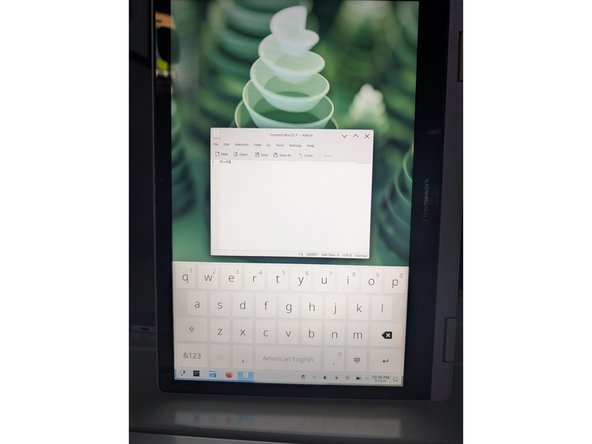
Using Tablet Mode. Simply follow the appropriate link above matching your hardware to complete setup. Once that step is completed, you can then fold back the screen into tablet mode. The on-screen keyboard appears when you enter any text field like application search, text editing, etc.
-
-
-
-
-
Update your BIOS/Firmware. Open the terminal, run the following command and follow the directions. If there are no updates available, that is completely fine. This just ensures you are current.
-
IMPORTANT: We do NOT recommend updating BIOS and firmware using various GUIs. We recommend using fwupdmgr as provided in the step above. Using GUIs can potentially create issues that would not be present using fwupdmgr directly.
-
LVFS may not update if the battery is at 100%. If you experience issues, discharge to 95%, plug AC back in, then re-run fwupdmgr update.
-
fwupdmgr refresh --force -
fwupdmgr get-updates -
fwupdmgr update
-
-
-
If you need additional help, feel free to visit our active support community.
-
We also recommend this amazing newcomer guide for NixOS newcomers called Zero to Nix.
-


Enjoy using NixOS on your Framework Laptop 12! If you have any questions or run into any issues, we recommend bringing them to the Community in the Linux NixOS topic. Members of the Framework team participate in discussions there.
Enjoy using NixOS on your Framework Laptop 12! If you have any questions or run into any issues, we recommend bringing them to the Community in the Linux NixOS topic. Members of the Framework team participate in discussions there.