Introduction
Once you have your Framework Laptop 12 set up following the Quick Start Guide, you’re ready to install your preferred OS. The Framework Laptop 12 is running some very recent hardware, and we’ve worked with the team at Fedora to improve support. Fedora 44 is one of the Linux distributions we recommend, as it has full hardware support with very little setup required, and it offers a great user experience overall.
One note on Fedora is that the distro follows a fairly aggressive update policy on new kernels. This means that if you have the most recent generation of hardware, there is a higher risk that a kernel update could have a driver regression. On older platforms, this is less of a risk. To avoid this risk altogether, you can use a more conservative distro like Ubuntu LTS.
This is an Officially Supported Linux Distribution. Learn more here.
Tools
No tools specified.
Parts
-
-
This guide is for the Fedora 44 Workstation (GNOME) on both Framework Laptop 12 (13th Gen Intel® Core™ and Intel® Core™ Series 3).
-
Framework Laptop 12 Intel® Core™ Series 3 customers looking for Fedora KDE Plasma Desktop, please visit our guide here.
-
Framework Laptop 12 (13th Gen Intel® Core™) customers looking for Fedora KDE Plasma Desktop, please visit our guide here.
-
Please be sure to NOT skip Step 10 as it addresses the needs of each platform for Fedora 44 Workstation on both Framework Laptop 12 models.
-
-
-
First, download the latest Fedora Workstation release https://fedoraproject.org/workstation/ from the Fedora website. This Guide assumes a simple installation scenario of a fresh install on a blank drive.
-
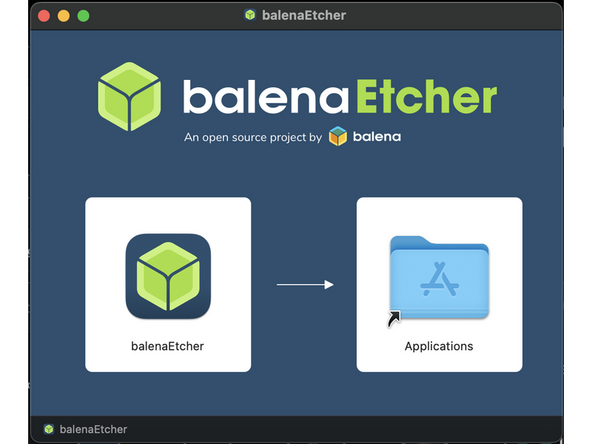
Download balenaEtcher as a tool to create the USB installer from the ISO. balenaEtcher is available for MacOS. Install it.
-
If upgrading from Fedora 43 Workstation, we recommend backing up your home directory and doing a clean installation. If you decide you prefer to upgrade from 43, make absolutely sure your 43 installation is fully up to date first.
-
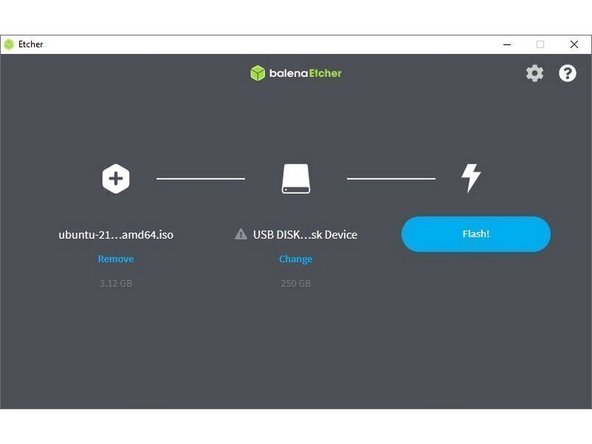
Launch balenaEtcher. Insert your USB drive (8GB or larger). Click on "Flash from file" and select the Fedora ISO that you downloaded. Click on "Select target" and choose your USB drive. Click "Flash" and wait a minute or two for it to complete.
-
Once the USB drive creation is complete, you can close balenaEtcher and eject the USB drive from your OS.
-
-
-
First, download the latest Fedora Workstation release https://fedoraproject.org/workstation/ from the Fedora website. This Guide assumes a simple installation scenario of a fresh install on a blank drive.
-
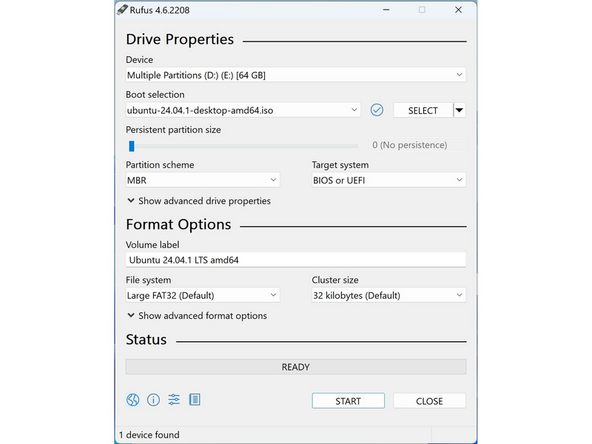
Download Rufus as a tool to create the USB installer from the ISO - select the top download option from the link provided. Rufus is available for Windows. Install it.
-
If upgrading from Fedora Workstation 43, we recommend backing up your home directory and doing a clean installation. If you decide you prefer to upgrade from 43, make absolutely sure your 43 installation is fully up to date first.
-
If you are removing Windows to install Linux, you may run into the "Device is Active" error. This will provide you with guidance to overcome this error.
-
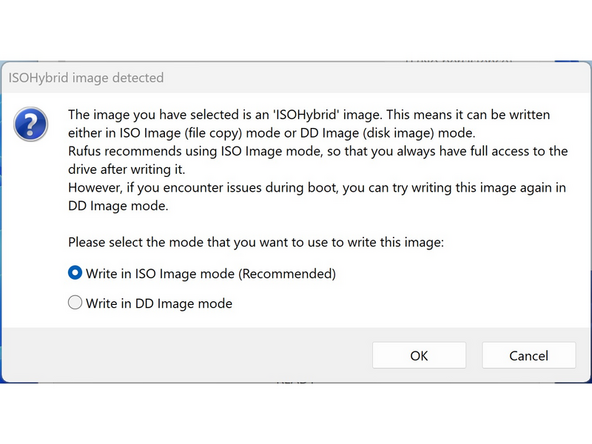
Launch Rufus. Insert your USB drive (8GB or larger). Rufus will detect it under the "Device" dropdown, confirm it's selected there. Click "SELECT" and choose the Fedora ISO that you downloaded. Click "START" and wait a minute or two for it to complete.
-
-
-
First, download the latest Fedora Workstation release https://fedoraproject.org/workstation/ from the Fedora website. This Guide assumes a simple installation scenario of a fresh install on a blank drive.
-
Fedora: Media Writer is already installed on Workstation, so just launch it from the app menu.
-
Other distro, Flatpak installed: Run flatpak install flathub org.fedoraproject.MediaWriter, then launch it from the app menu or with flatpak run org.fedoraproject.MediaWriter.
-
Other distro, no Flatpak: Install Flatpak and add Flathub per https://flathub.org/setup
-
Insert an 8 GB+ USB key. Back up its contents first, since this erases the entire drive.
-
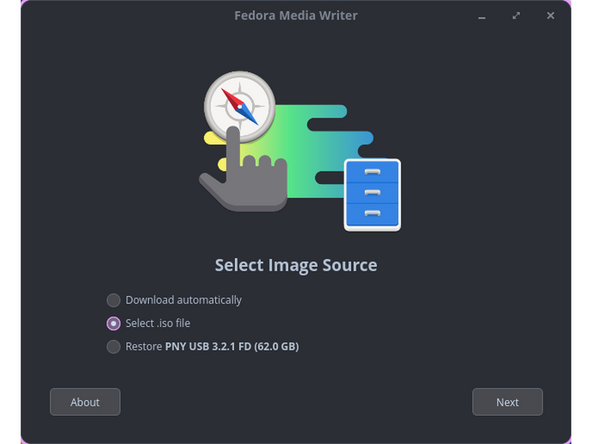
Open Fedora Media Writer, choose Select .iso file, and pick the Fedora 44 Workstation ISO you downloaded.
-
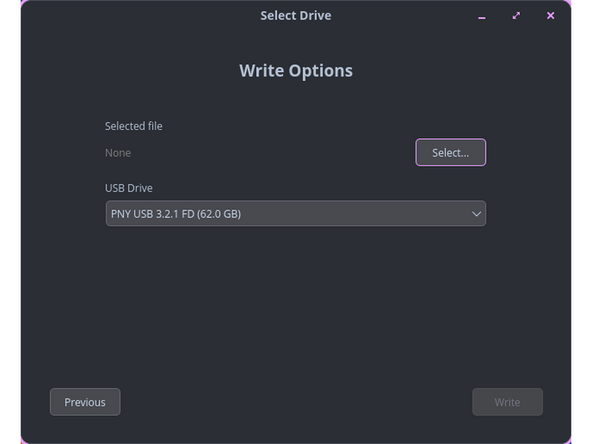
Select your USB drive from the device list, double-checking the name and size so you don't wipe the wrong disk.
-
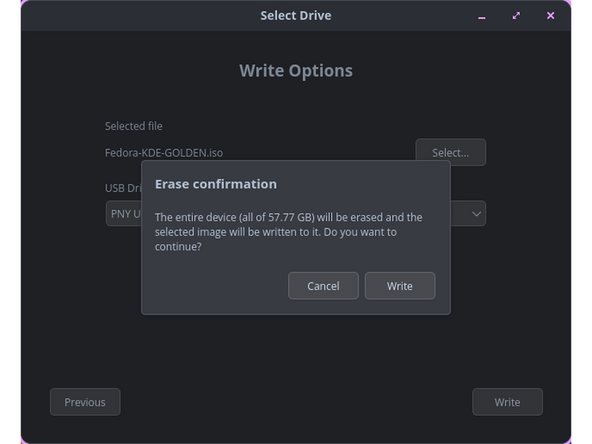
Click Write, enter your password if prompted, wait for it to finish, then click Finish and safely eject the USB.
-
-
-
Fedora works with Secure Boot out of the box. Fedora Live USBs will boot regardless of whether or not it is disabled. Users who intend to dual-boot with Windows should not disable Secure Boot!
-
If a user has a reason to disable Secure Boot, such as specialized third party devices that require unsigned drivers:
-
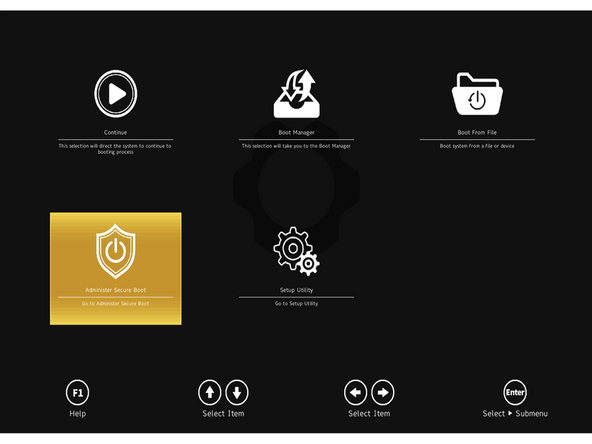
Boot into BIOS by tapping F2 just before the Framework splash screen.
-
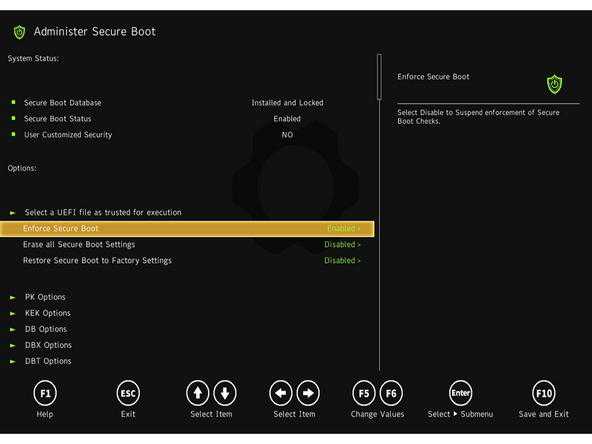
Arrow down to Administer Secure Boot. Press enter.
-
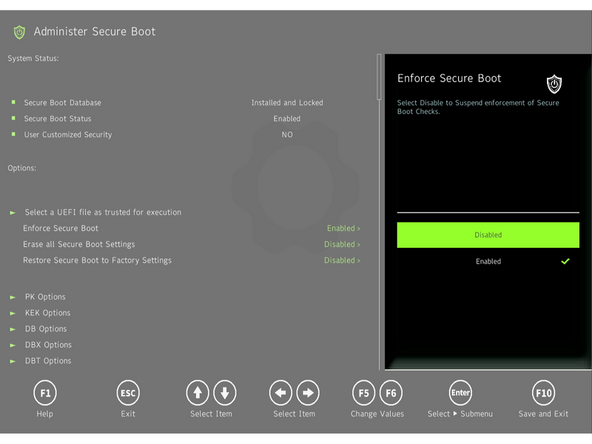
Arrow down to Enforce Secure Boot. Press enter, select Disabled, and press enter.
-
Press F10 to save and reboot. With Yes selected, press Enter.
-
To enable Secure Boot again, repeat the above steps but select Enable this time.
-
-
-
Boot to Fedora Live USB: Insert the USB drive into the powered-off machine, then power it on.
-
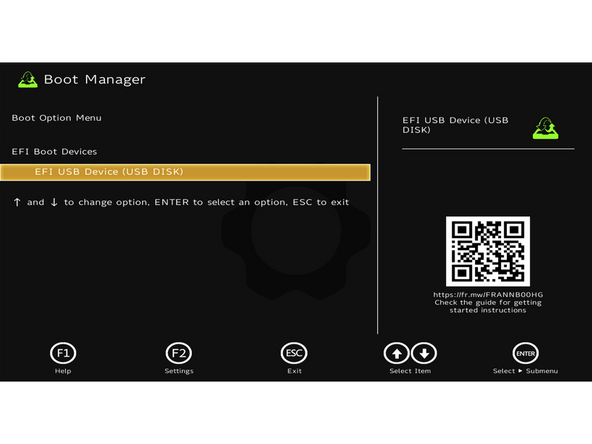
If an OS is already installed, immediately begin tapping F12 as soon as the power light comes on. Start tapping before the Framework logo appears.
-
At the Boot Option Menu, use arrow keys to select your USB drive (shown as "EFI USB Device (USB Disk)" or similar) and press Enter.
-
If Windows is currently installed, trying to boot a Linux Live USB can result in the "Device is Active" error. This will provide guidance to overcome this error.
-
Next select Start Fedora Workstation-Live 44. Hit the enter key.
-
The installer will start automatically after some time. How long depends on the speed of the USB drive.
-
-
-
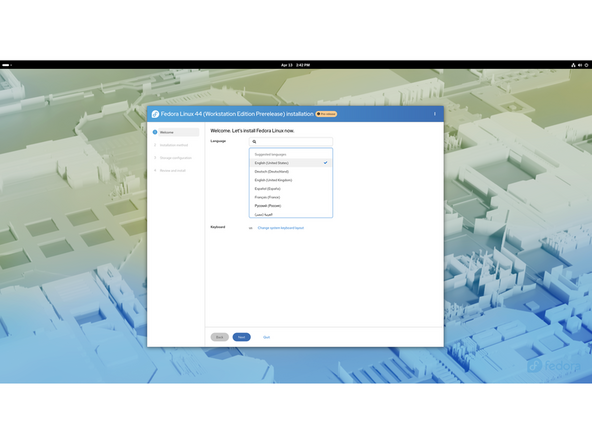
Select the keyboard language you'd like to use. On the next screen, click on the Installation Destination button to choose the disk. Note that you can install Fedora onto a USB drive or a Storage Expansion Card as an alternative to installing it onto your internal drive.
-
If there is an OS already installed on the target drive, you'll need to follow the guided steps in the installer to resize partitions or delete the existing partitions. This is out of scope of this guide, but Fedora has very detailed documentation: https://docs.fedoraproject.org/en-US/qui...
-
Important for non-US keyboard users! Please open this link in a new tab and read carefully.
-
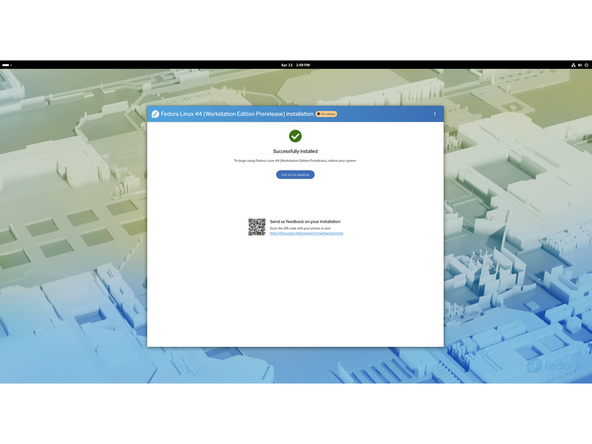
Click Finish Installation and then reboot into your new Fedora install!
-
The installer will close the window, but not reboot. You can click on the power icon in the top right, click Power Off / Log Out, and click Restart.
-
-
-
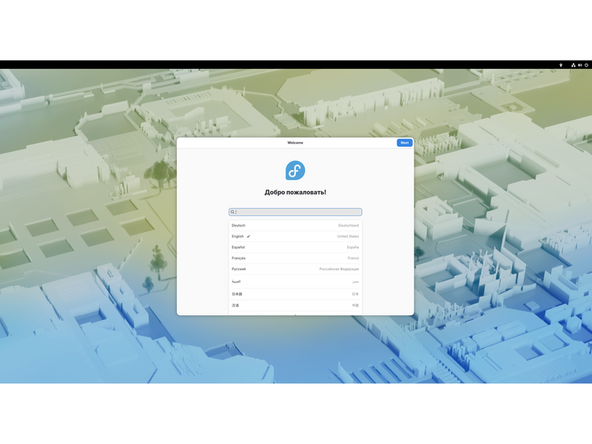
Click on preferred language, again for your preferred keyboard. This begins the process of completing the initial set up of your Fedora installation.
-
Connect to Wi-Fi or Skip. If you wish not to connect to wireless just yet, you can skip this and return to connecting to Wi-Fi later on.
-
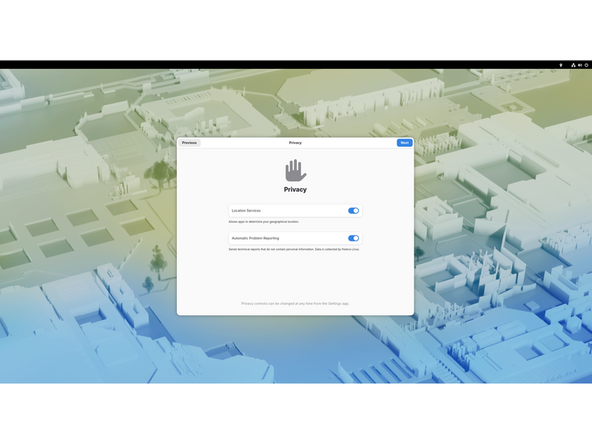
Choose your Privacy settings. Here you can decide if you would like to allow Location Services using Mozilla Location Service or not.
-
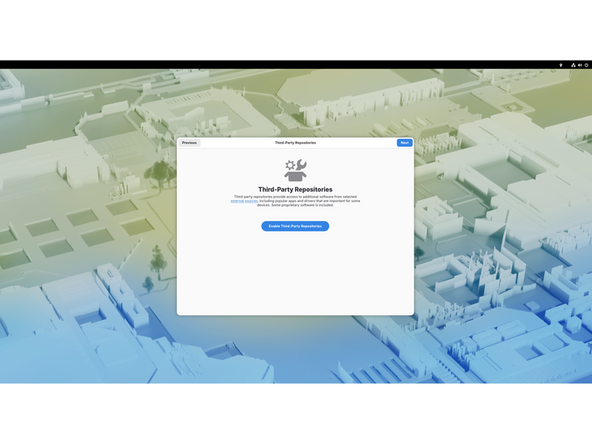
Click on Enable Third-Party Repositories. Unless you have a specific reason for not doing so, it's recommended that these repositories are enabled for access to additional drivers and applications.
-
Set up your user account. And then your user password.
-
-
-
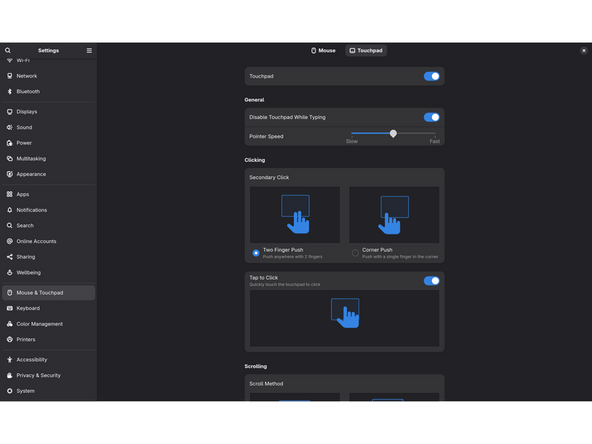
To configure the touchpad according to user preference:
-
Go to Settings>Mouse and Touchpad.
-
Select the Touchpad tile/button at the top of displayed window.
-
There are options to control Touchpad while typing behavior, pointer speed, secondary click options, tap to click, scrolling method, and scroll direction.
-
-
-
If using a Framework Laptop 12 equipped with a fingerprint sensor, the following instructions will walk through registering fingerprints.
-
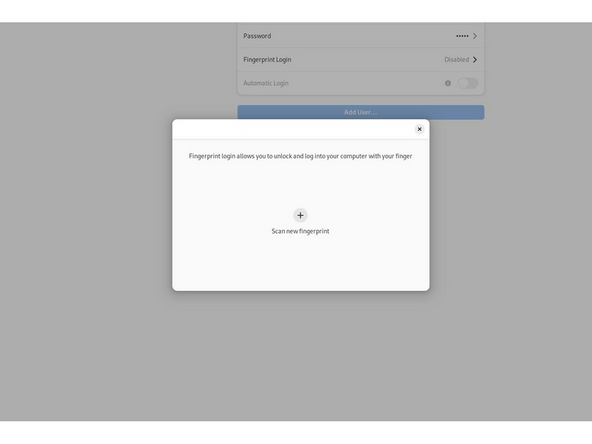
To set up fingerprint login, first click on Activities, search for user.
-
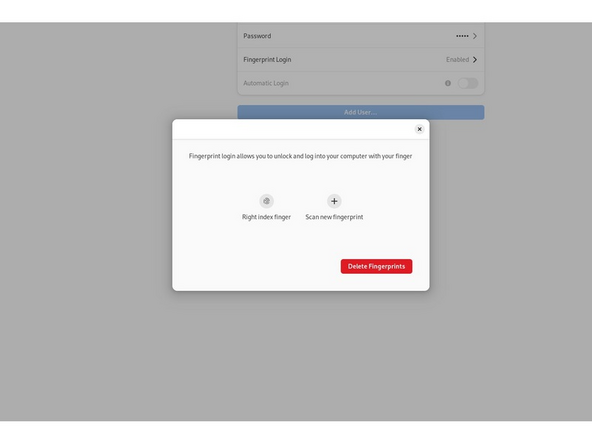
Choose Fingerprint Login. Then select Scan new fingerprint. Select a finger to register. The right ring finger is a fairly comfortable choice for the position of the fingerprint sensor on the Framework Laptop 12 (Intel Core Series 3). Carefully tap that finger tip on the sensor (power button). This process takes many repetitions.
-
Once it's successful, the word Complete will display. The window can be closed.
-
If the fingerprint reader is not working as expected, please follow our help guide to troubleshoot and resolve the issue with steps specific to Fedora.
-
-
-
We're almost done. Please follow the links to your Framework Laptop 12.
-
Click here for the completion guide for Framework Laptop 12 (13th Gen)
-
Click here for the completion guide for Framework Laptop 12 (Core Series 3)
-
Using Tablet Mode. Simply follow the appropriate link above matching your hardware to complete setup. Once that step is completed, you can then fold back the screen into tablet mode. The on-screen keyboard appears when you enter any text field like application search, text editing, etc.
-
Our recommendations for Optimizing Fedora Battery Life. This includes important expansion card behavior.
-
-
-
-
How to check the BIOS version. Go to and click upper left corner where you see the horizontal line, search terminal and launch it. Please follow this link to copy and paste the code into your terminal, then press enter.
-
The output will tell you which Framework Laptop 12 you have and also which BIOS version you're using.
-
Framework Laptop 12 BIOS and Driver Releases (13th Gen Intel Core), click here for the latest firmware.
-
Framework Laptop 12 BIOS and Driver Releases (Core Series 3), click here for the latest firmware.
-
IMPORTANT: Per the instructions above, we do NOT recommend updating BIOS and firmware using various GUIs. We recommend using fwupdmgr as provided in the step above. Using GUIs can potentially create issues that would not be present using fwupdmgr directly.
-
-
-
Expecting different touchpad behavior? The touchpad help guide is here.
-
Need help? Please visit our troubleshooting guide first.
-
If you need additional help, feel free to visit our active support community.
-
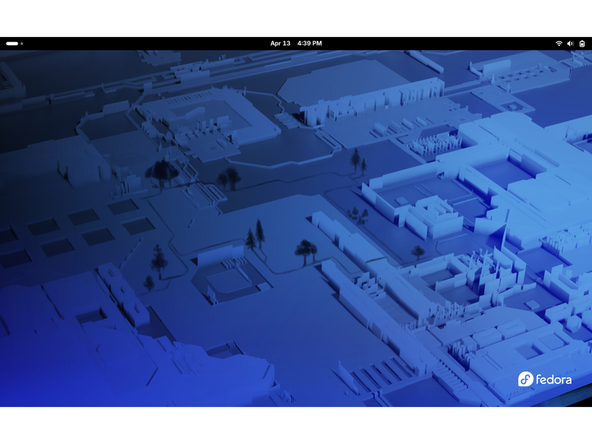
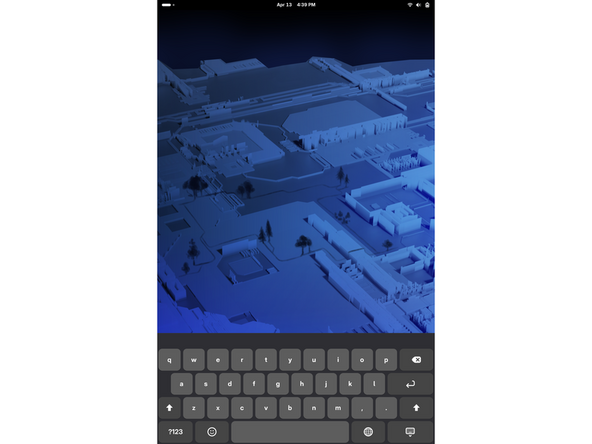
Enjoy using Fedora Workstation on your Framework Laptop 12!
Enjoy using Fedora Workstation on your Framework Laptop 12!