
Introduction
Once you have your Framework Laptop 12 set up following the Quick Start Guide, you’re ready to install your preferred OS. With the latest release of Arch Linux, everything works pretty smoothly. You can check our Linux page for additional Linux compatibility notes.
NOTE: This is a Compatible Community Supported Linux Distribution. Learn more here.
Tools
Parts
No parts specified.
-
-
First, download Arch Linux from Arch's website. Arch Linux has a detailed installation guide that you can follow. We'll go through the steps in this Guide assuming you have a simple installation scenario of a fresh install on a blank drive.
-
Open the Terminal app.
-
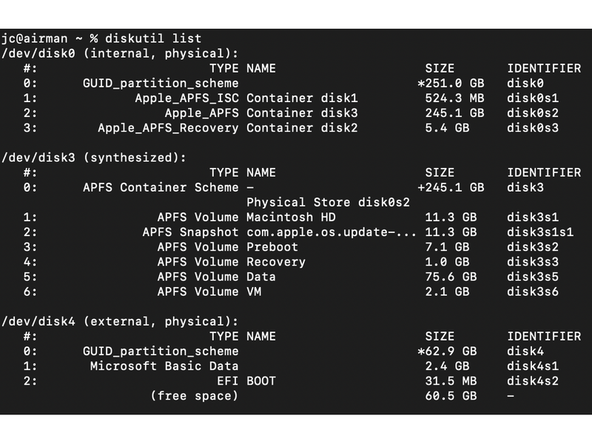
Run the command
diskutil listto list the storage devices the system sees. The flash drive should be listed as external. -
Be absolutely certain the command is typed correctly as this can result in loss of data.
-
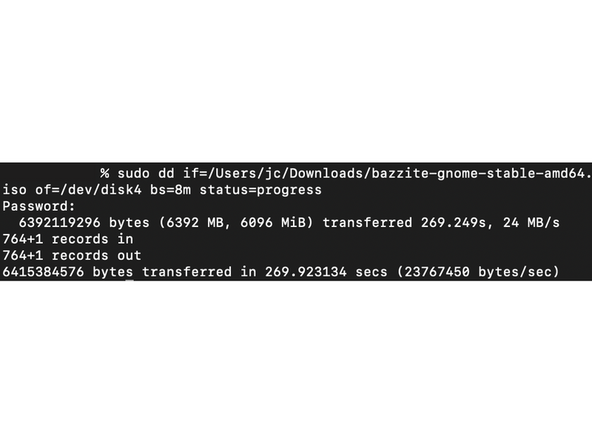
Use
ddto write the downloaded Arch Linux iso to the flash drive:dd if=/path/to/arch-linux.iso of=/dev/diskX bs=8m status=progress -
Be absolutely certain the paths are correct before running this command with
sudo, it will result in loss of data if the wrong disk is chosen. -
Once the USB drive creation is complete, close the terminal and safely eject the USB drive.
-
-
-
First, download Arch Linux from Arch's website. Arch Linux has a detailed installation guide that you can follow. We'll go through the steps in this Guide assuming you have a simple installation scenario of a fresh install on a blank drive.
-
New line.Download Rufus as a tool to create the USB installer from the ISO - select the top download option from the link provided. Rufus is available for Windows. Install it.
-
Launch Rufus. Insert your USB drive (8GB or larger). Click on "Flash from file" and select the Arch Linux iso that you downloaded. Click on "SELECT" and choose your USB drive. Select "GPT" as the Partition scheme. Click "START" and wait a minute or two for it to complete.
-
-
-
Enforce Secure Boot must be Disabled: While Arch Linux can be configured to support Secure Boot, the Live ISO does not ship with a signed bootloader by default. Information about Secure Boot on Framework Computers can be found here.
-
Information about implementing Secure Boot with Arch Linux can be found on the Arch Wiki.
-
Insert the USB drive into the powered off Framework Desktop, and then power on. If an existing OS is installed on a Storage drive in the desktop, immediately after the power light comes on begin rapidly tapping (continuously ) the F12 key - begin tapping well before the Framework logo is visible.
-
If there is no internal storage drive installed or it is blank, the desktop will boot to the USB drive directly.
-
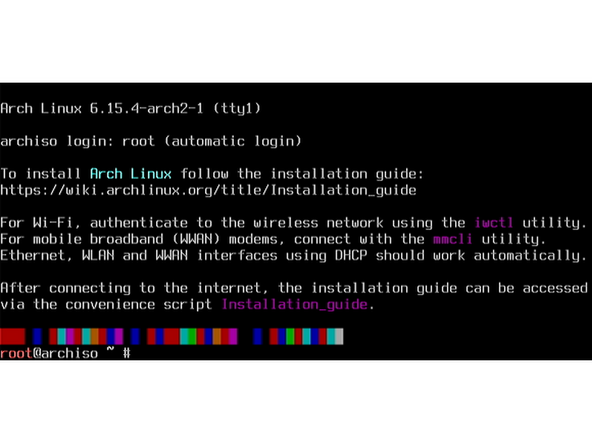
Hit Enter again to boot into and install Arch Linux.
-
This is a distribution of Linux that is intended to be built from a relatively minimal state. Refer to the Arch Wiki for more detailed information.
-
To fast track the install process with a text-based user interface, there is a helper library called archinstall designed to speed up the process.
-
-
-
If using an Ethernet Expansion Card, the Live Environment will automatically connect to the internet.
-
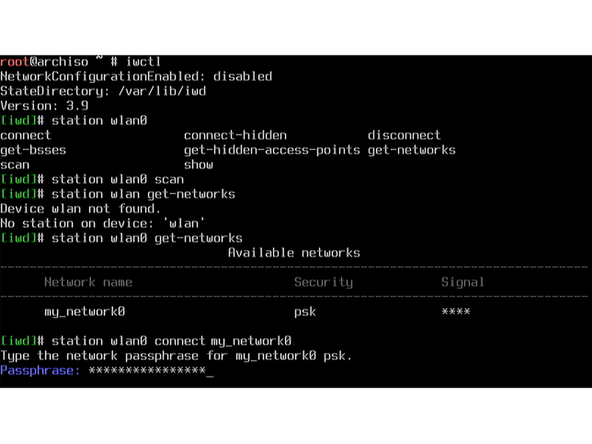
If using WiFi, begin by entering
iwctl -
Enter
station wlan0 scanthen enterstation wlan0 get-networks -
Enter
station wlan0 connect "NetworkName"replacingNetworkNamewith the name of the desired network shown byget-networks, then enter the network password when prompted. -
Exit
iwctlby entering eitherexitorquit -
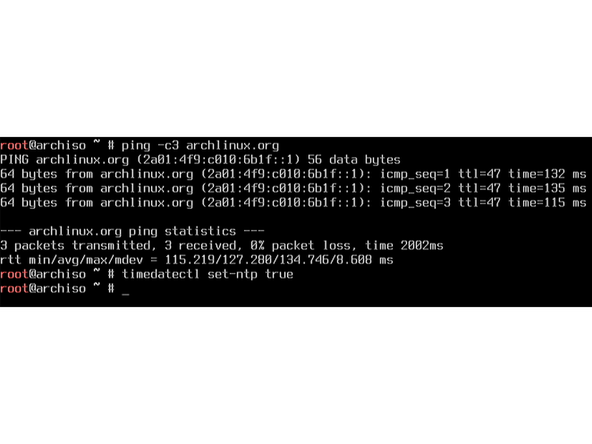
Test the connection to the Arch Linux servers with
ping -c3 archlinux.org -
Sync the system clock with the network by entering
timedatectl set-ntp true
-
-
-
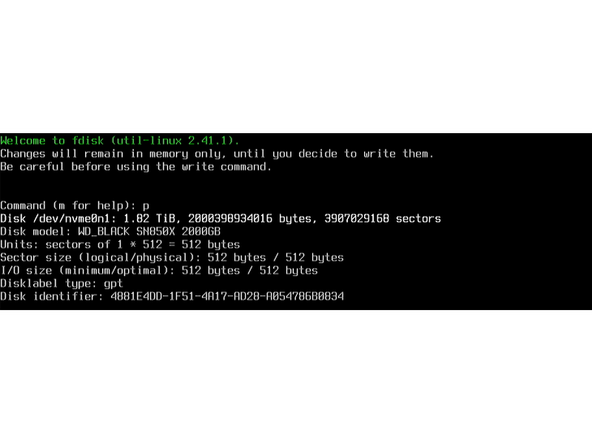
List the disks currently recognized by the system and their properties by running
fdisk -l -
This guide assumes the first NVMe drive recognized by the system is being used for installation. This process will wipe the drive being targeted and the loss of all data on it.
-
Run
fdisk /dev/nvme0n1 -
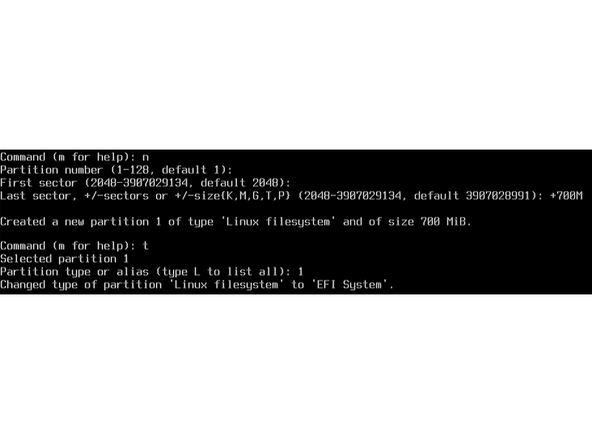
Initialize the disk with a new partition table by typing
gand pressing enter. -
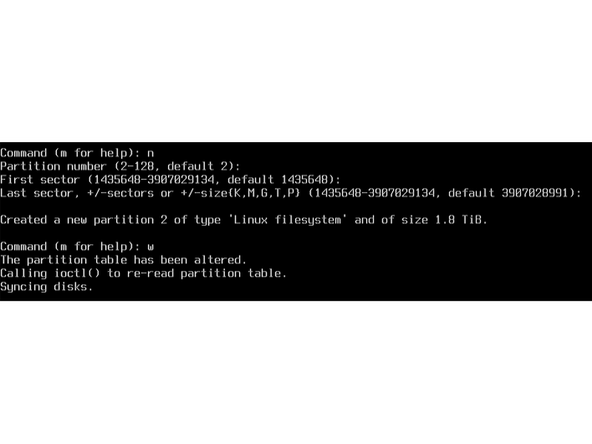
Create the boot partition by typing
nthen pressing enter. Press enter to select the default Partition Number. Press enter again to select the default First Sector. Finally enter+700Mas the selection for Last Sector. -
Enter
tto change the Partition Type. Enter1then press enter to change the partition type to EFI System. -
Create the root partition for the system by again typing
nand pressing enter. This time press enter 3 times to make the default selections. This will use the rest of the available storage on the targeted drive. -
Enter
wto write the changes to the drive and exitfdisk.
-
-
-
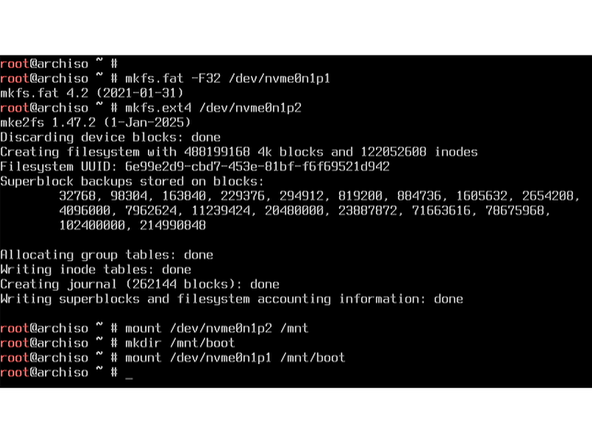
Format the boot partition in FAT32 by running the command:
mkfs.fat -F32 /dev/nvme0n1p1 -
For the root partition, almost any filesystem can be used, but this guide will use EXT4. Format the root partition in EXT4 by running the command:
mkfs.ext4 /dev/nvme0n1p2 -
First mount the root partition using the command:
mount /dev/nvme0n1p2 /mnt -
Now create the folder that the boot partition will mount to with the command:
mkdir /mnt/boot -
Next mount the boot partition to this newly created folder with:
mount /dev/nvme0n1p1 /mnt/boot
-
-
-
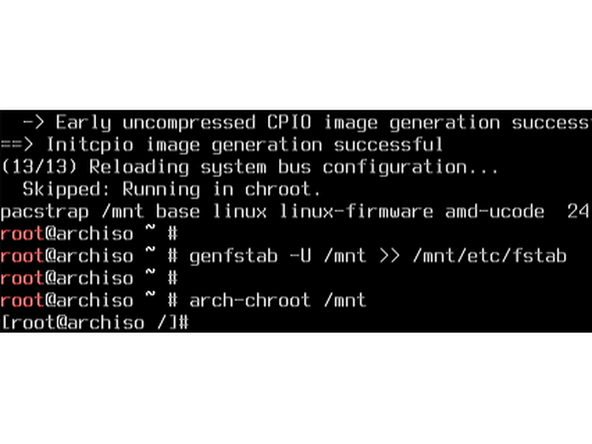
The first step of installation once the storage is prepared is to install the base system and packages. This is done by running the command:
pacstrap /mnt base linux linux-firmware intel-ucode -
After the previous step completes, the system needs a configuration file that tells it what storage to use in the system and how. This file can be generated automatically by running the command:
genfstab -U /mnt >> /mnt/etc/fstab -
At this point the system is prepared for the rest of the install process. This is done from within the freshly installed system without restarting by running the command:
arch-chroot /mnt -
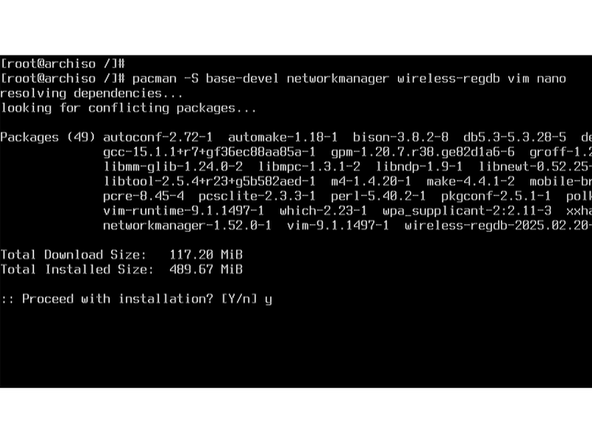
Install a few more essential packages that will be used to complete installation by running the command:
pacman -S base-devel networkmanager wireless-regdb vim nano
-
-
-
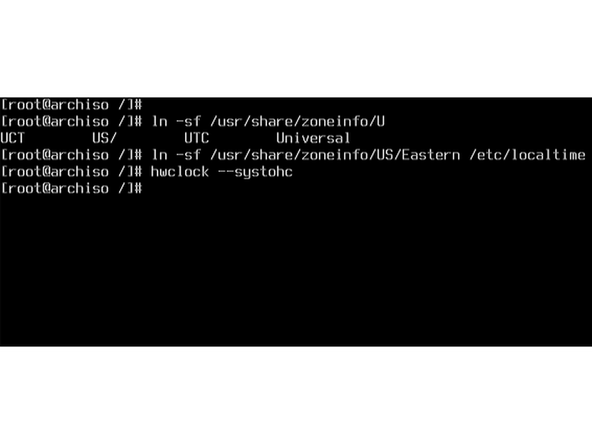
Folders containing lists of supported options for setting the system's timezone can be listed by running the command:
ls /usr/share/zoneinfo/ -
For the purposes of this guide, the US/Eastern timezone will be used as an example. Set the system's timezone to the United States' Eastern Time by running the command:
ln -sf /usr/share/zoneinfo/America/New_York /etc/localtime -
Finally, set the hardware clock of the system by running the command:
hwclock --systohc
-
-
-
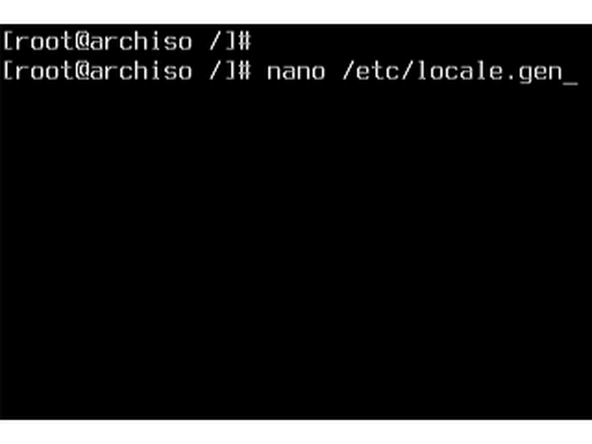
The file
locale.genneeds to be edited in order to set language support. To open the file for editing, run the command:nano /etc/locale.gen -
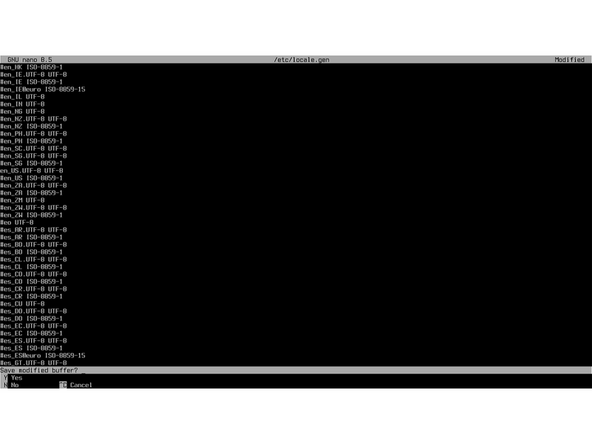
Use the arrow keys to scroll down and find the line with the appropriate locale, and remove the
#from the start of that line. -
For example, to set the locale to US English, locate the line that reads
#en_US.UTF-8 UTF-8and change it toen_US.UTF-8 UTF-8 -
After making edits, press Ctrl+O and Enter to save the changes, then Ctrl+X to exit
nano. -
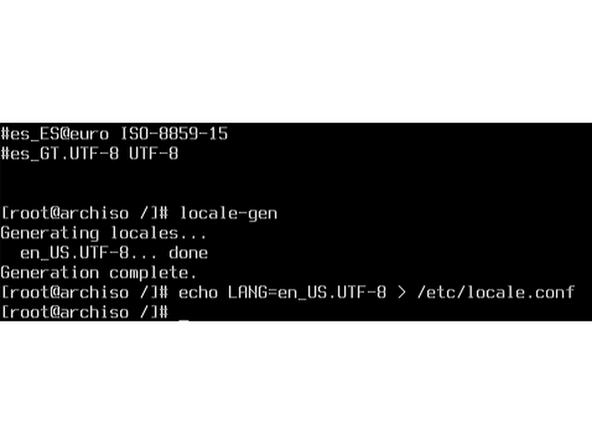
Now generate the system locale by running the command:
locale-gen -
Finally, create the locale configuration file. This can be done quickly using the command
echo LANG=en_US.UTF-8 > /etc/locale.conf -
To use another language, replace
en_US.UTF-8with the locale of choice as it appears in/etc/locale.gen
-
-
-
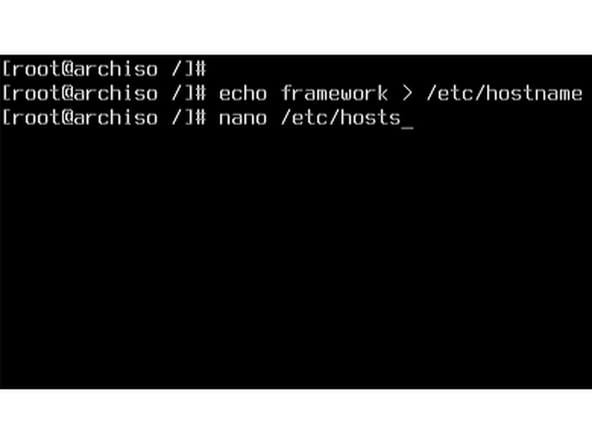
Set the hostname of the system. This is the name that the computer is seen as by other devices on the network. The limit for the hostname is 253 ASCII characters. This guide will use "framework" as an example. This can be done in a number of ways, including running the command:
echo framework > /etc/hostname -
Edit the
hostsfile to include the hostname. This helps to ensure reliable networking. To do this edit, run the command:nano /etc/hosts -
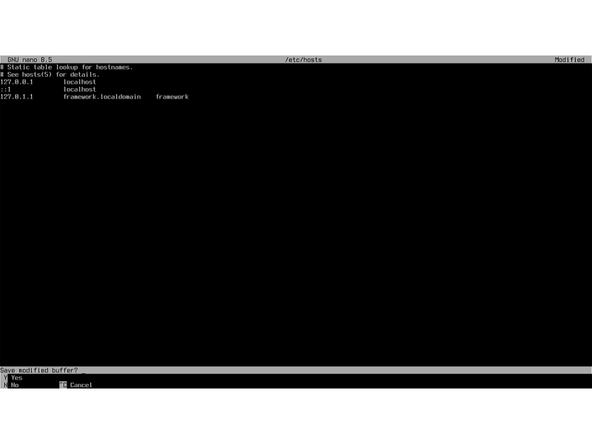
While in this file, add a line that links your hostname to the localhost address. The line should look something like:
127.0.1.1 framework.localdomain framework -
Press Ctrl+X, then Y, then Enter to save the edits and exit nano.
-
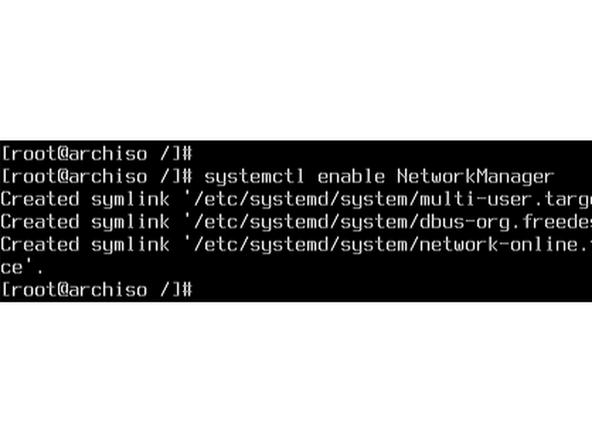
Enable NetworkManager by running the command:
systemctl enable NetworkManager
-
-
-
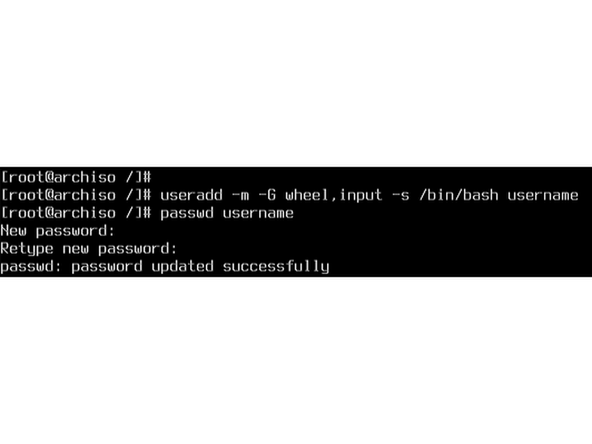
Create a new user with administrator privileges by running the command:
useradd -m -G wheel,input -s /bin/bash username -
usernamecan be replaced with any combination of 32 or fewer lower case letters and numbers. Special characters should be avoided. -
Set a password for this new account by running the command:
passwd username -
Enter the desired password twice when prompted. The password will not be set it both passwords do not match.
-
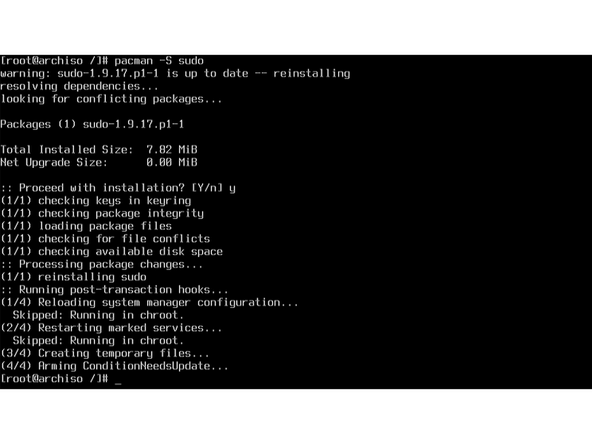
Set up administrator access for users by installing
sudoby running the command:pacman -S sudo -
Set permissions for
sudoby editing thesudoersfile. This can be done by running the command:EDITOR=nano visudo -
Use the arrow keys to scroll down and find the line that reads
# %wheel ALL=(ALL:ALL) ALLand alter it to%wheel ALL=(ALL:ALL) ALLbefore pressing Ctrl+X then Y, then Enter to save and exit.
-
-
-
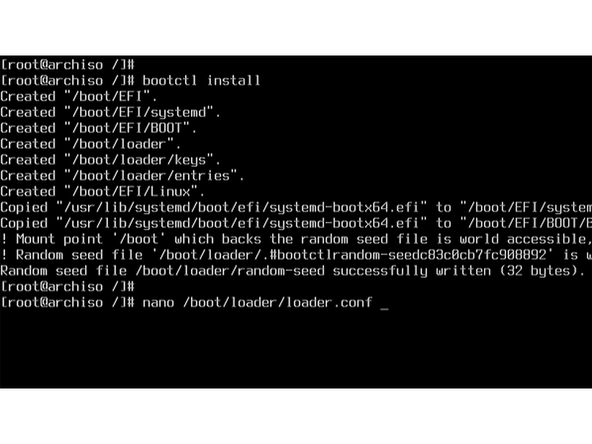
There are many options for a bootloader in Linux. This guide will focus on
bootctlwhich is included with a base install of Arch Linux. Install the bootloader to the boot partition by running the command:bootctl install -
Edit the loader configuration file by running the command:
nano /boot/loader/loader.conf -
The first line of this file is for setting the default boot selection. So it should look like:
default arch.conf -
The second line of this file is for setting the timeout, or how long the bootloader is visible for in seconds. It should look like:
timeout 3 -
Press Ctrl+X, then Y, then Enter to save and exit.
-
-
-
Now that the bootloader is installed and configured, the file arch.conf for the default boot entry that was set earlier. This file can be created by running the command:
nano /boot/loader/entries/arch.conf -
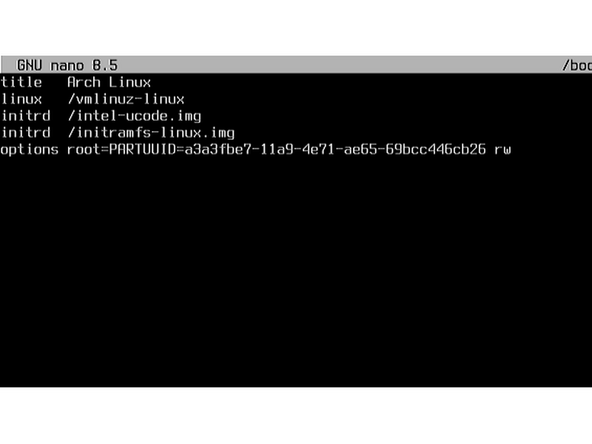
The first line of this file is to set the title for the boot entry. This is the text displayed when the bootloader is displayed during early boot. It should look like:
title Arch Linux -
The second line of this file is for selecting the Linux image that is loaded by this bootloader entry. It should look like:
linux /vmlinuz-linux -
The next lines of this file are for setting system specific files to be loaded by the Initial RAM Disk that is loaded during boot. There can be multiple lines for
initrd. Press Ctrl+X and enter after making the changes to save and close the file. -
For this example, the first
initrdline should be for loading processor specific microcode. The line should look like:initrd /intel-ucode.img -
The second
initrdline in this particular entry file is for loading the Initial RAM Filesystem. It should look like:initrd /initramfs-linux.img -
The last line is for setting the kernel options. This includes indicating the root filesystem. To add the ID for the root filesystem to the entry file, run the following command:
echo 'options\troot=PARTUUID=$(blkid -s PARTUUID -o value /dev/nvme0n1p2) rw' >> /boot/loader/entries/arch.conf
-
-
-
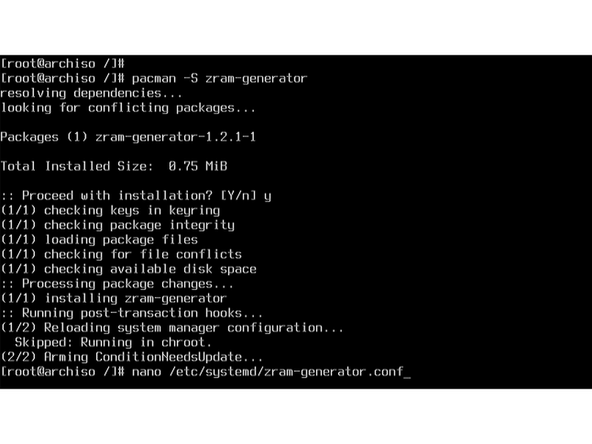
Swap is absolutely essential to maintaining good performance in a Linux system. Even when there is unused physical RAM, memory is often reallocated for the purposes of optimizing for system responsiveness. ZRAM compresses a section of RAM instead of using system storage for this purpose. Install it by running:
pacman -S zram-generator -
Create a configuration file for ZRAM by running:
nano /etc/systemd/zram-generator.conf -
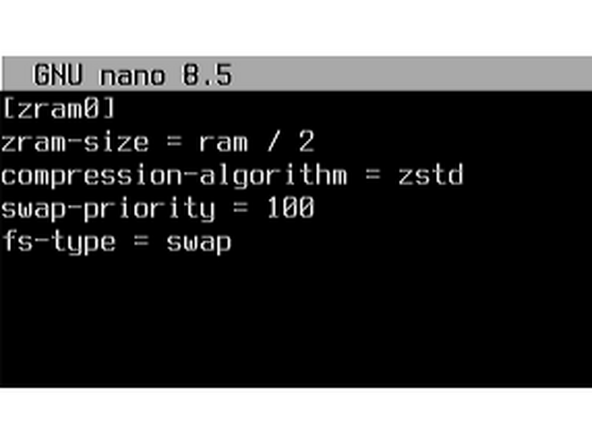
This configuration file consists of five lines. The first line is the name of the ZRAM device. For this example, the line will be:
[zram0] -
The second line sets the size of the ZRAM device. Typically this should be one quarter to one half of the system's physical memory. For this example, it will be set to half by adding the line:
zram-size = ram / 2 -
The third line determines the algorithm used to compress the memory used to make the ZRAM device. On modern systems,
zstdis fast and compresses well. Set it by adding the line:compression-algorithm = zstd -
The fourth line sets swap priority, which determines how often the system will use swap. The default setting is the same as adding the line:
swap-priority = 100 -
The fifth and final line is used to set the filesystem type. This should be automatically set correctly, but to be safe add the line:
fs-type = swap -
Press Ctrl+X, then Y, then Enter to save your changes and exit.
-
-
-
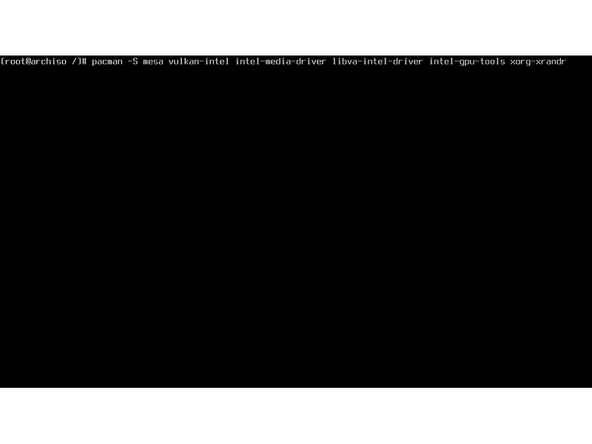
To install the Intel graphical drivers run the command:
pacman -S mesa vulkan-intel intel-media-driver libva-intel-driver intel-gpu-tools xorg-xrandr -
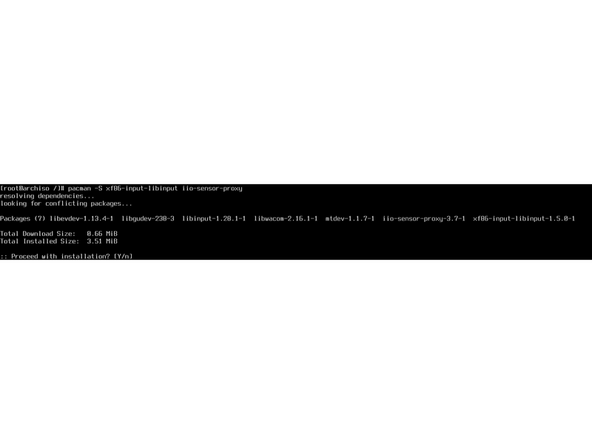
To install drivers related to input devices, run the command:
pacman -S xf86-input-libinput iio-sensor-proxy -
To install audio related packages, firmware, and drivers, run the command:
pacman -S pipewire pipewire-alsa pipewire-pulse pipewire-jack wireplumber sof-firmware alsa-utils alsa-firmware -
To install Bluetooth related packages, run the command:
pacman -S bluez bluez-utils blueman iwd -
Enable Bluetooth after installing these packages by running:
systemctl enable bluetooth -
To install power management related packages, run the command:
pacman -S tuned tuned-ppd -
Enable the `tuned` service to enable power management by running:
systemctl enable tuned -
To install webcam and expansion card related packages, run the command
pacman -S v4l-utils udisks2 gvfs-mtp gvfs-gphoto2
-
-
-
Arch Linux has an extremely wide range of graphical interfaces for users to choose from. This guide will focus on installing either Gnome Desktop or KDE.
-
To install Gnome and its related packages, run the command:
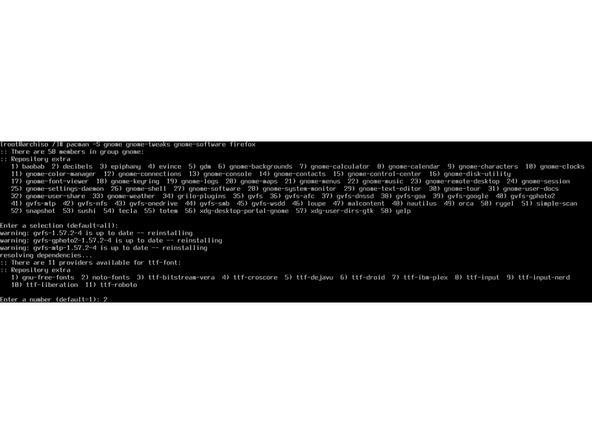
pacman -S gnome gnome-tweaks gnome-software firefox -
When given an option for fonts, selecting
2fornoto-fontswill ensure maximum compatibility across languages. -
To enable Gnome to start up automatically, run the command:
systemctl enable gdm -
To install KDE and its related packages, run the command:
pacman -S plasma kde-applications firefox -
When given an option for fonts, selecting 2 for
noto-fontswill ensure maximum language compatibility. -
To enable KDE to start up automatically, run the command:
systemctl enable sddm
-
-
-
Arch Linux is a very barebones system and does not come with some packages included as part of the base system. To add some of these tools to the system, run the command:
pacman -S cups git wget btop -
Cups is the print server for Linux. If this system will not be used with a printer, the
cupspackage can be skipped. If a printer will be used with the system, enablecupsafter installing it by running the command:systemctl enable cups
-
-
-
At this point, the system should have a functional Arch Linux installation on it with either Gnome or KDE as a desktop environment. Exit the
chrootenvironment by running the command:exit -
Unmount the partitions that were used for installation by running the command:
umount -R /mnt -
Reboot the system and remove the Live USB drive.
-
-
-
The Arch Wiki Framework category from the Arch Community.
-
This serves as a place holder. Once additional details on Framework Laptop 12 populate in the wiki, this page will be updated. Information on the Intel-based Framework Laptop 13 may be applicable to the Framework Laptop 12.
-
-
-
How to check the BIOS version. Go to and click upper left corner where you see the horizontal line, search terminal and launch it. Please follow the step below:
-
sudo pacman -S lshw dmidecode --noconfirm && clear && sudo dmidecode | grep -A3 'Vendor:\|Product:' && sudo lshw -C cpu | grep -A3 'product:\|vendor:'
-
The output will tell you which Framework Laptop 12 you have and also which BIOS version you're using.
-
Framework Laptop 12 firmware update link will appear here when it's ready.
-
IMPORTANT: Per the instructions above, we do NOT recommend updating BIOS and firmware using various GUIs. We recommend using fwupdmgr as provided in the step above. Using GUIs can potentially create issues that would not be present using fwupdmgr directly.
-
-
-
If you need additional help, feel free to visit our active support community.
-


Enjoy using Arch on your Framework Laptop 12! If you have any questions or run into any issues, we recommend bringing them to the Community in the Linux Arch topic. Members of the Framework team participate in discussions there.
Enjoy using Arch on your Framework Laptop 12! If you have any questions or run into any issues, we recommend bringing them to the Community in the Linux Arch topic. Members of the Framework team participate in discussions there.

One Comment
The automatic (?) translation into German also translated some Linux commands, which means they no longer work - e.g. "tuned" -> "abgestimmig".
Ewald Holste - Open Reply