Introduction
Once you have your Framework Desktop set up following the Quick Start Guide, you’re ready to install your preferred OS. Omarchy is described as "An opinionated Arch + Hyprland setup by DHH". It provides a pre-configured but minimal fully-encrypted Arch-based system with a GUI.
NOTE: Omarchy is based on Arch Linux, a Community Supported Linux Distribution. Learn more here.
-
-
First, download Omarchy Linux from Omarchy's website.
-
Download balenaEtcher as a tool to create the USB installer from the ISO.
-
balenaEtcher is available for macOS on Intel and Apple Silicon Macs. Download the X64 version for Intel Macs and the arm64 version for Apple Silicon Macs.
-
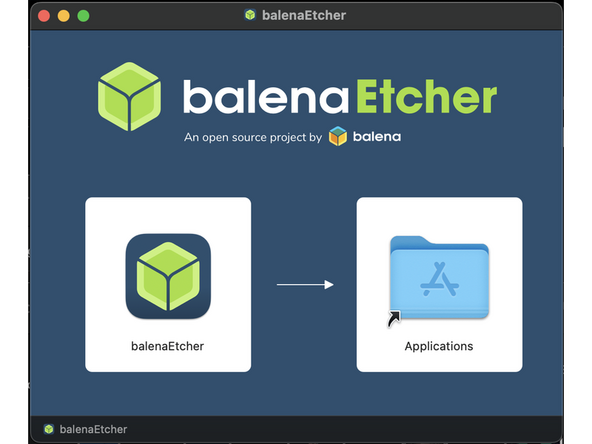
Install by double clicking on the balenaEtcher.dmg file, then click-and-dragging the balenaEtcher icon to the Applications folder.
-
Insert a USB drive that is 8GB or larger, allow your Mac to access the accessory, then launch balenaEtcher.
-
Click on "Flash from file" and select the Omarchy ISO downloaded earlier. Then click on "Select Target" and choose the USB drive. Finally click "Flash" and wait for the process to complete.
-
Once the USB drive creation is complete, it is safe to close balenaEtcher and eject the USB drive in Finder.
-
-
-
First, download Omarchy Linux from Omarchy's website.
-
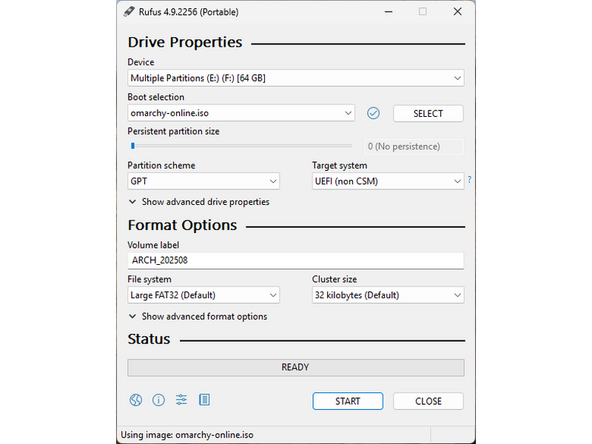
Download Rufus as a tool to create the USB installer from the ISO - select the top download option from the link provided. Use the downloaded EXE file to install Rufus.
-
Launch Rufus. Insert your USB drive (8GB or larger). Click on "Flash from file" and select the Arch Linux iso that you downloaded. Select "GPT" under "Partition Scheme". Click on "SELECT" and choose your USB drive. Click "START" and wait a minute or two for it to complete.
-
-
-
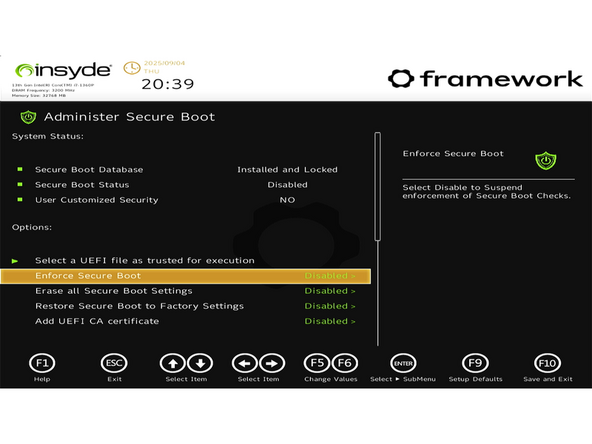
Enforce Secure Boot must be Disabled: While Omarchy can be configured to support Secure Boot, it does not support Secure Boot by default. Information about Secure Boot on Framework Computers can be found here. To disable Secure Boot:
-
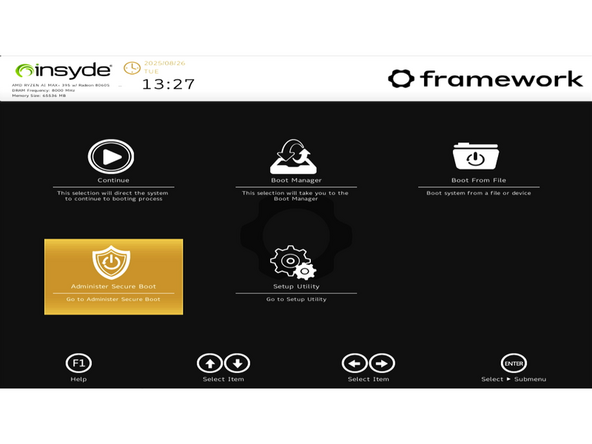
Power on, then tap F2 rapidly at the Framework splash screen.
-
Use the arrow keys to select Administer Secure Boot tile on the screen. Press enter.
-
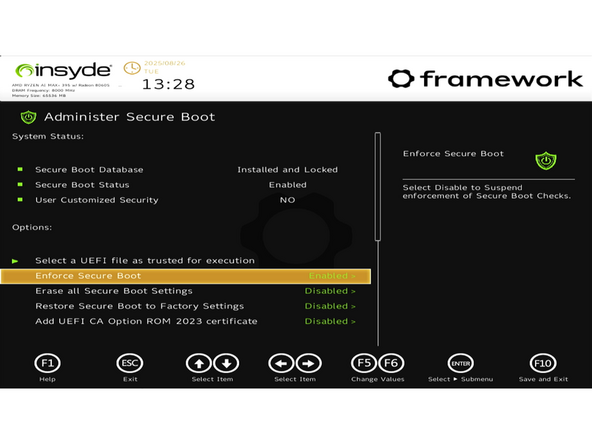
Use the arrow keys to select Enforce Secure Boot, it will show as Enabled. Press the enter key, use the arrow keys to select "Disabled" then press the enter key again. Press F10 key to save and reboot.
-
This may impact the functionality of Windows if it is installed on another drive in the system.
-
Insert the USB drive into the powered off Framework Desktop, and then power on. Immediately after the power light comes on begin rapidly tapping (continuously ) the F12 key - begin tapping well before the Framework logo is visible.
-
If there is no internal storage drive installed or it is blank, the system will boot from the USB drive directly and there is no need to tap F12.
-
Use the arrow keys to select the USB drive and press enter to boot the Omarchy installer.
-
-
-
An internet connection is required to complete installation of Omarchy.
-
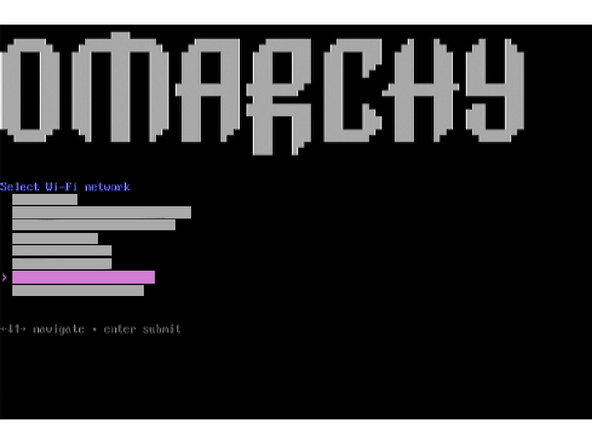
The Omarchy installer will immediately scan for wireless networks if it does not detect a wired internet connection.
-
Use the arrow keys to select a wireless network, then press Enter/Return to connect.
-
If the network requires a password, a prompt will open automatically. Type the password and press Enter/Return.
-
NOTE: At the time of writing, the RZ717 wireless module present on the AMD Ryzen AI 300 series mainboards may have trouble seeing or connecting to 6GHz-only WiFi 7 networks.
-
-
-
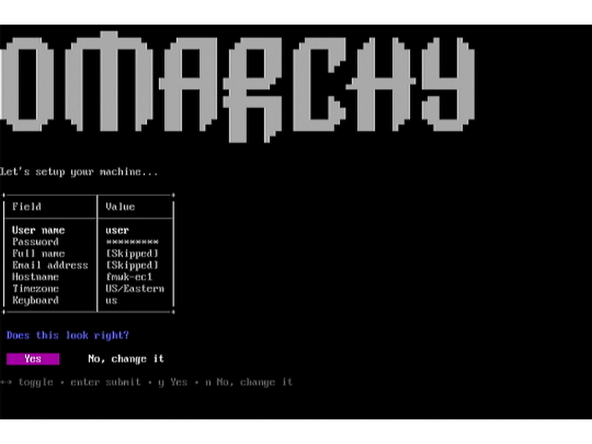
Go through the prompts to provide information needed for system configuration
-
Enter a username and password when prompted
-
The password created here is used for the user being created, the root (or Administrator) account, and as the primary key for full disk encryption.
-
Full name and email address are optional for use with Github, they do not need to be entered to complete installation or to use Omarchy
-
Hostname is the name the computer is seen as by networks and other computers.
-
Select a timezone and keyboard layout.
-
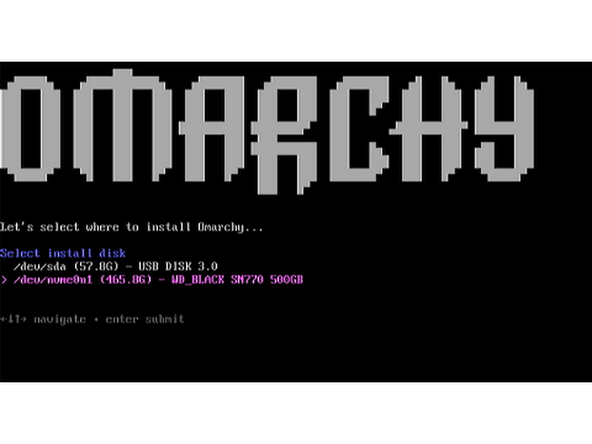
Confirm the previous selections. Omarchy's installer will now search for and provide a list of disks it can install to. Select the drive for install and press Enter/Return.
-
WARNING: This will wipe the entire drive and its contents. Be certain the correct drive is being selected.
-
-
-
Confirm the previous selections. Omarchy's installer will now search for and provide a list of disks it can install to. Select the drive for install and press Enter/Return.
-
WARNING: This will wipe the entire drive and its contents. Be certain the correct drive is being selected.
-
The installation process will begin at this point. Please be patient while packages are downloaded and installed.
-
This process should take 20 minutes or less, but can sometimes take a longer time, depending on connection speed.
-
When installation finishes, a summary screen will be shown. Remove the USB installer, and press Enter/Return to reboot.
-
Select Omarchy using the keyboard if prompted with a bootloader, then enter the password chosen earlier to unlock the computer and boot.
-
If the system has booted to the default desktop, the installation was a success. Please refer to The Omarchy Manual to learn how to use and configure Omarchy.
-